
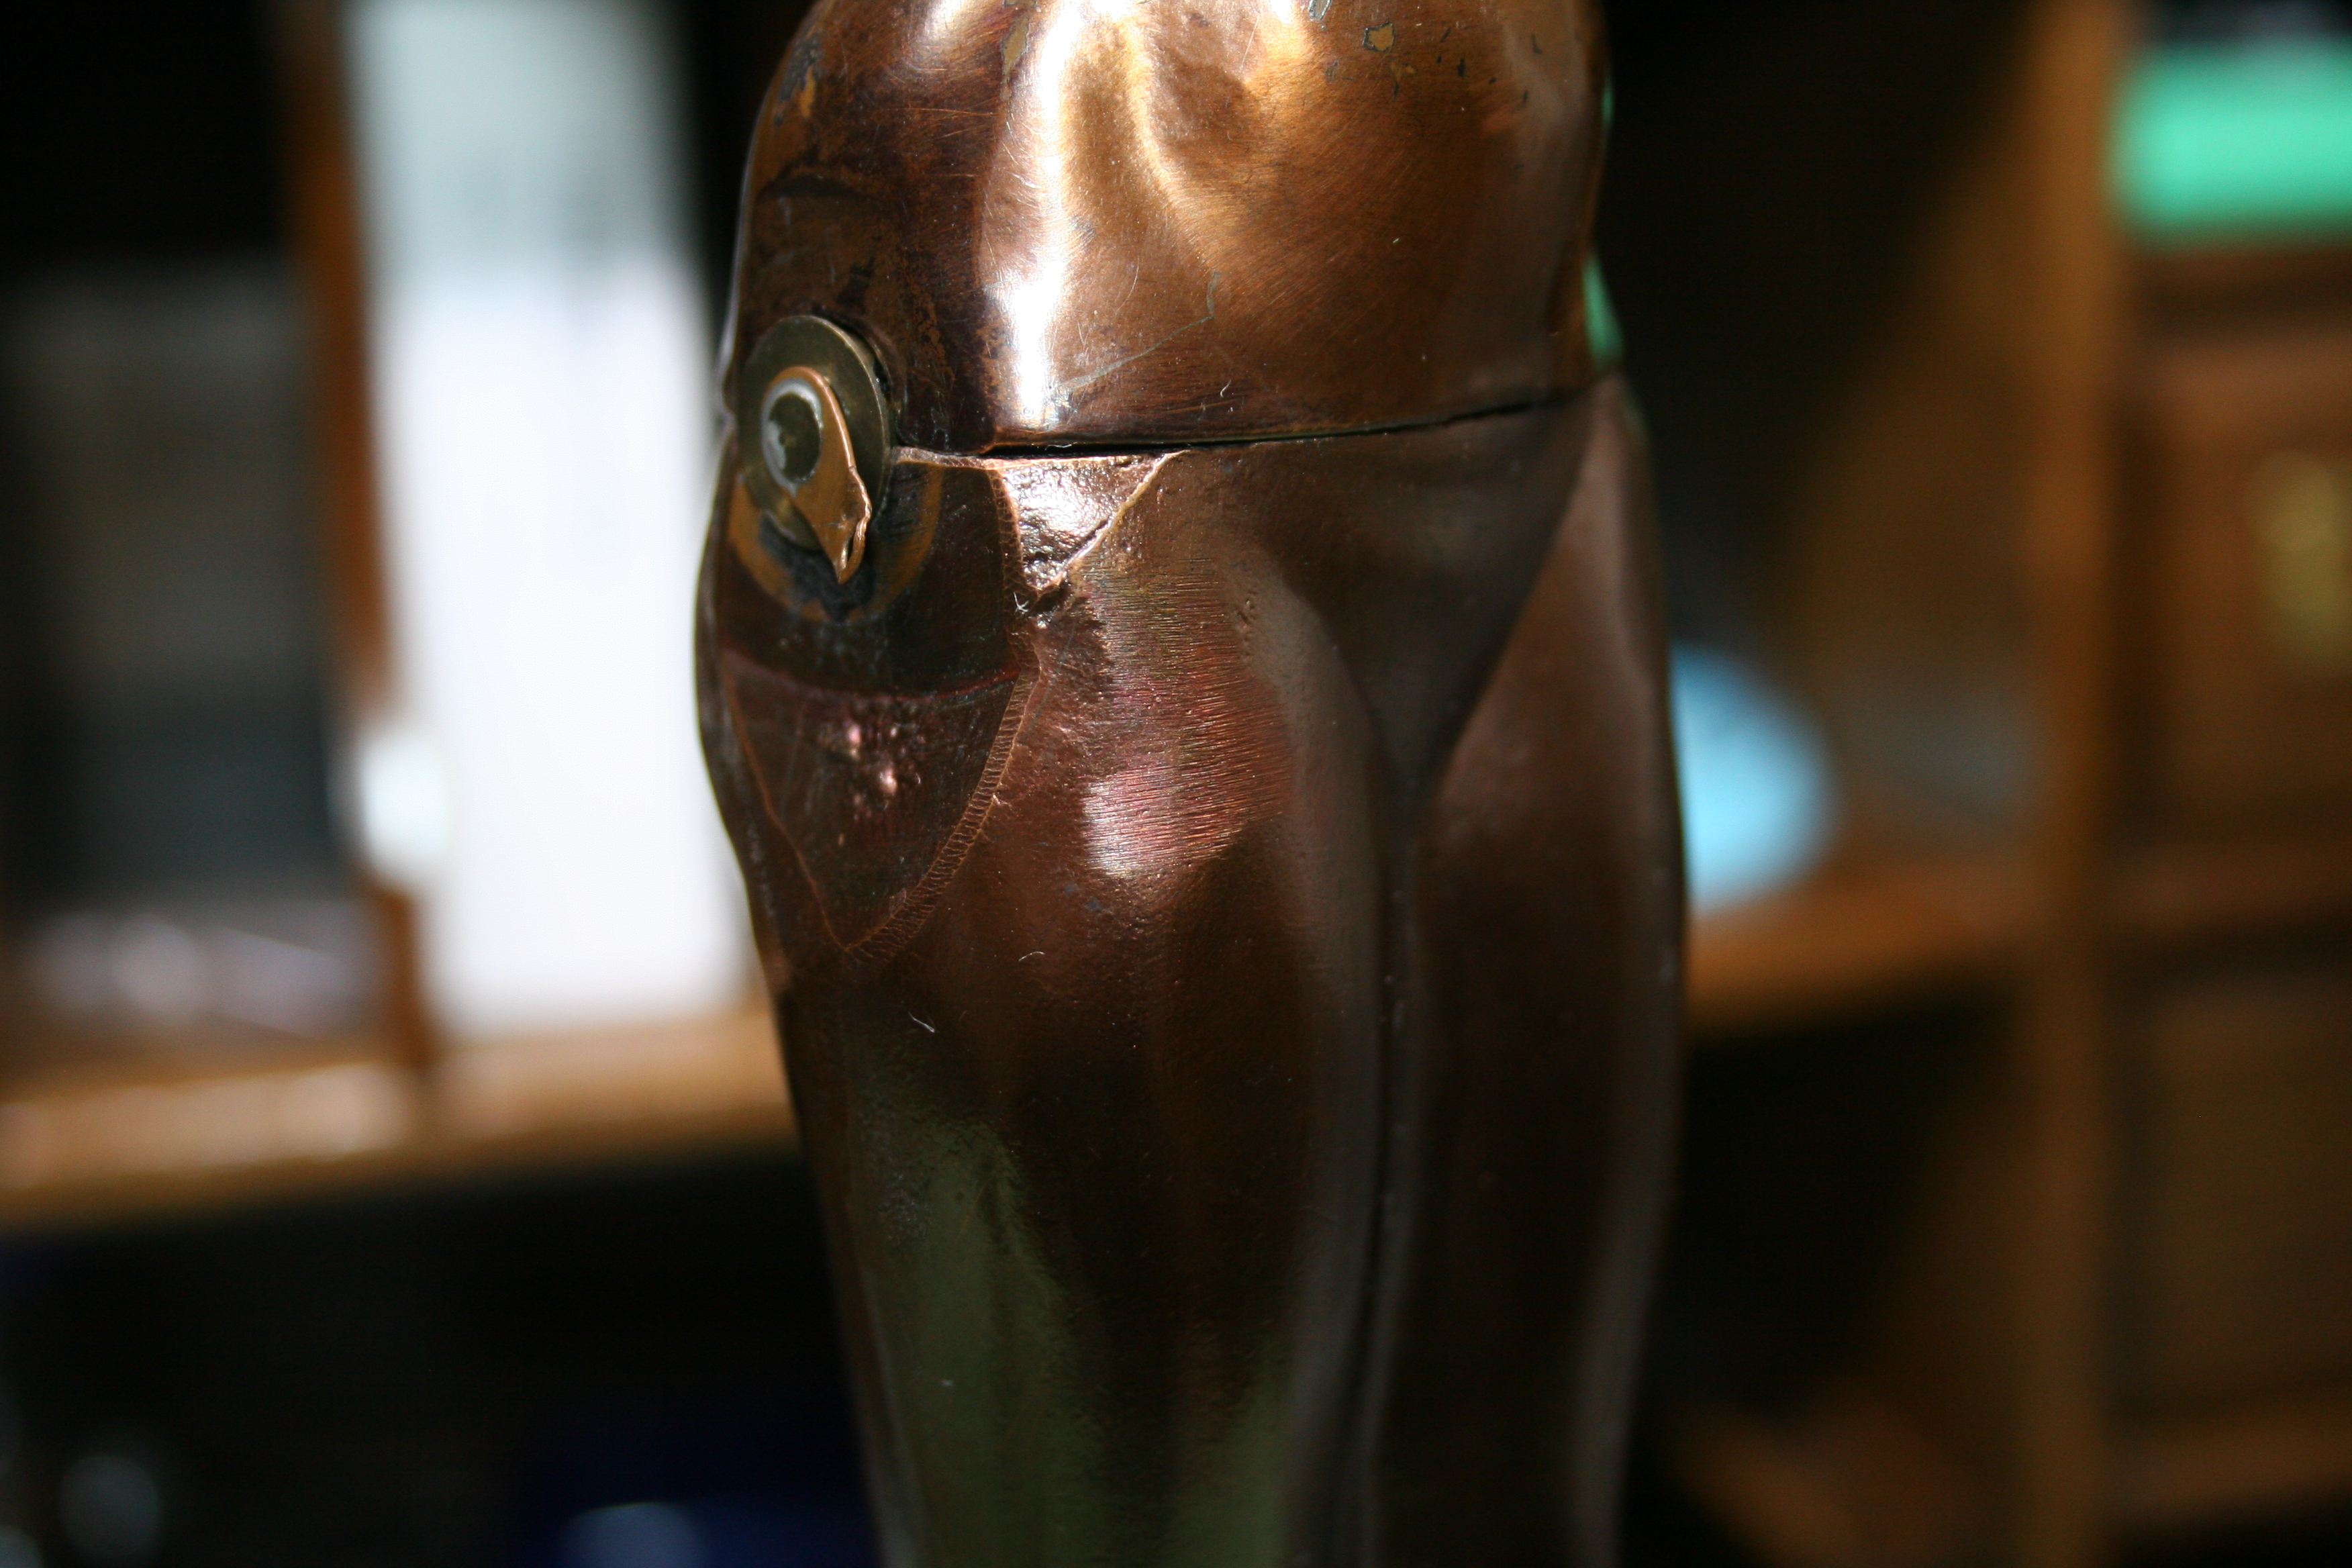
Well here is a another hula girl lamp from the 1940’s! I didn’t expect to see one of these so soon but I was contacted by an gentleman named Scot inquiring about a repair. This lamp has the exact same defect as the one I serviced earlier- one of the fasteners for the skirt had failed.
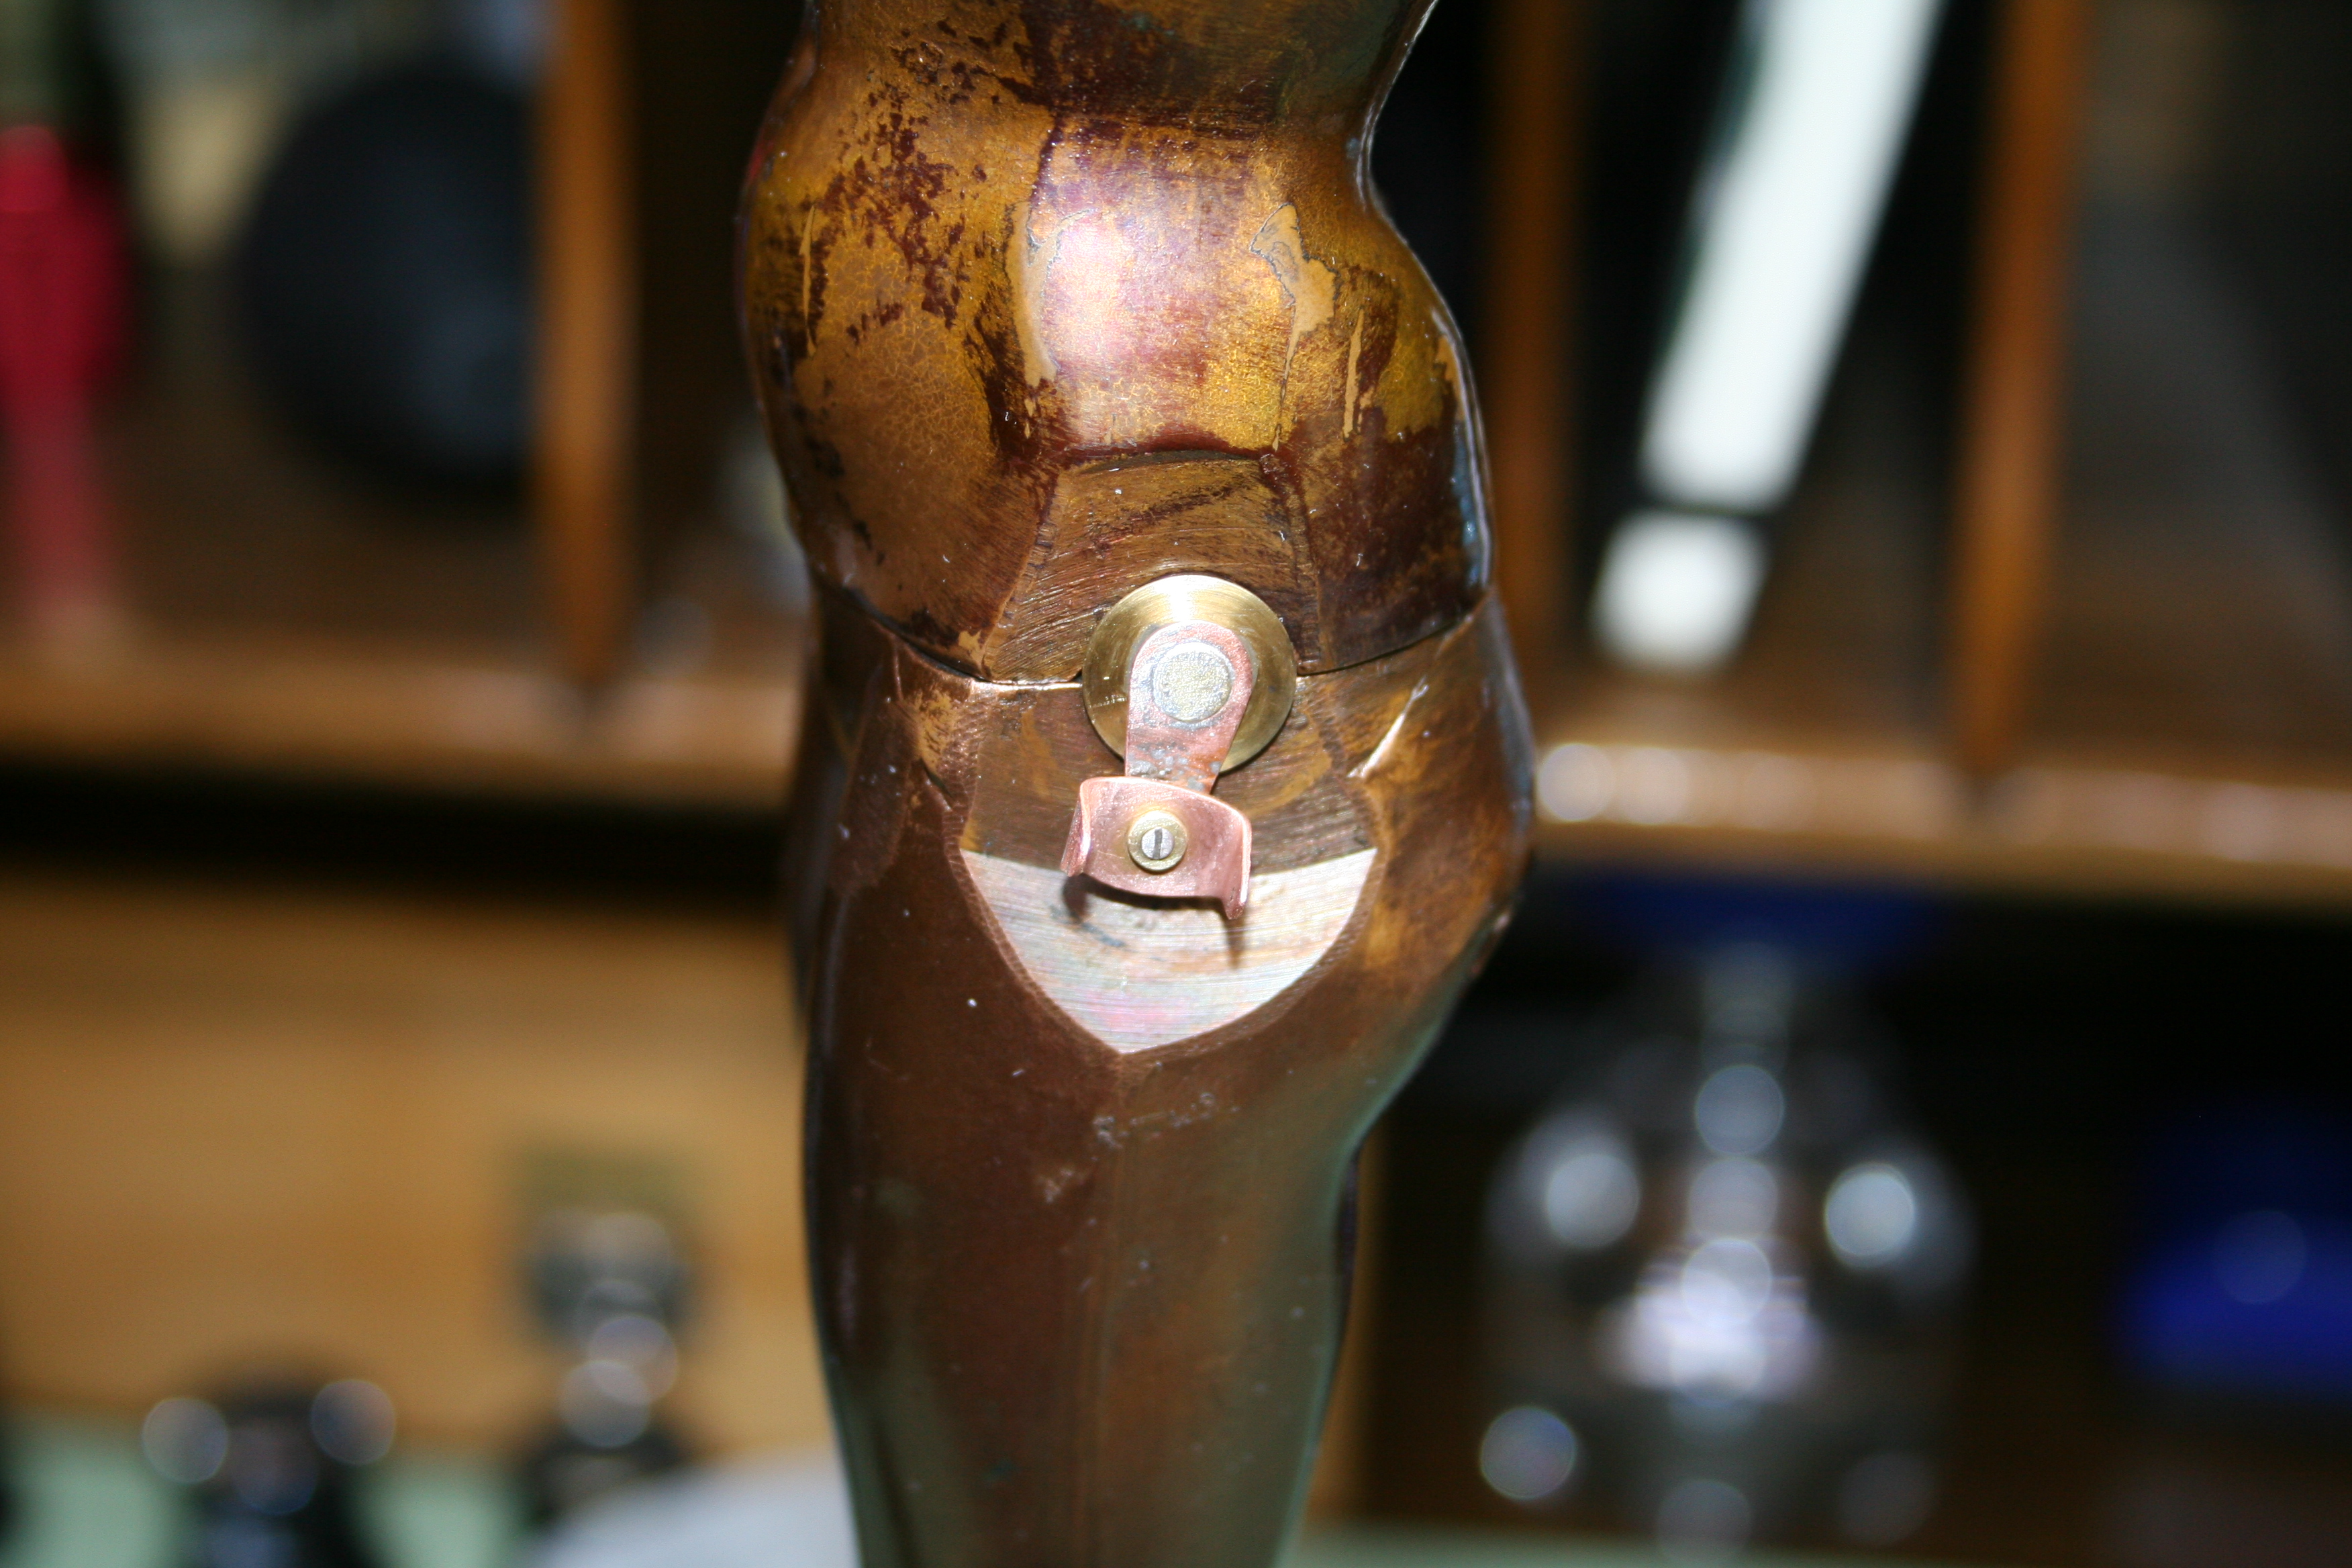
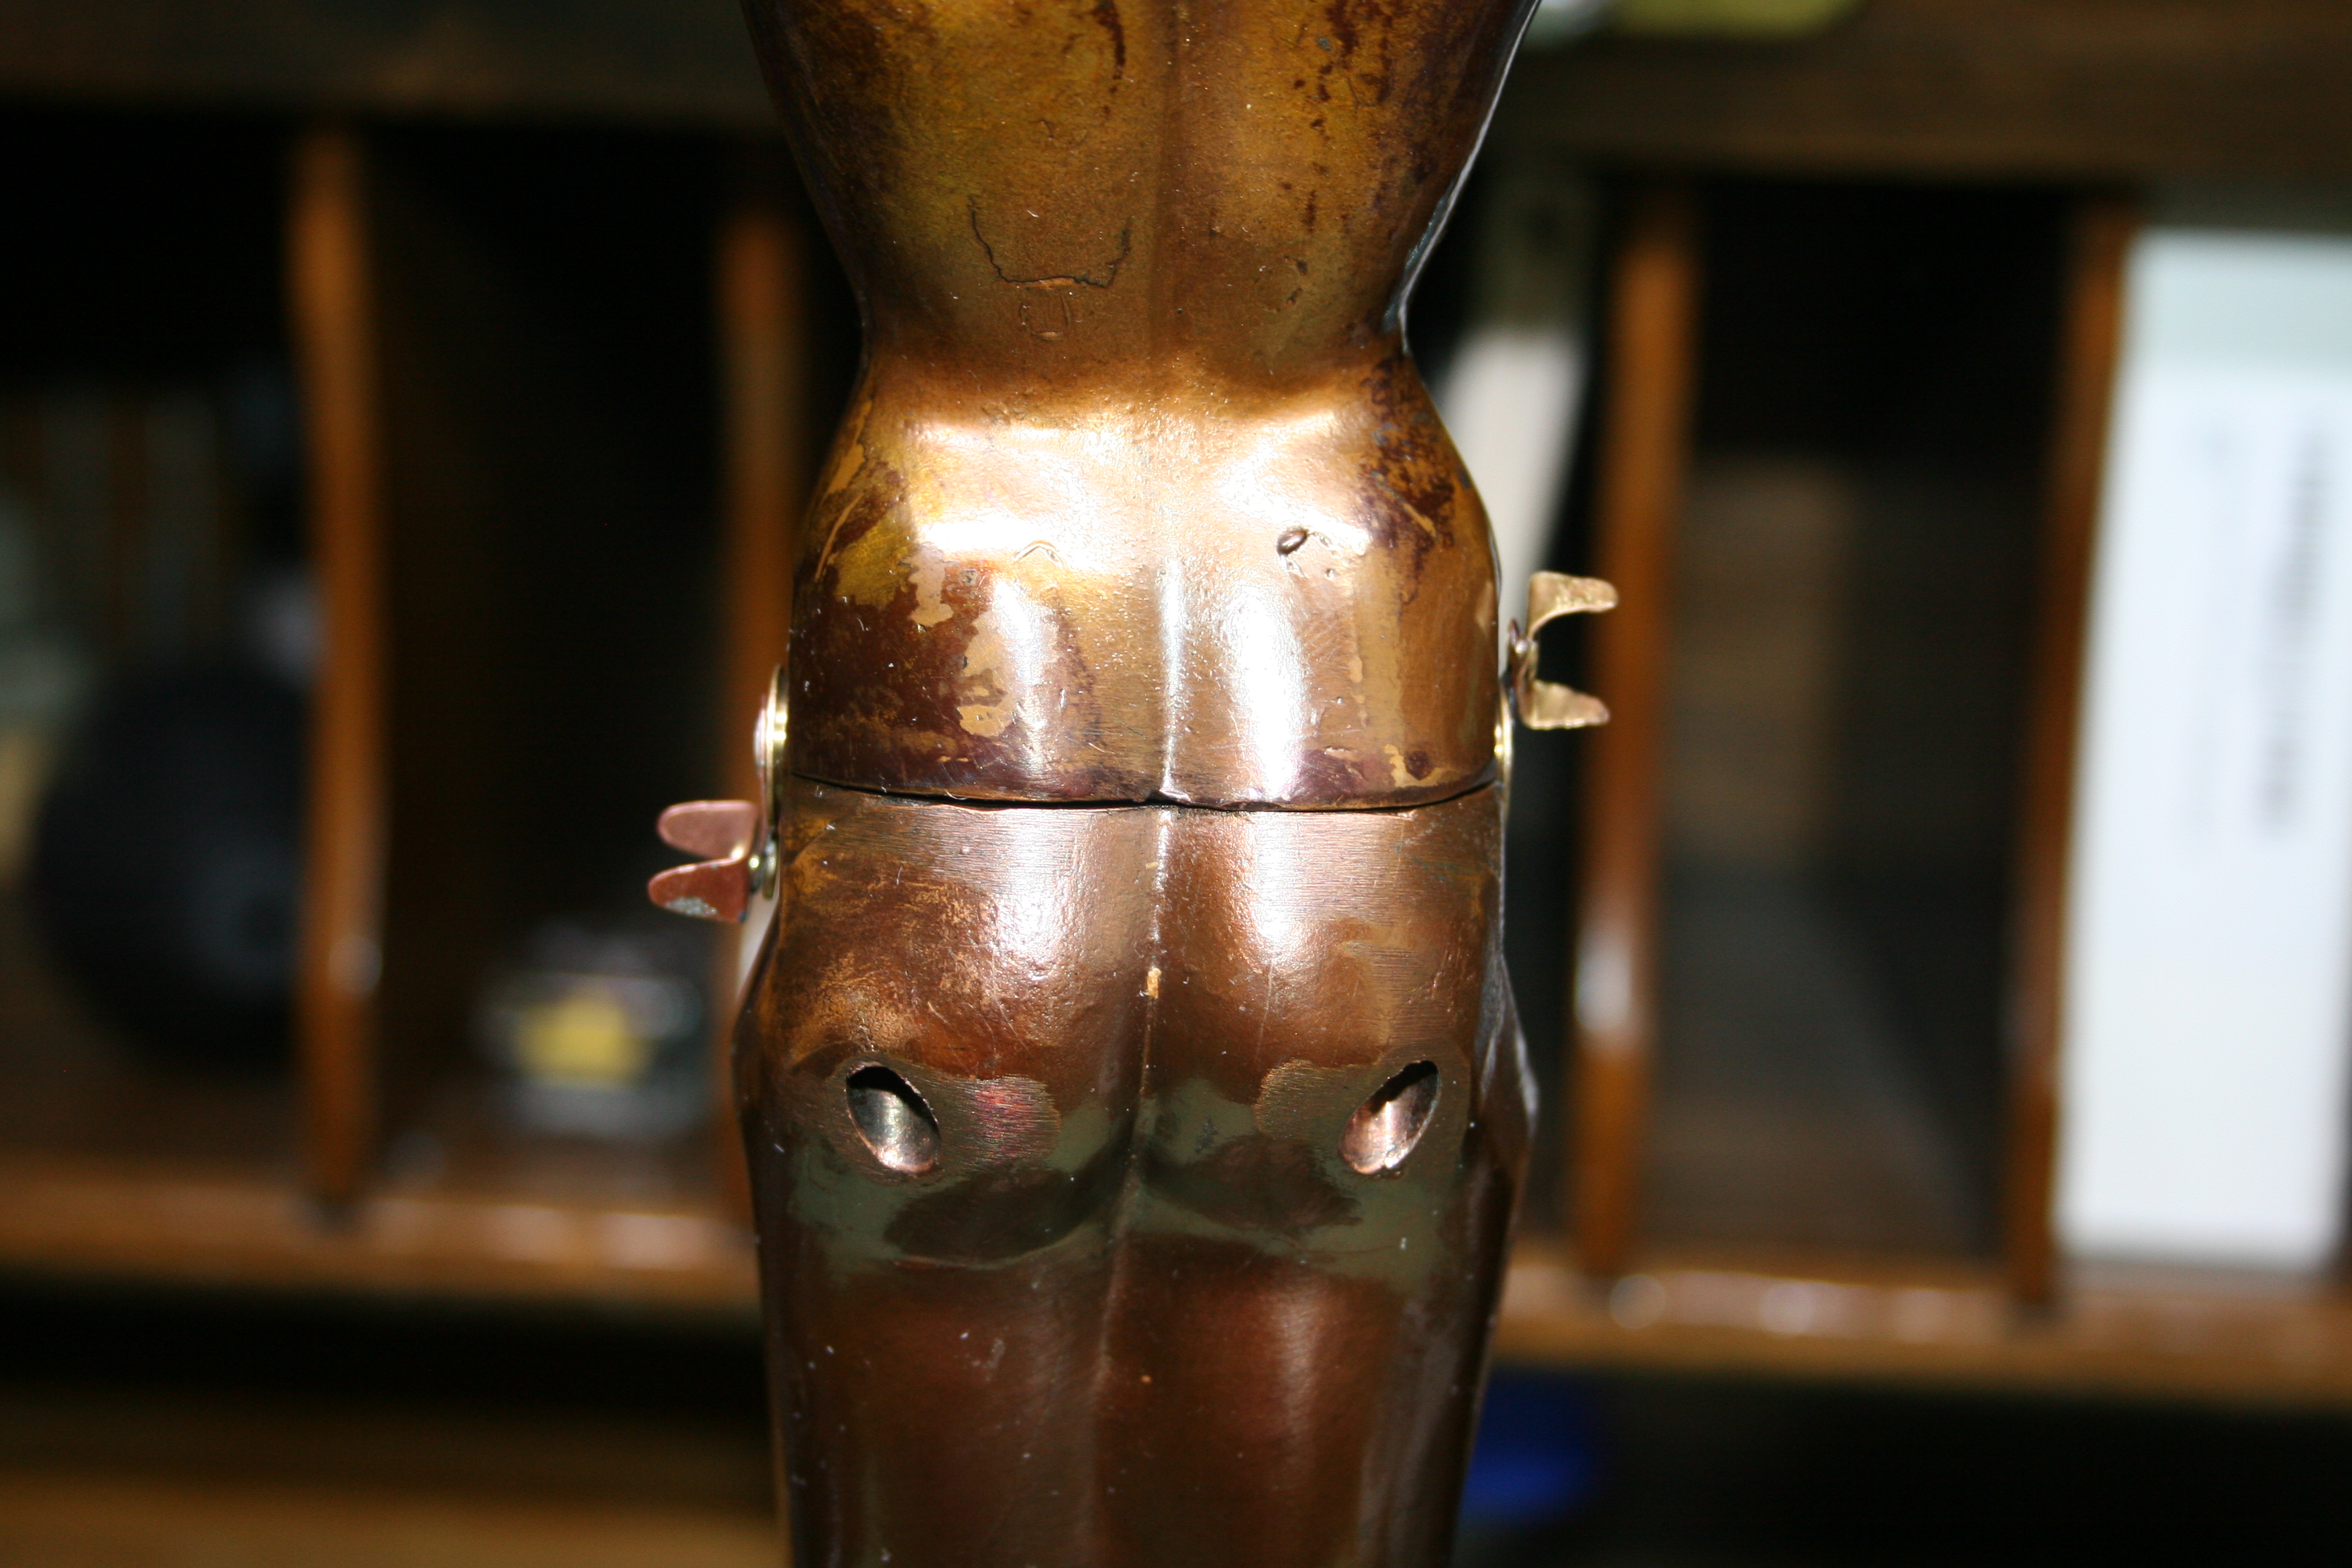
 The skirt is secured by two brass fasteners which are loosely attached to rotating cams on either hip. When the crank turns, one cam lifts while the other dips creating the illusion of swaying hips. It’s a bit kitschy but also a wonderful piece of vintage Americana. Still, having a strong affinity for Hawaii I would suggest visiting in person to properly experience a luau and hula dance!
The lamp was in quite good condition considering its age and was thankfully packed quite well by the owner. Outwardly, the only issue resulting from the transit was a loose socket for the light bulb. This was easily fixed with a few taps of the jeweler’s hammer.

As I expected the fastener had torn away from the cam and would need to be reattached. Unfortunately the fastener was missing so a new one would need to be fabricated.
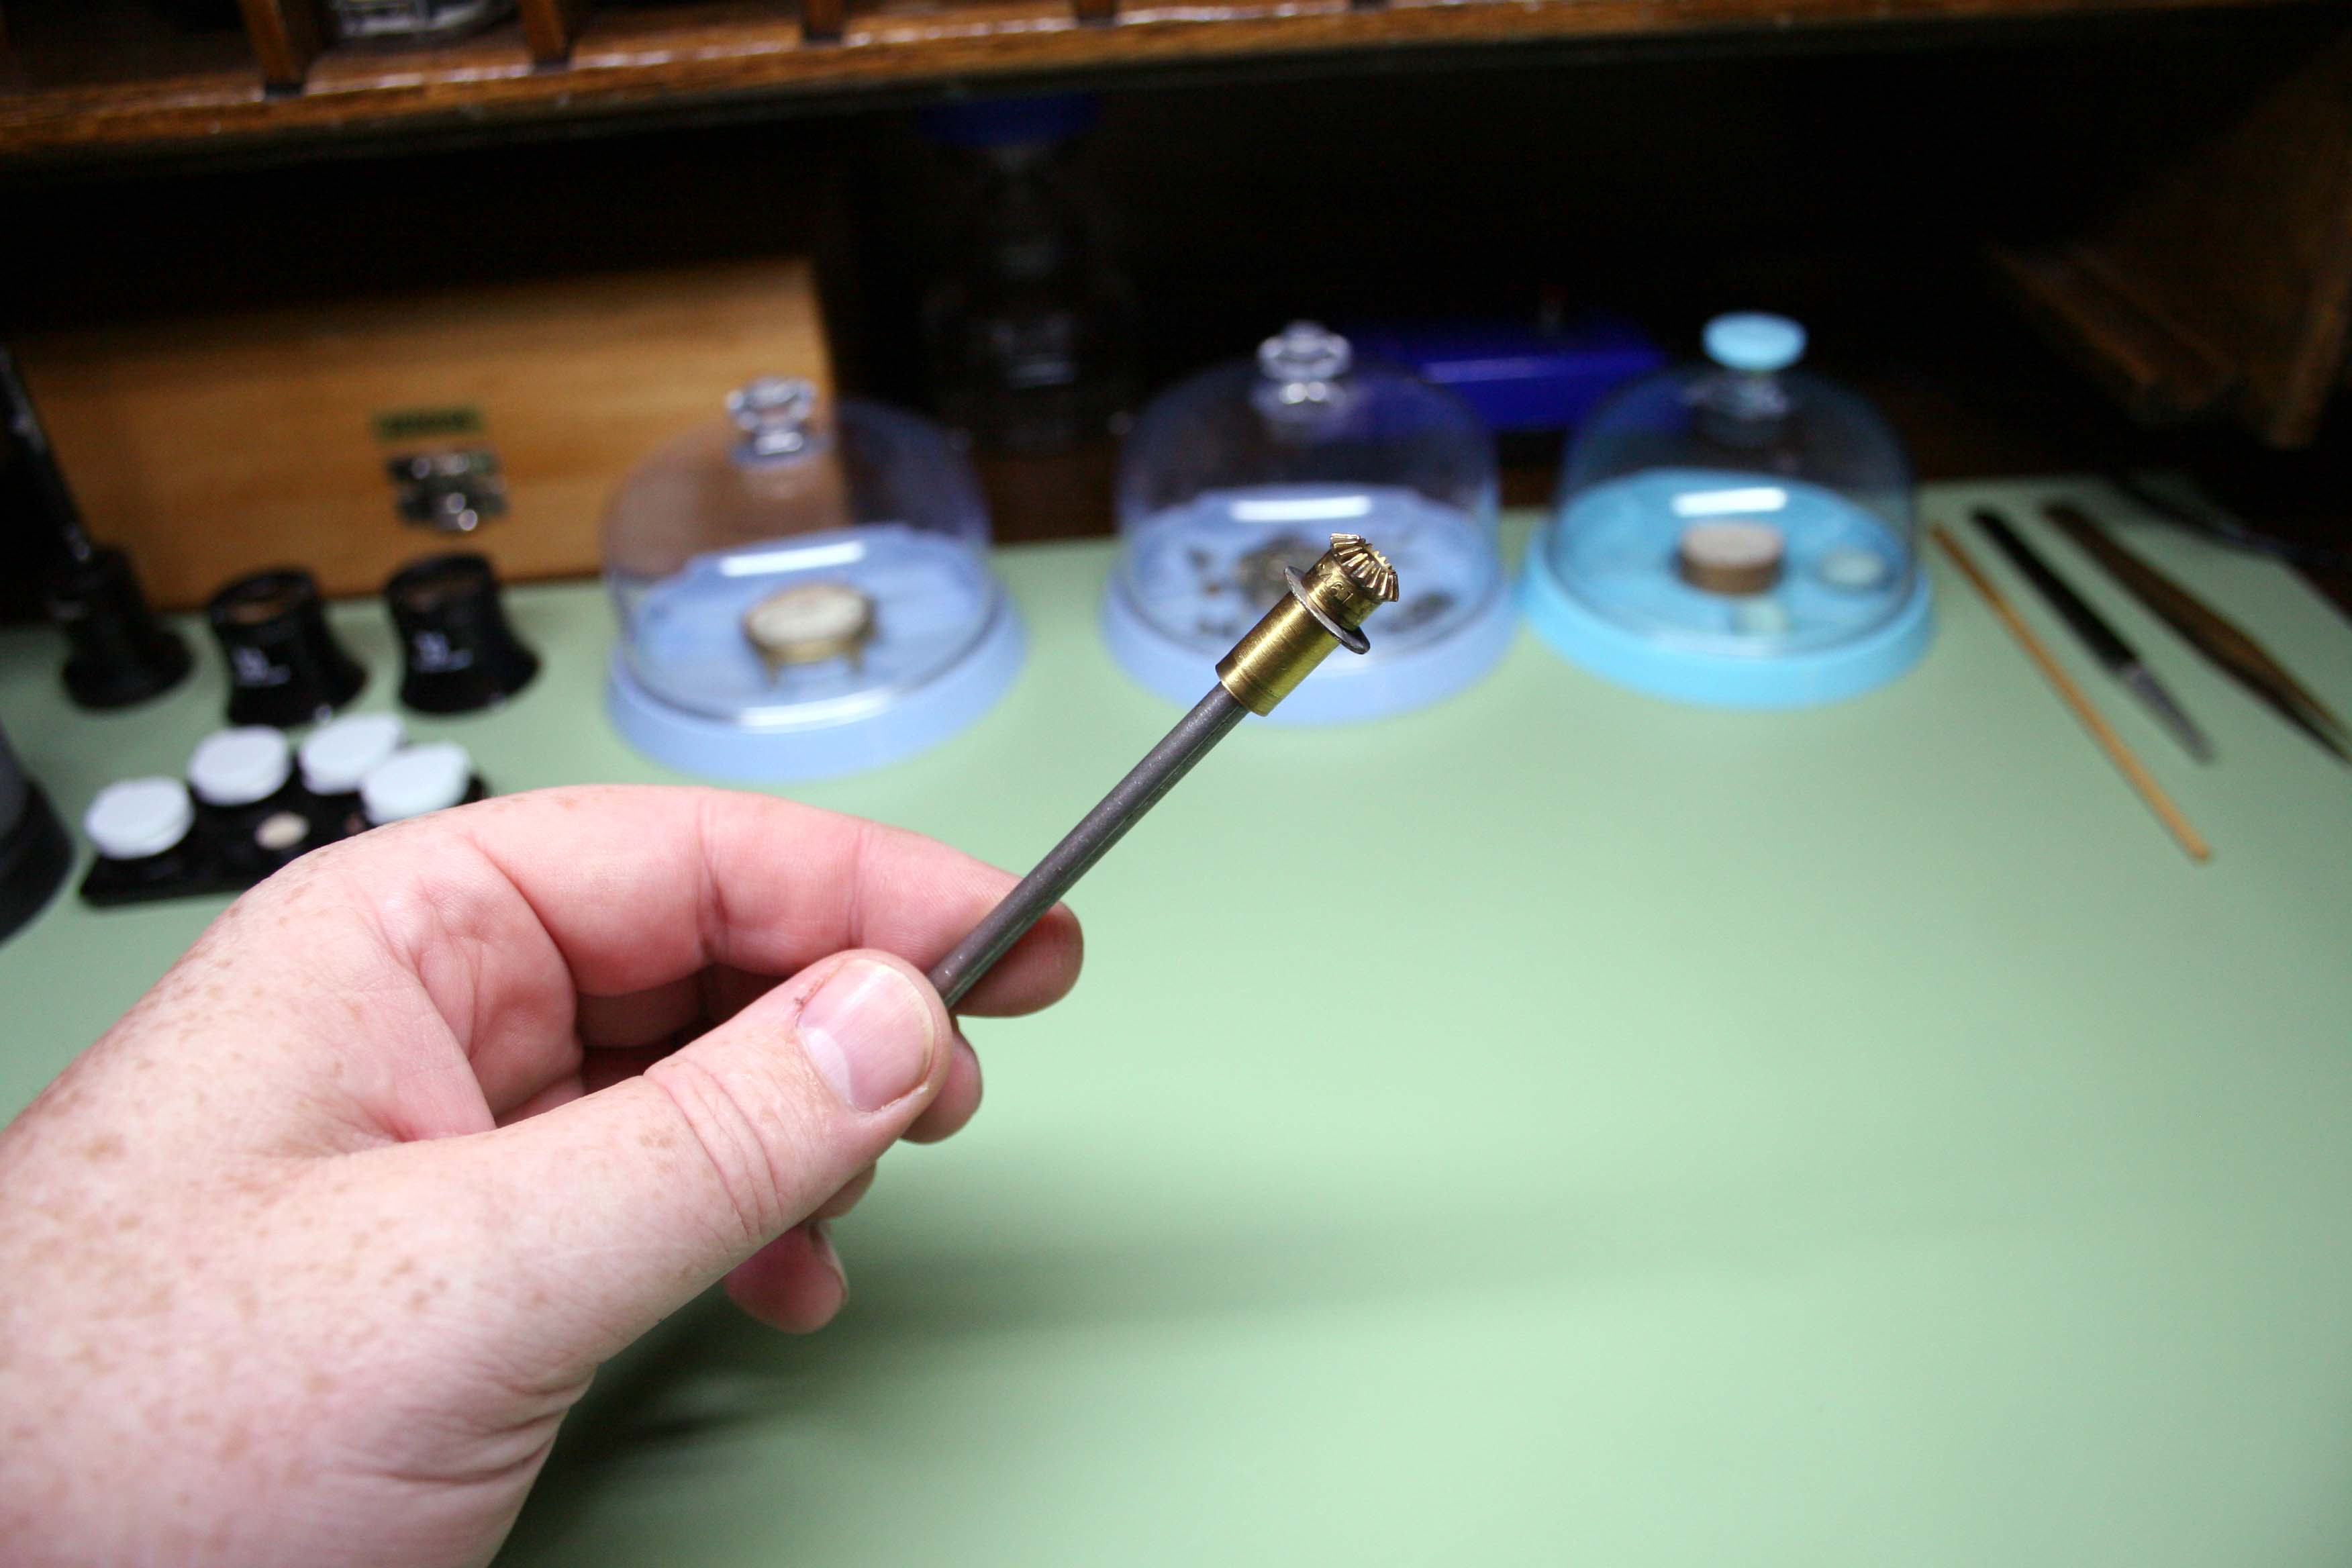
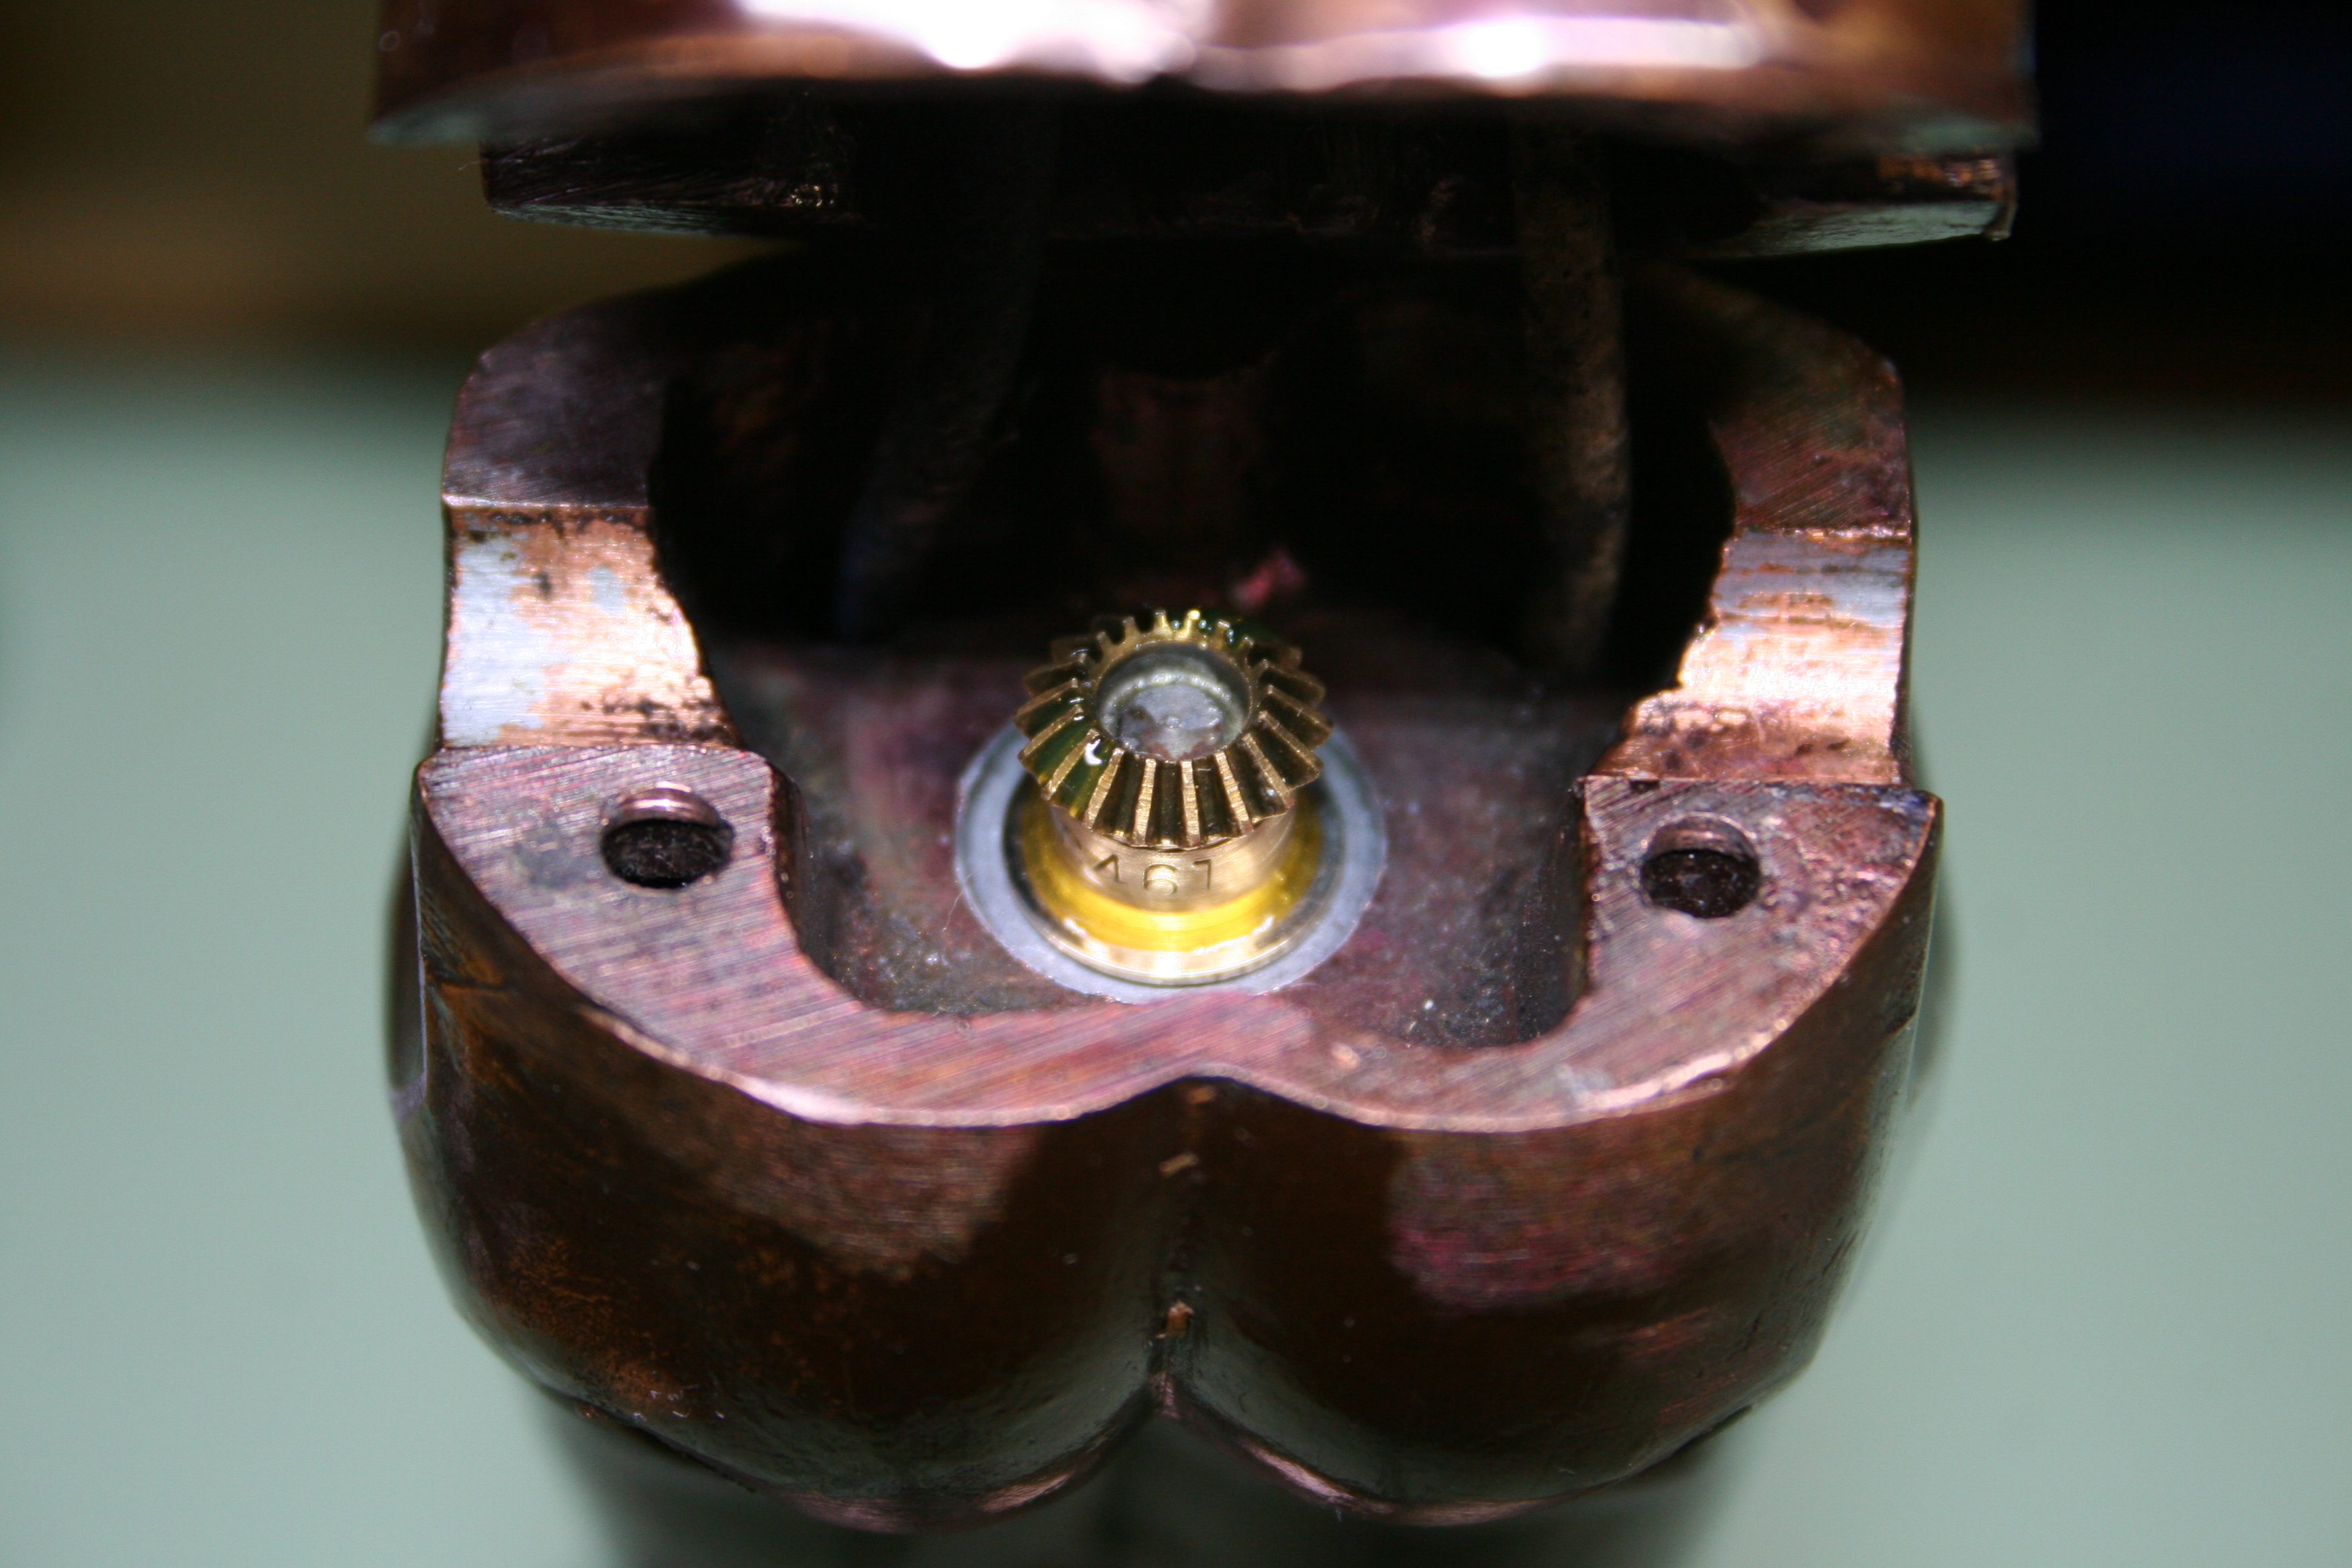
Instead of performing the repair while the cam and crank were secured in the lamp, I decided to see if the crank could be removed in order to work more freely on the bench. The statue split at the waist, following the removal of two screws, giving me access to the crankshaft.
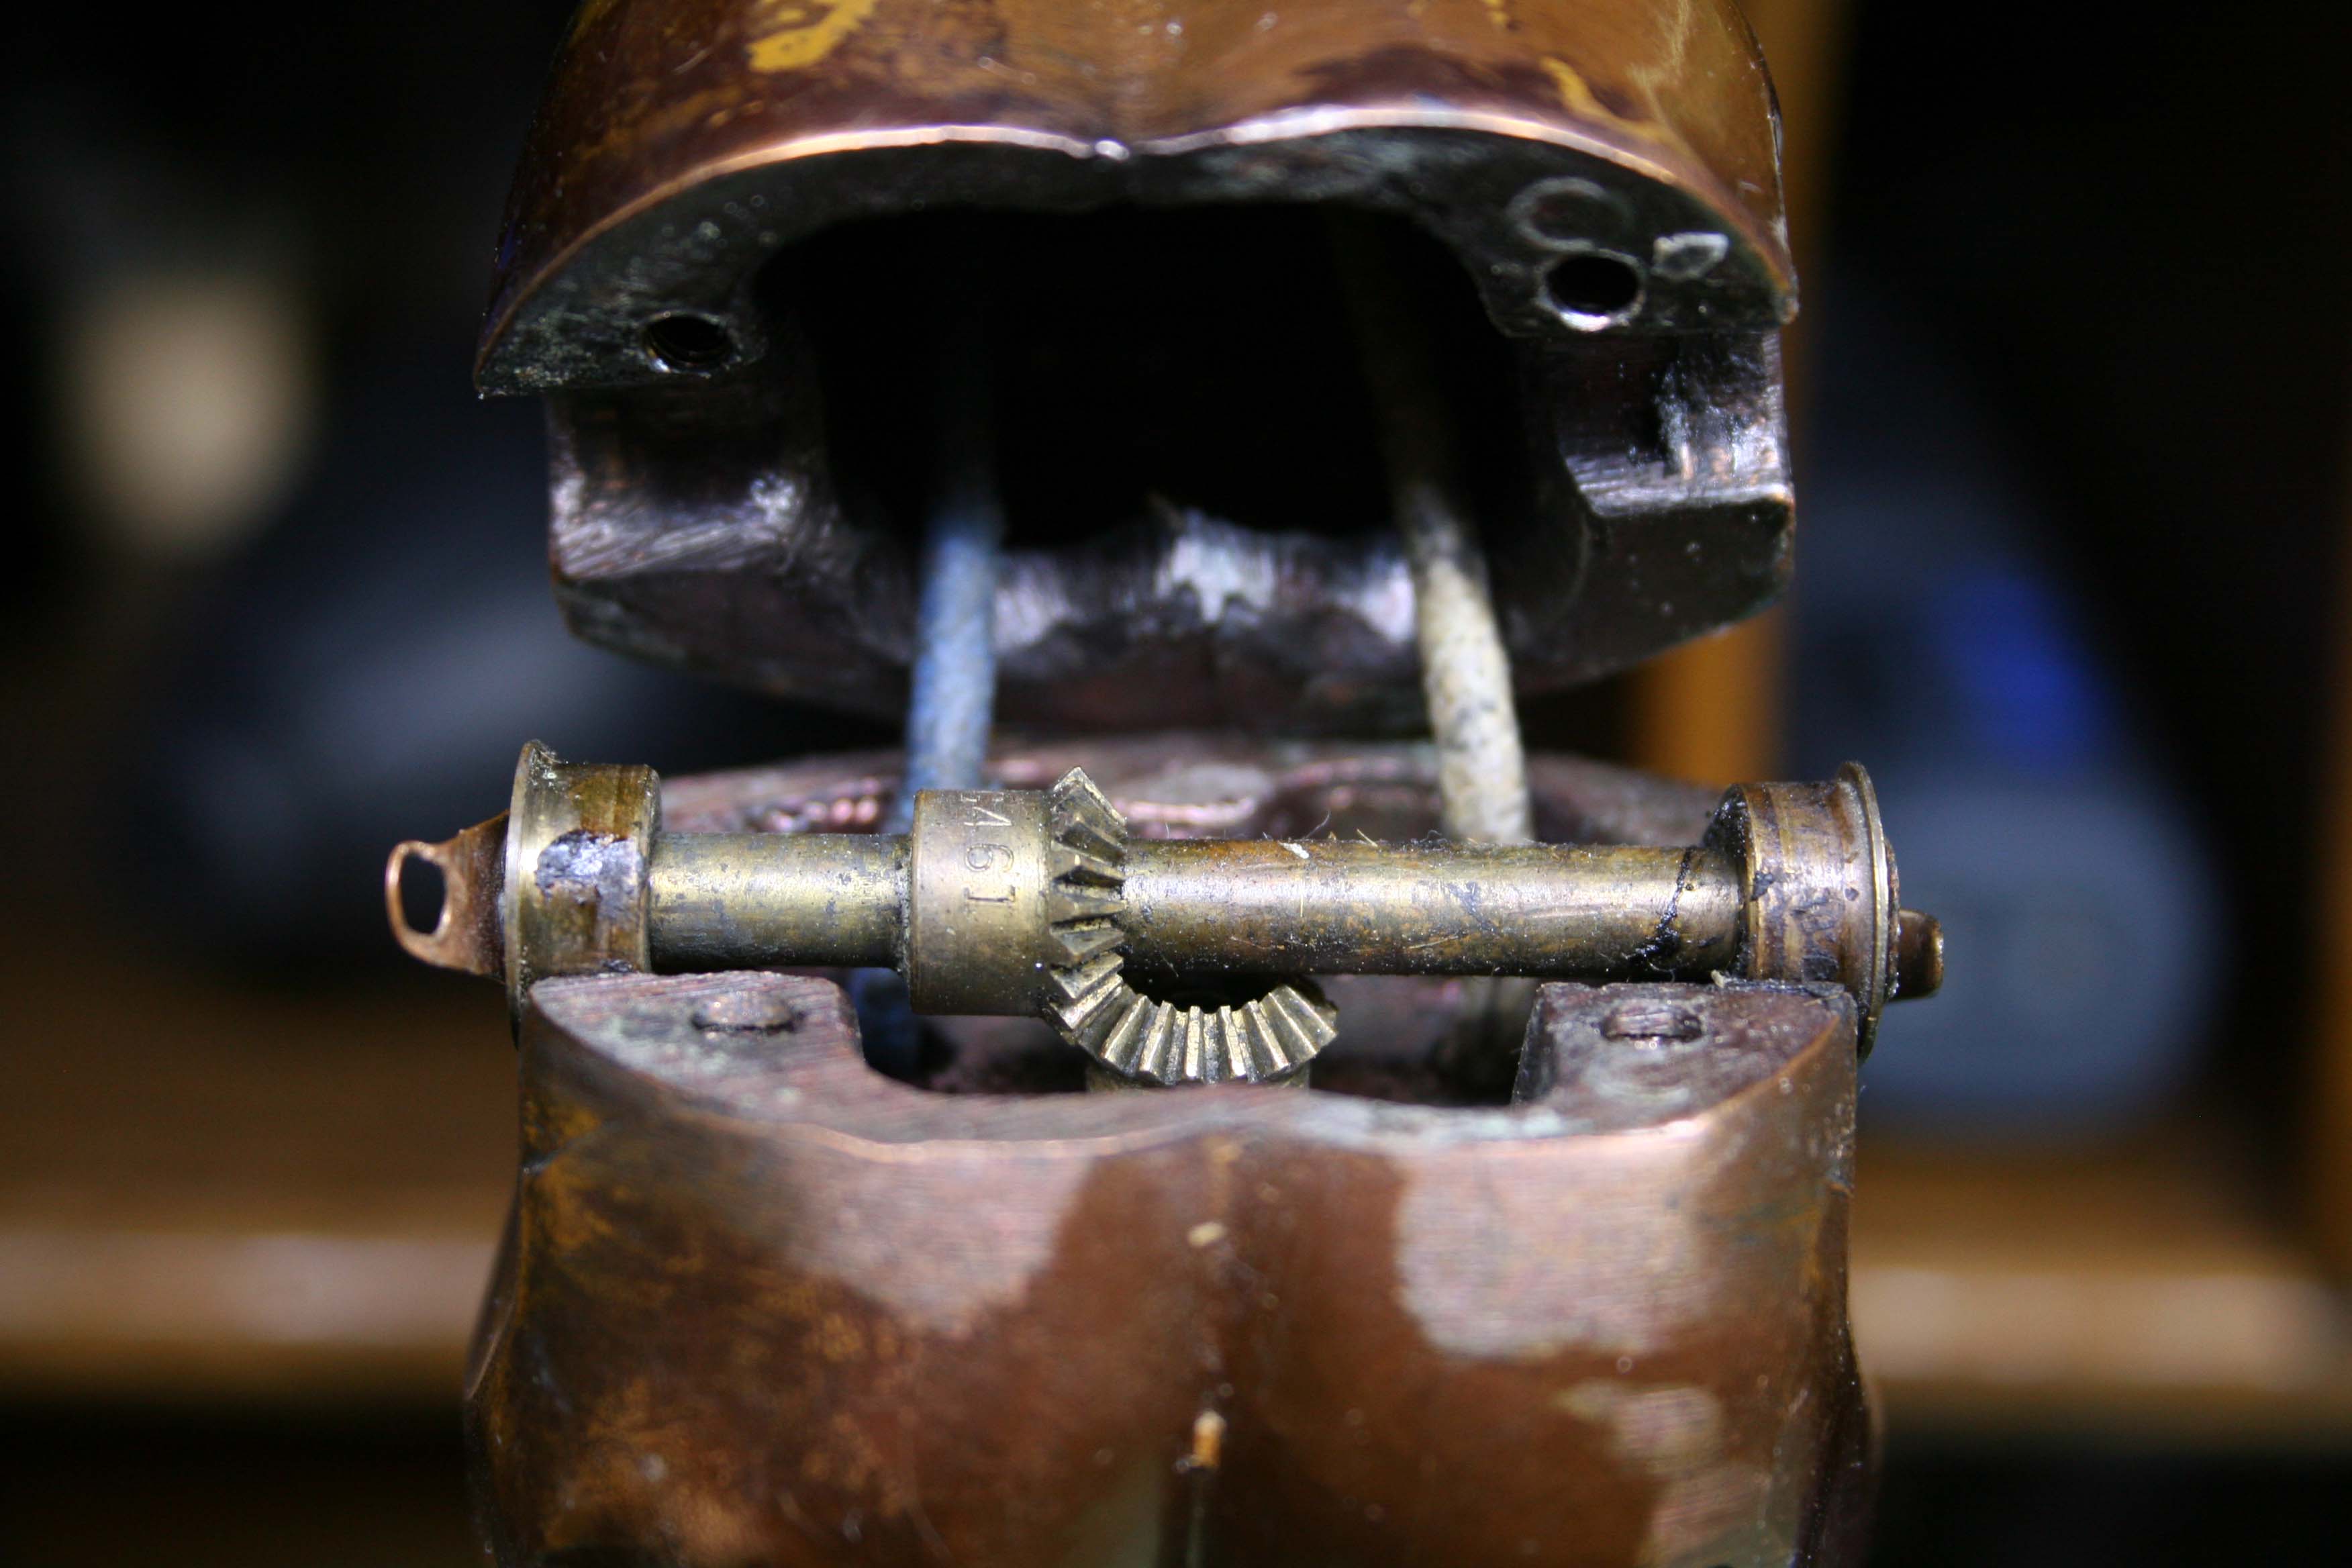
Years of accumulated grease and grime coated the crank shaft and would require a cleaning.

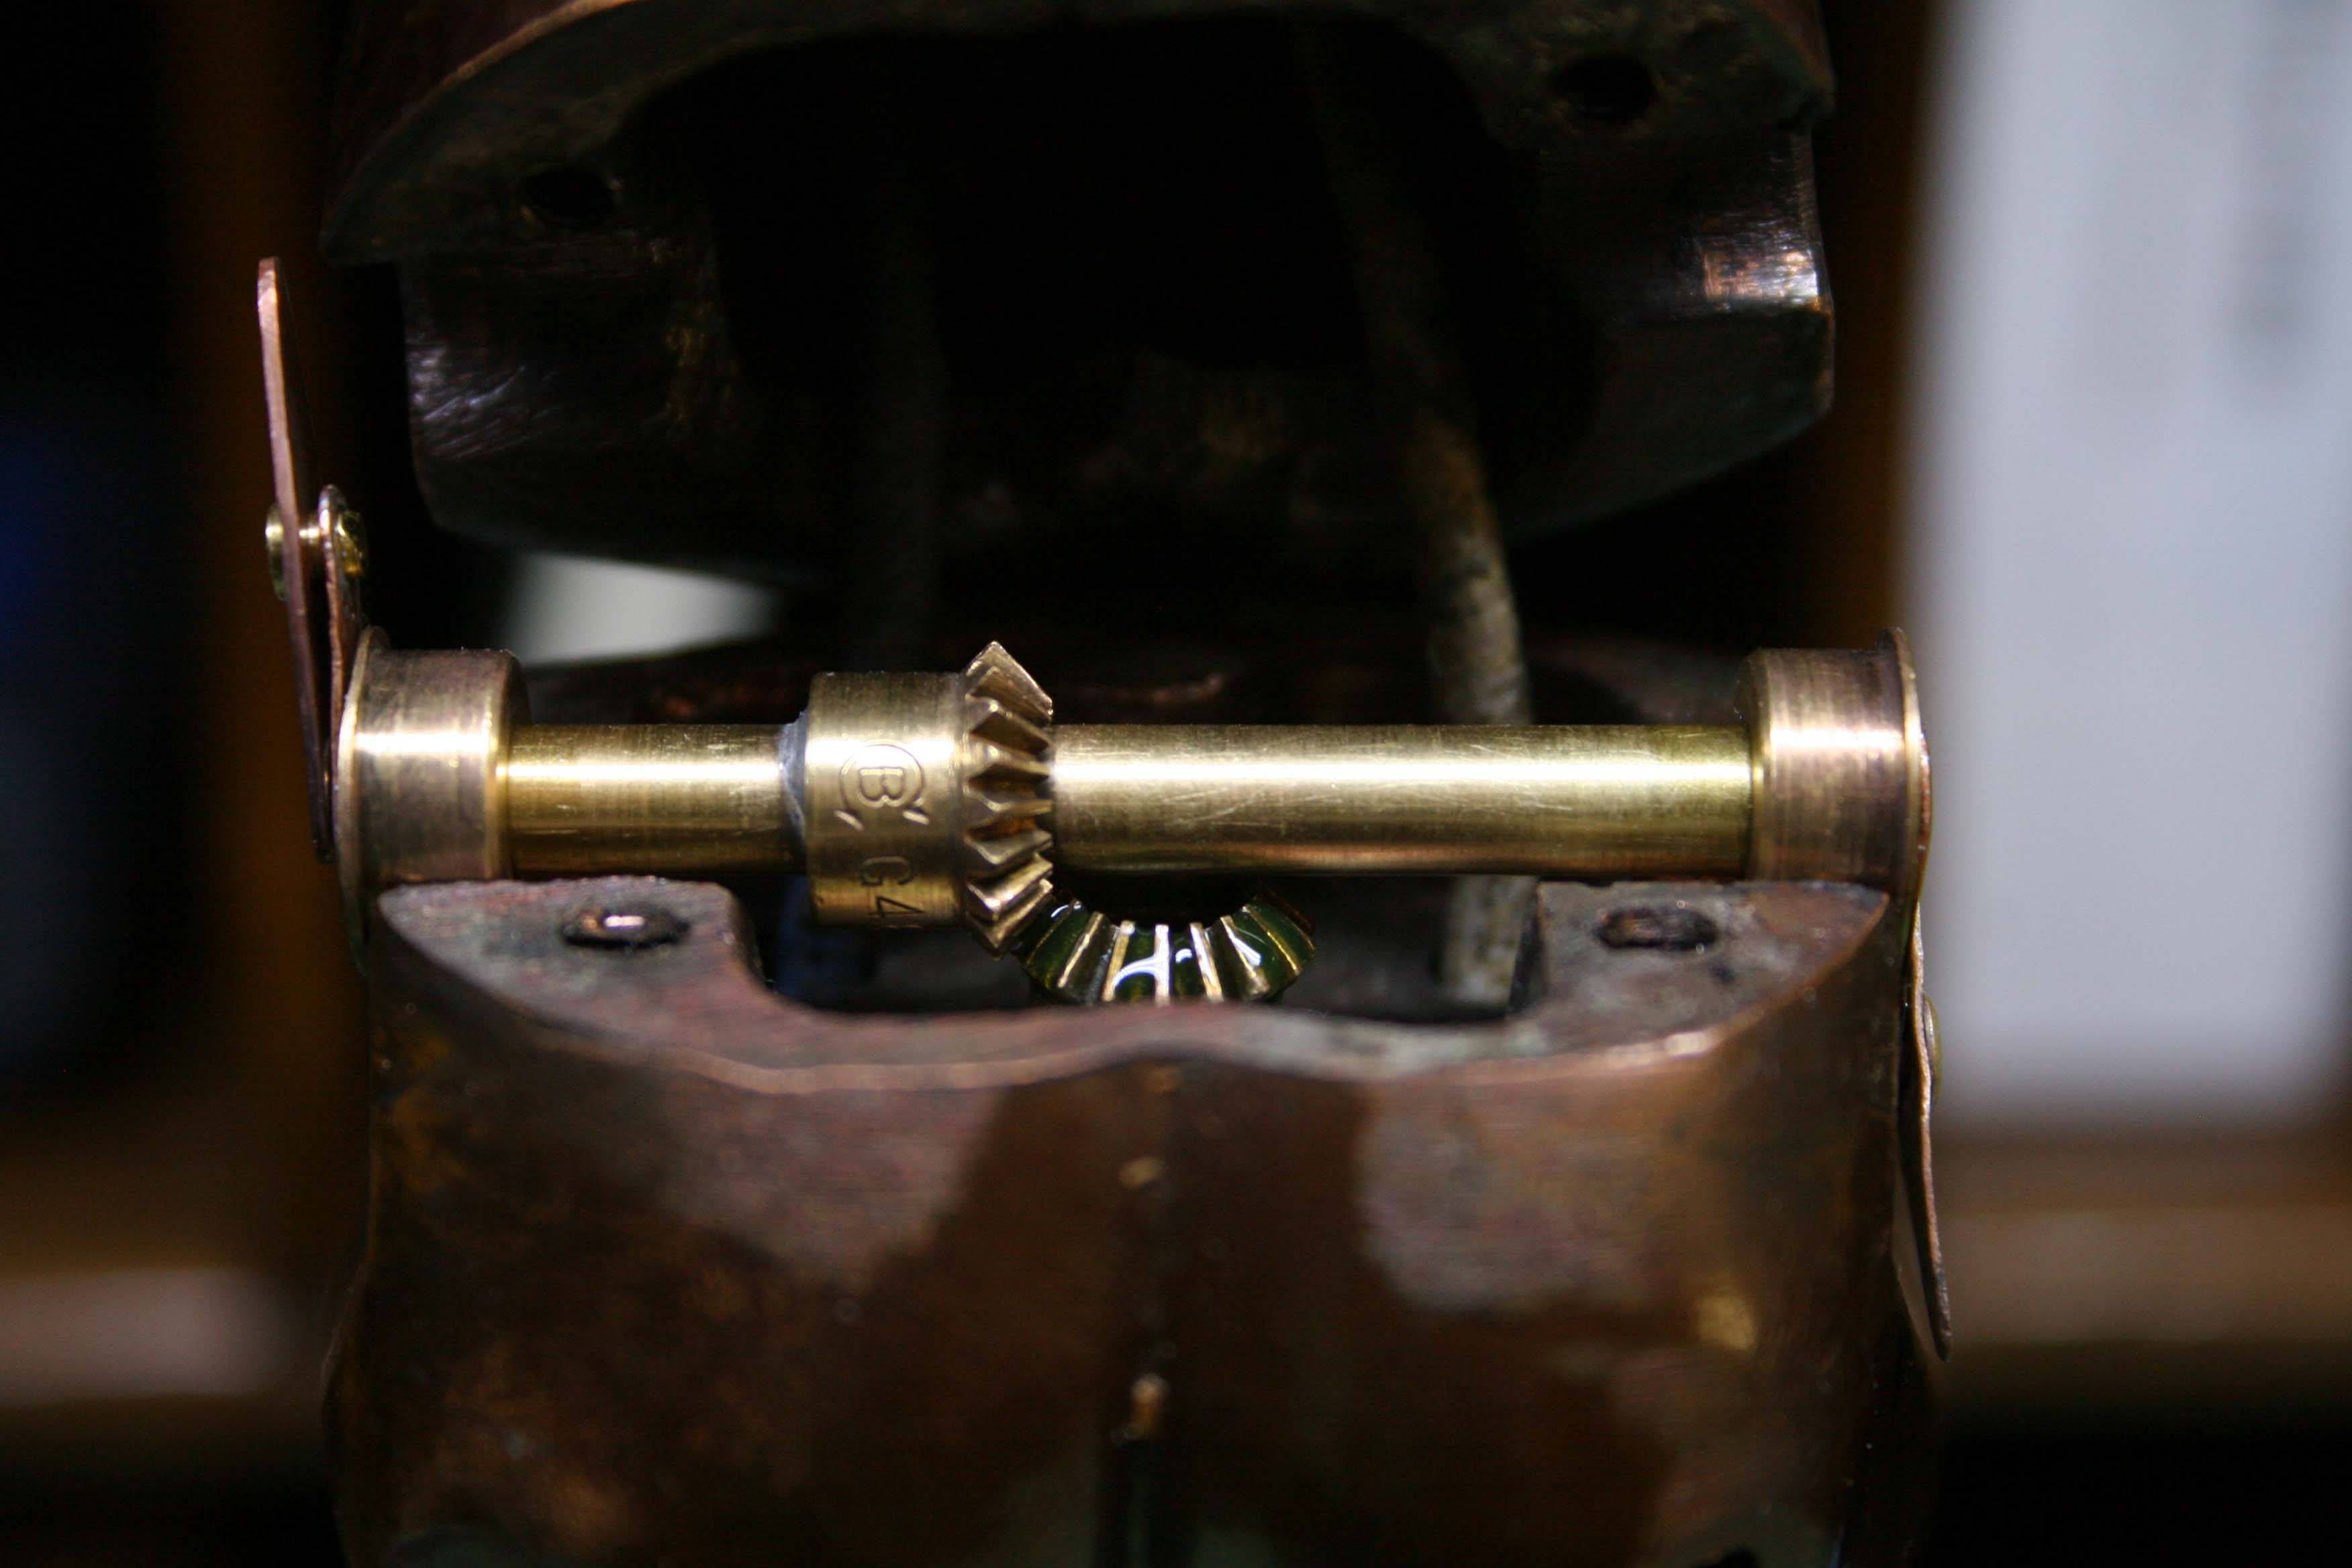
Under close inspection I could see that some work had been performed here in the past. One of the cams, which are soldered to the crank, had been removed before, probably by grinding away the solder. That had resulted in heavy scoring of the brass crank shaft right where it passed through the bearing.
In order to fix this I opted to desolder both cams from the shaft. Removal of the cams had the added benefit of making it quite easy to clean the entire assembly and inspect the bearings for damage.
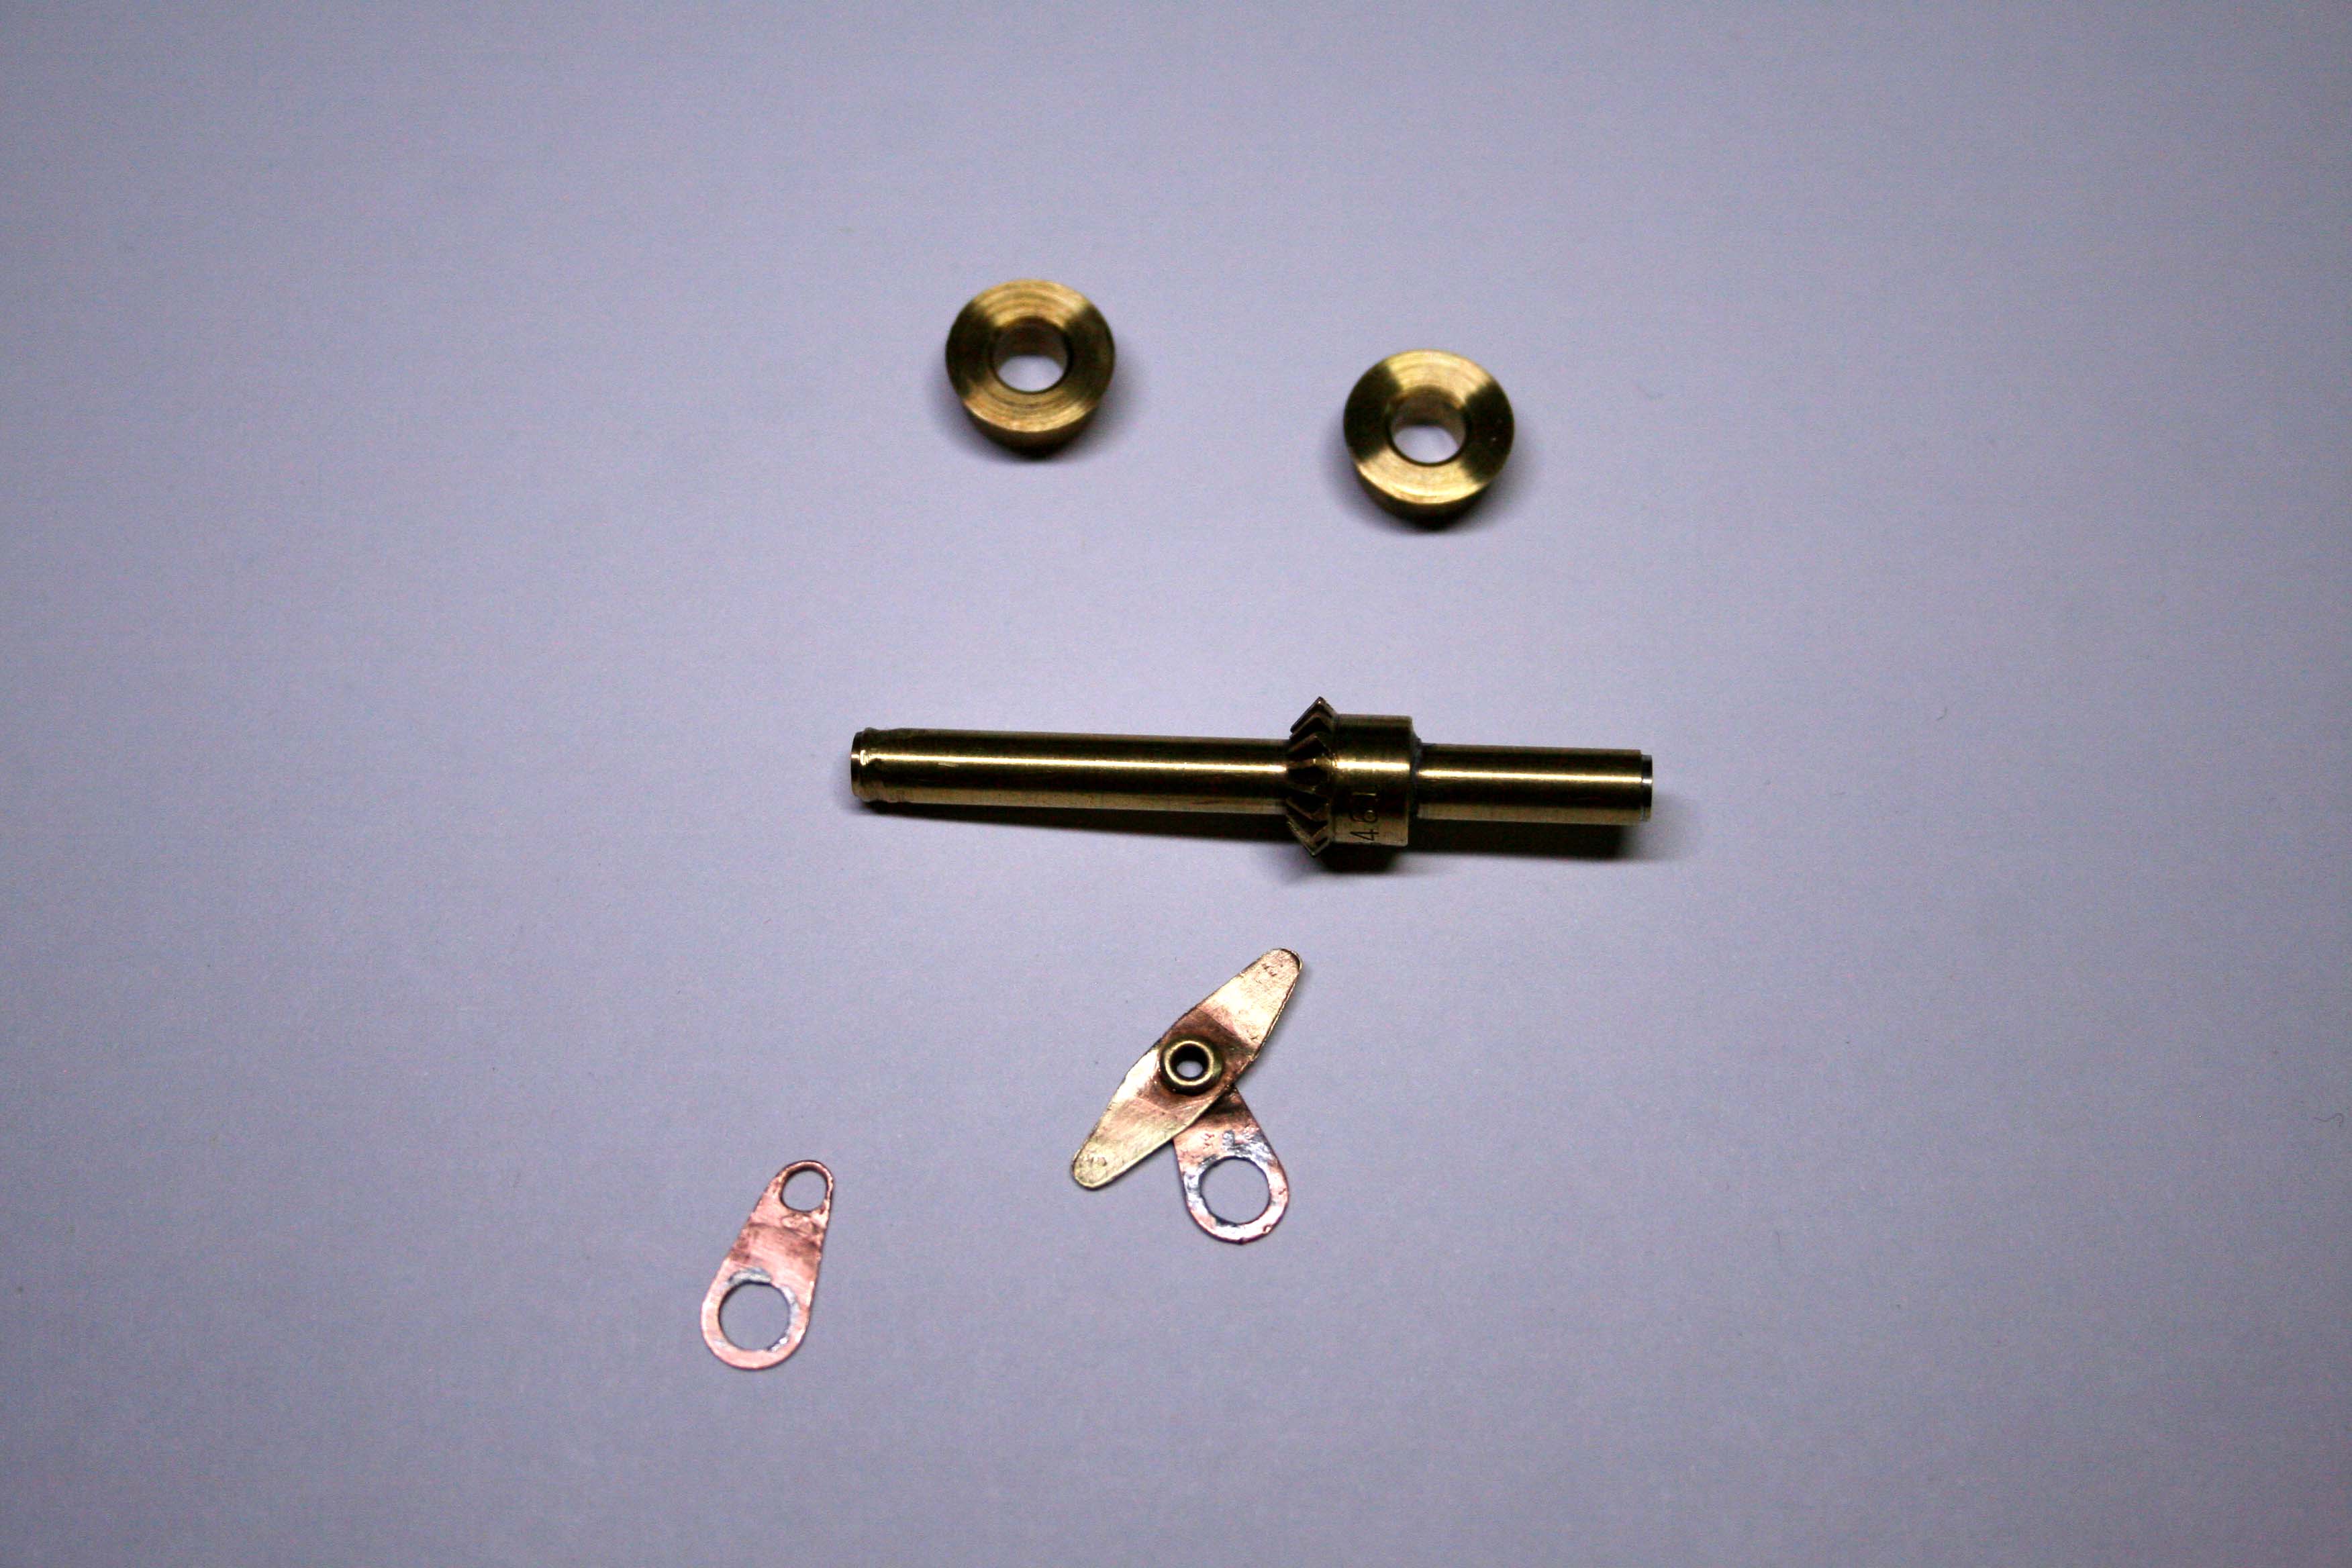
With disassembly complete I placed an order for some 0.3mm copper sheeting to fabricate a new skirt fastener and set the project aside.
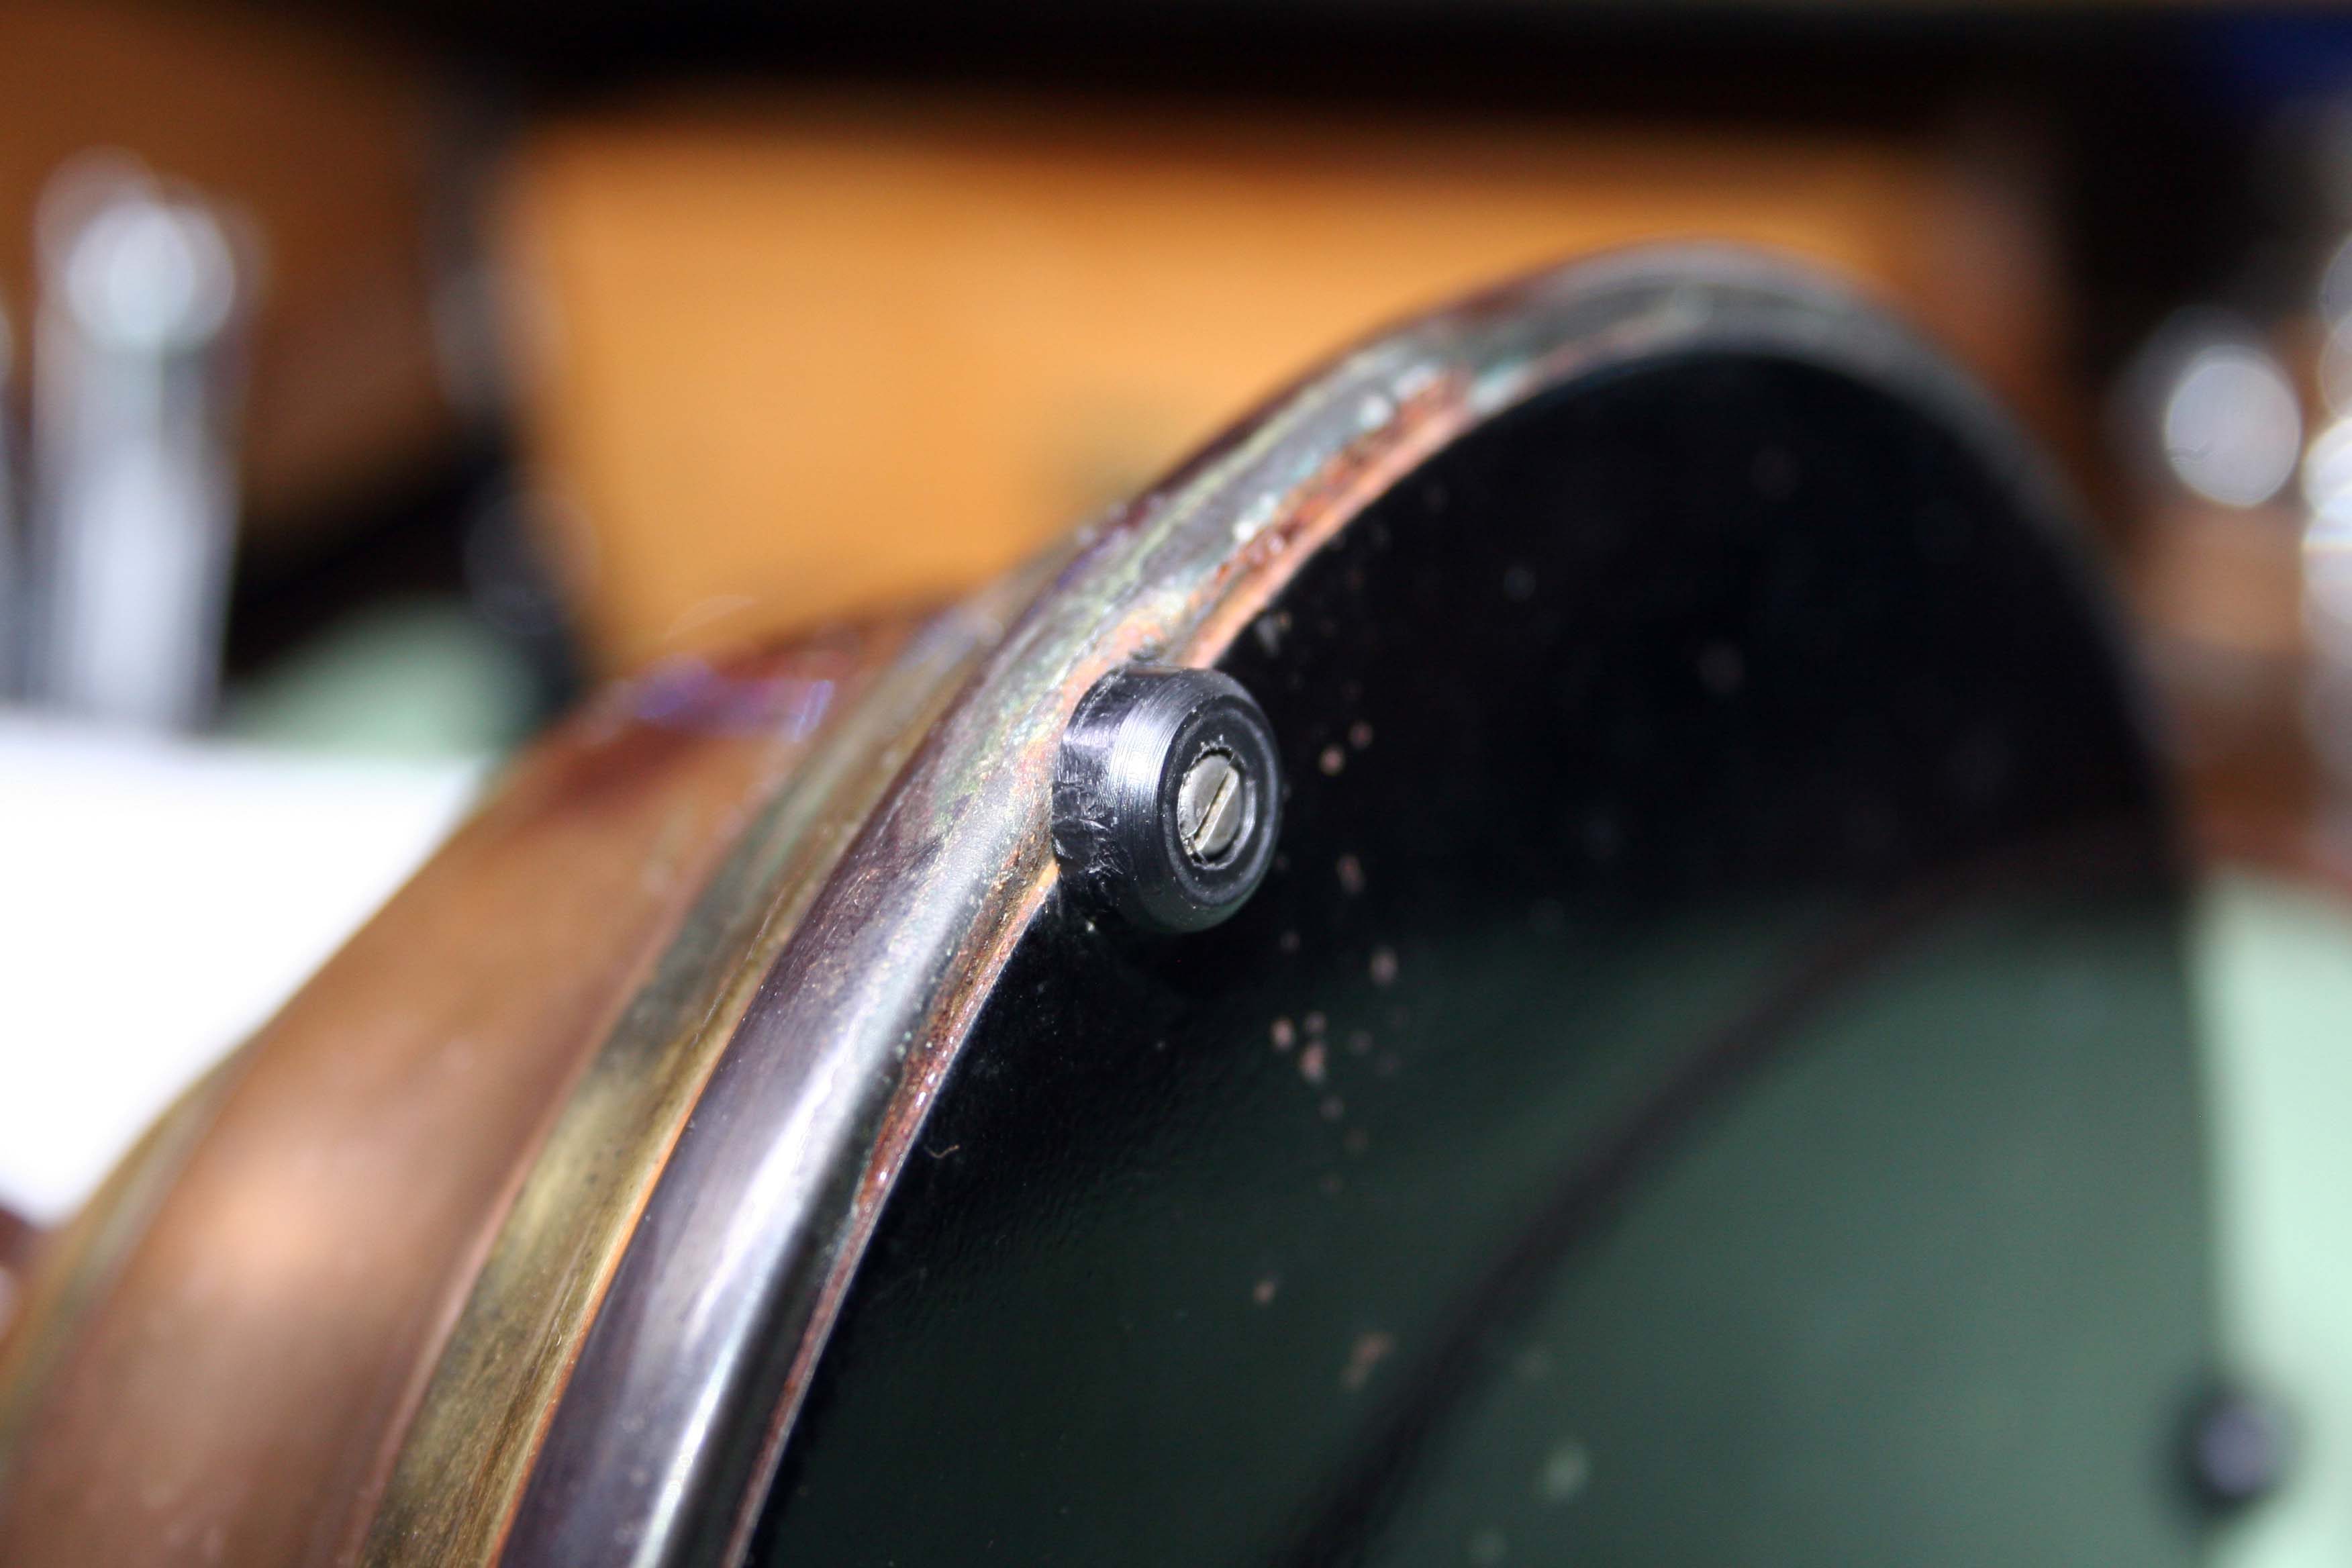
I noticed the lamp didn’t sit level on the desk though and examining the base discovered a rubber foot missing.
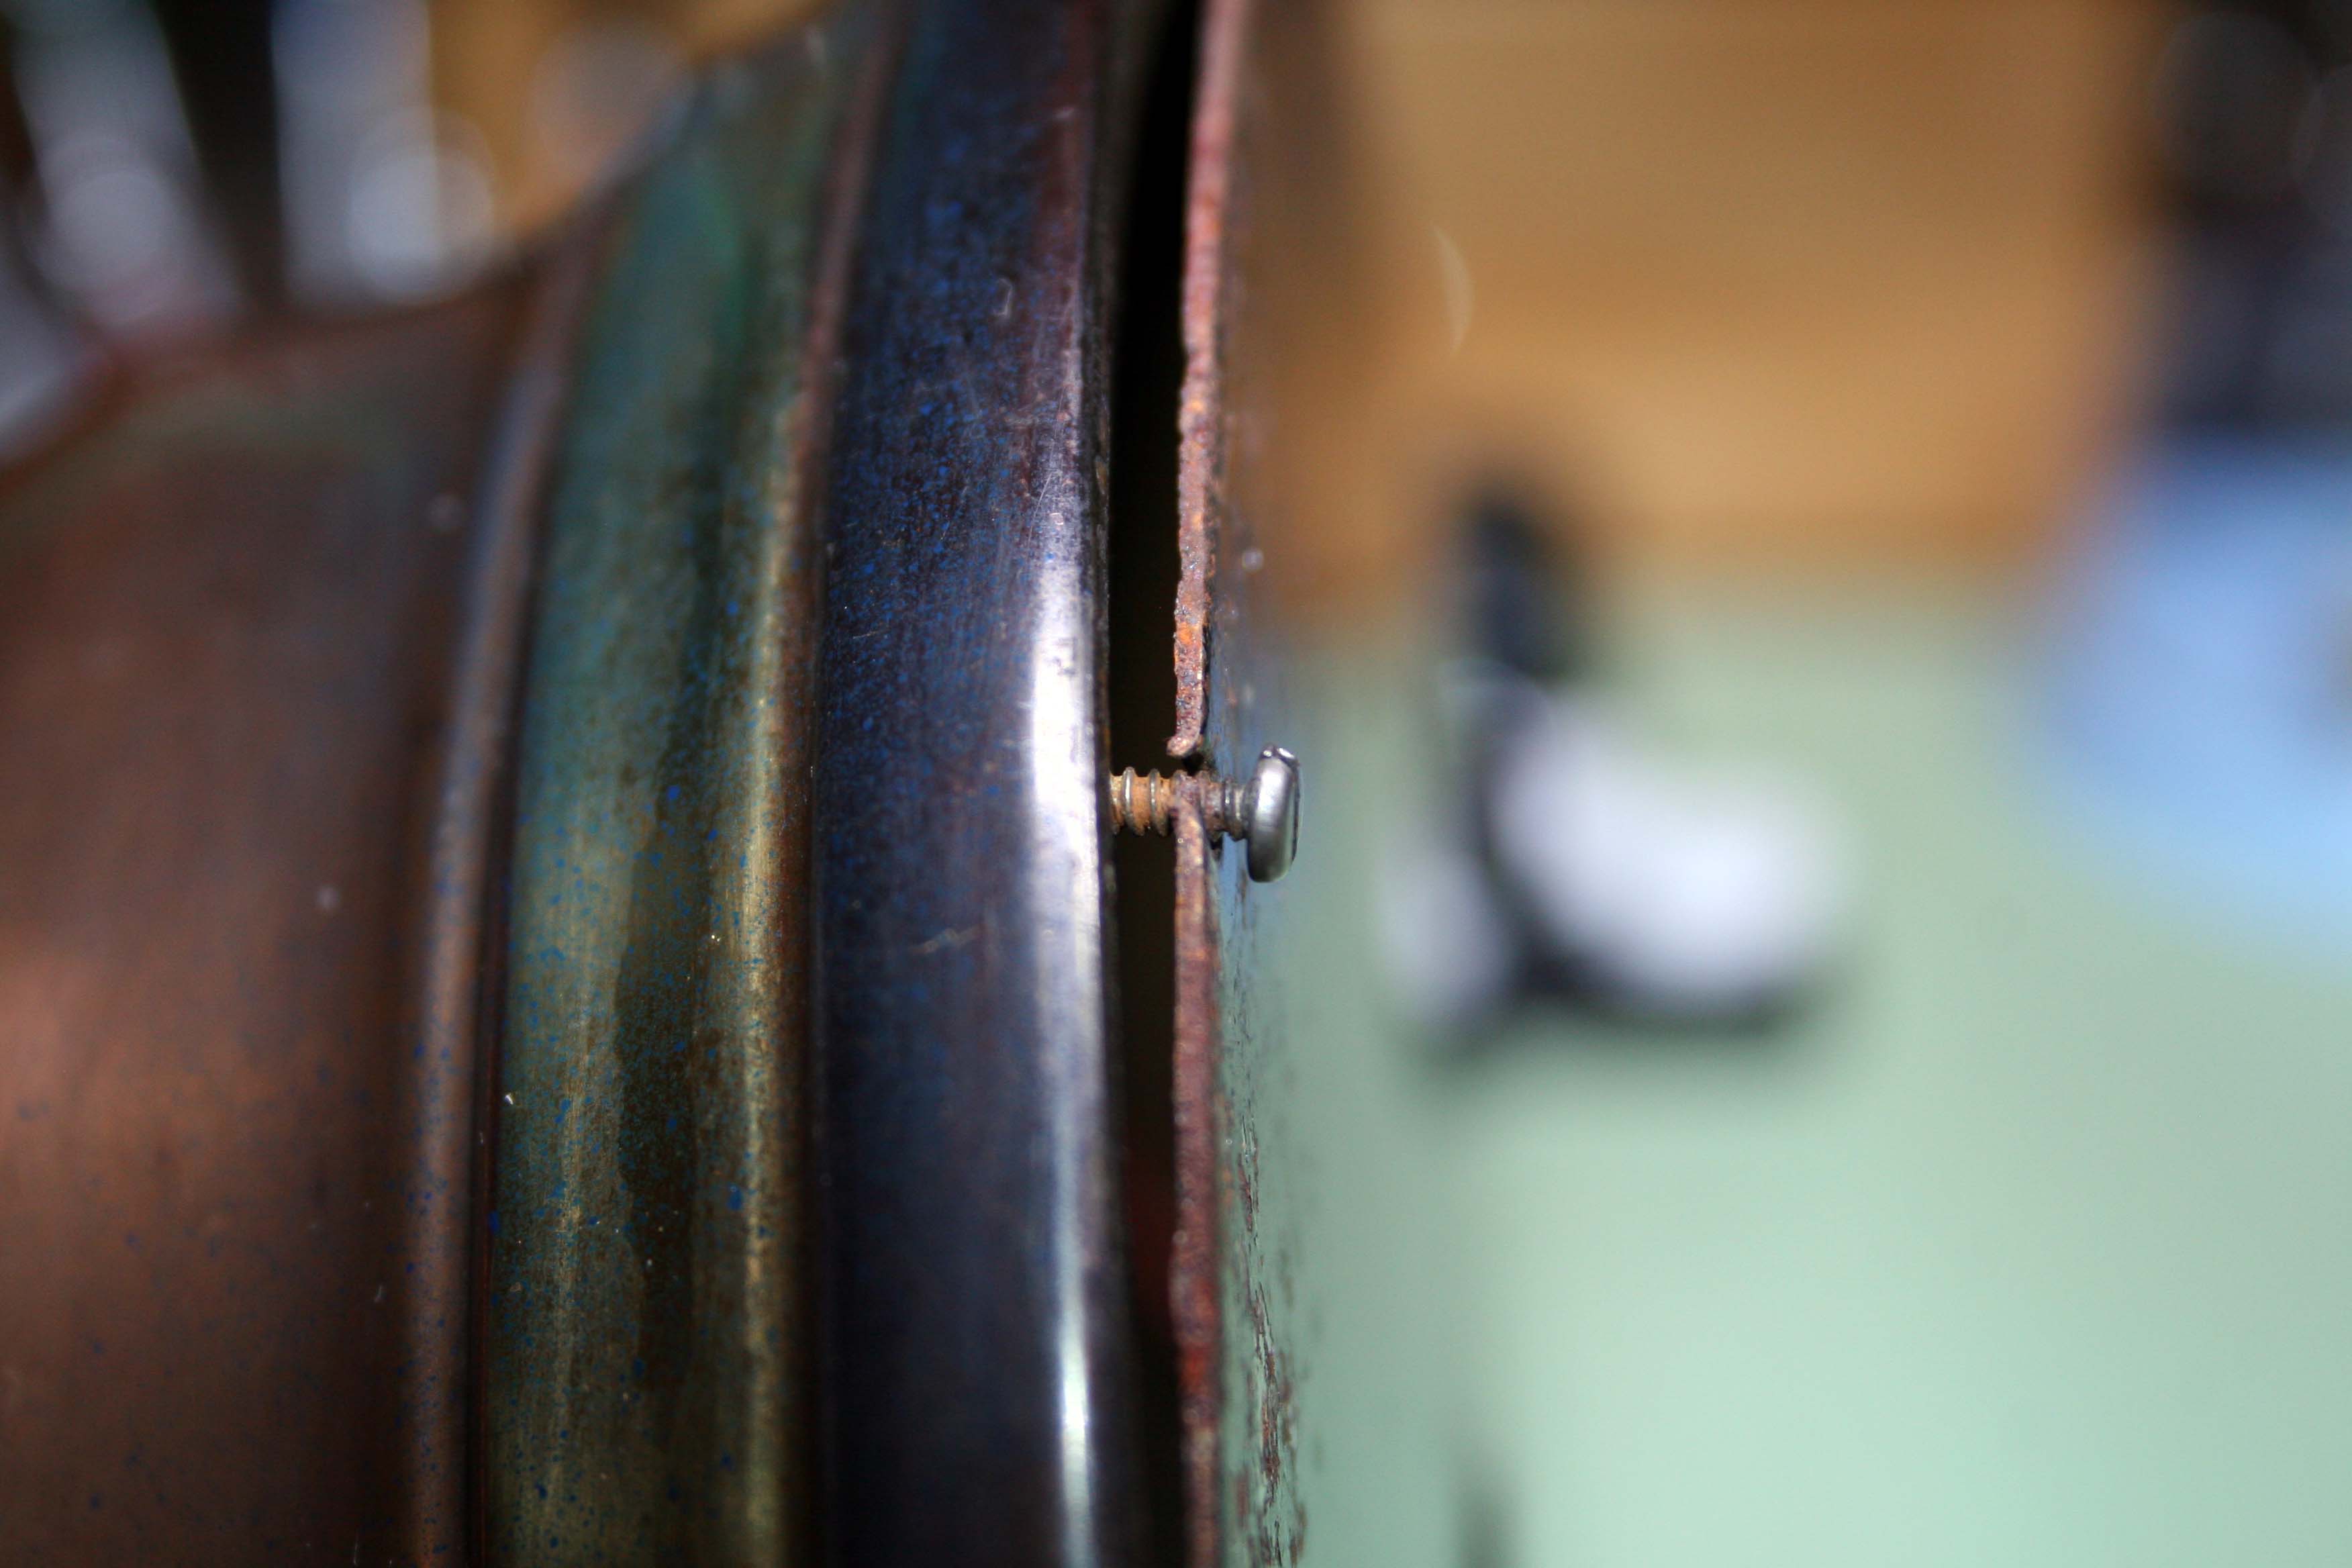
Each foot is secured to the base with a small steel screw. There should be three feet but here I only had two. The original rubber feet had hardened long ago so I matched the look and feel of the two remaining feet by fabricating the third from a bit of nylon rod. It’s quite fun to whittle away the soft nylon on the lathe and this job also gave me an excuse to use the micro drill press (which I just love).

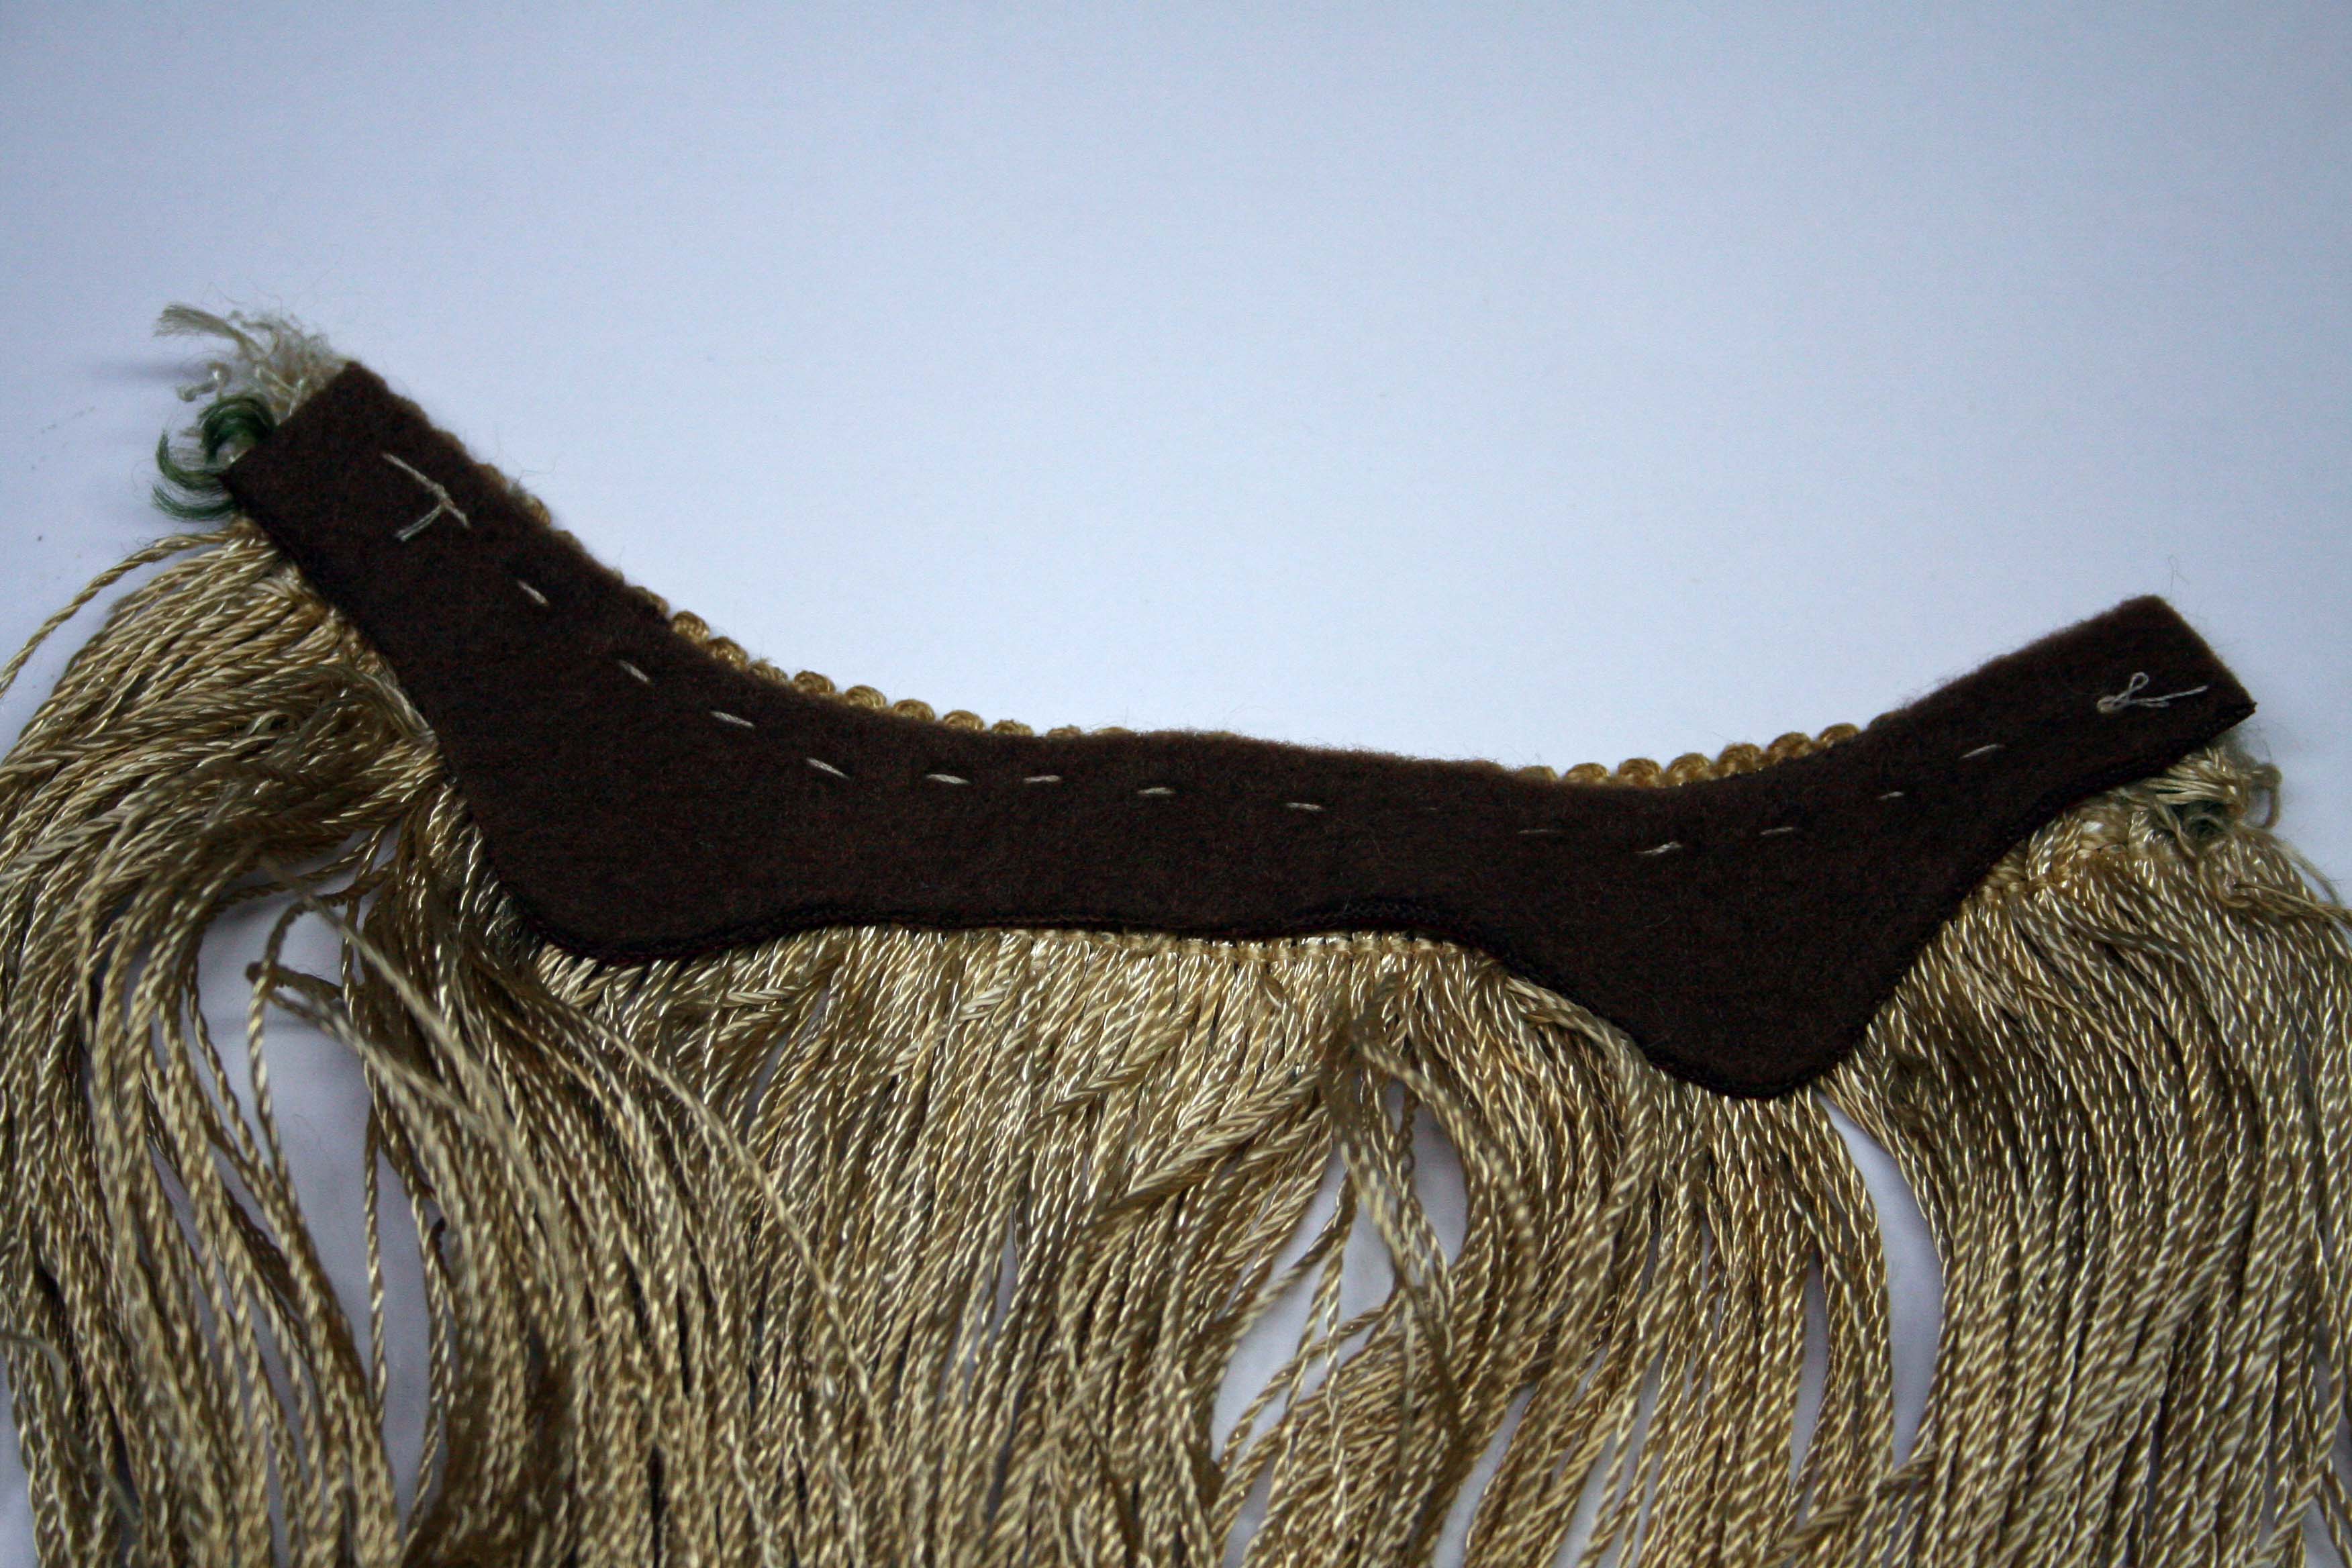
Feet fixed and still waiting on the copper stock, I turned my attention to the dancer’s skirt. Scot had thoughtfully supplied this with the lamp but unfortunately it was in poor repair; the faux leather band which is sewn inside the waistband had come undone and would need attention.
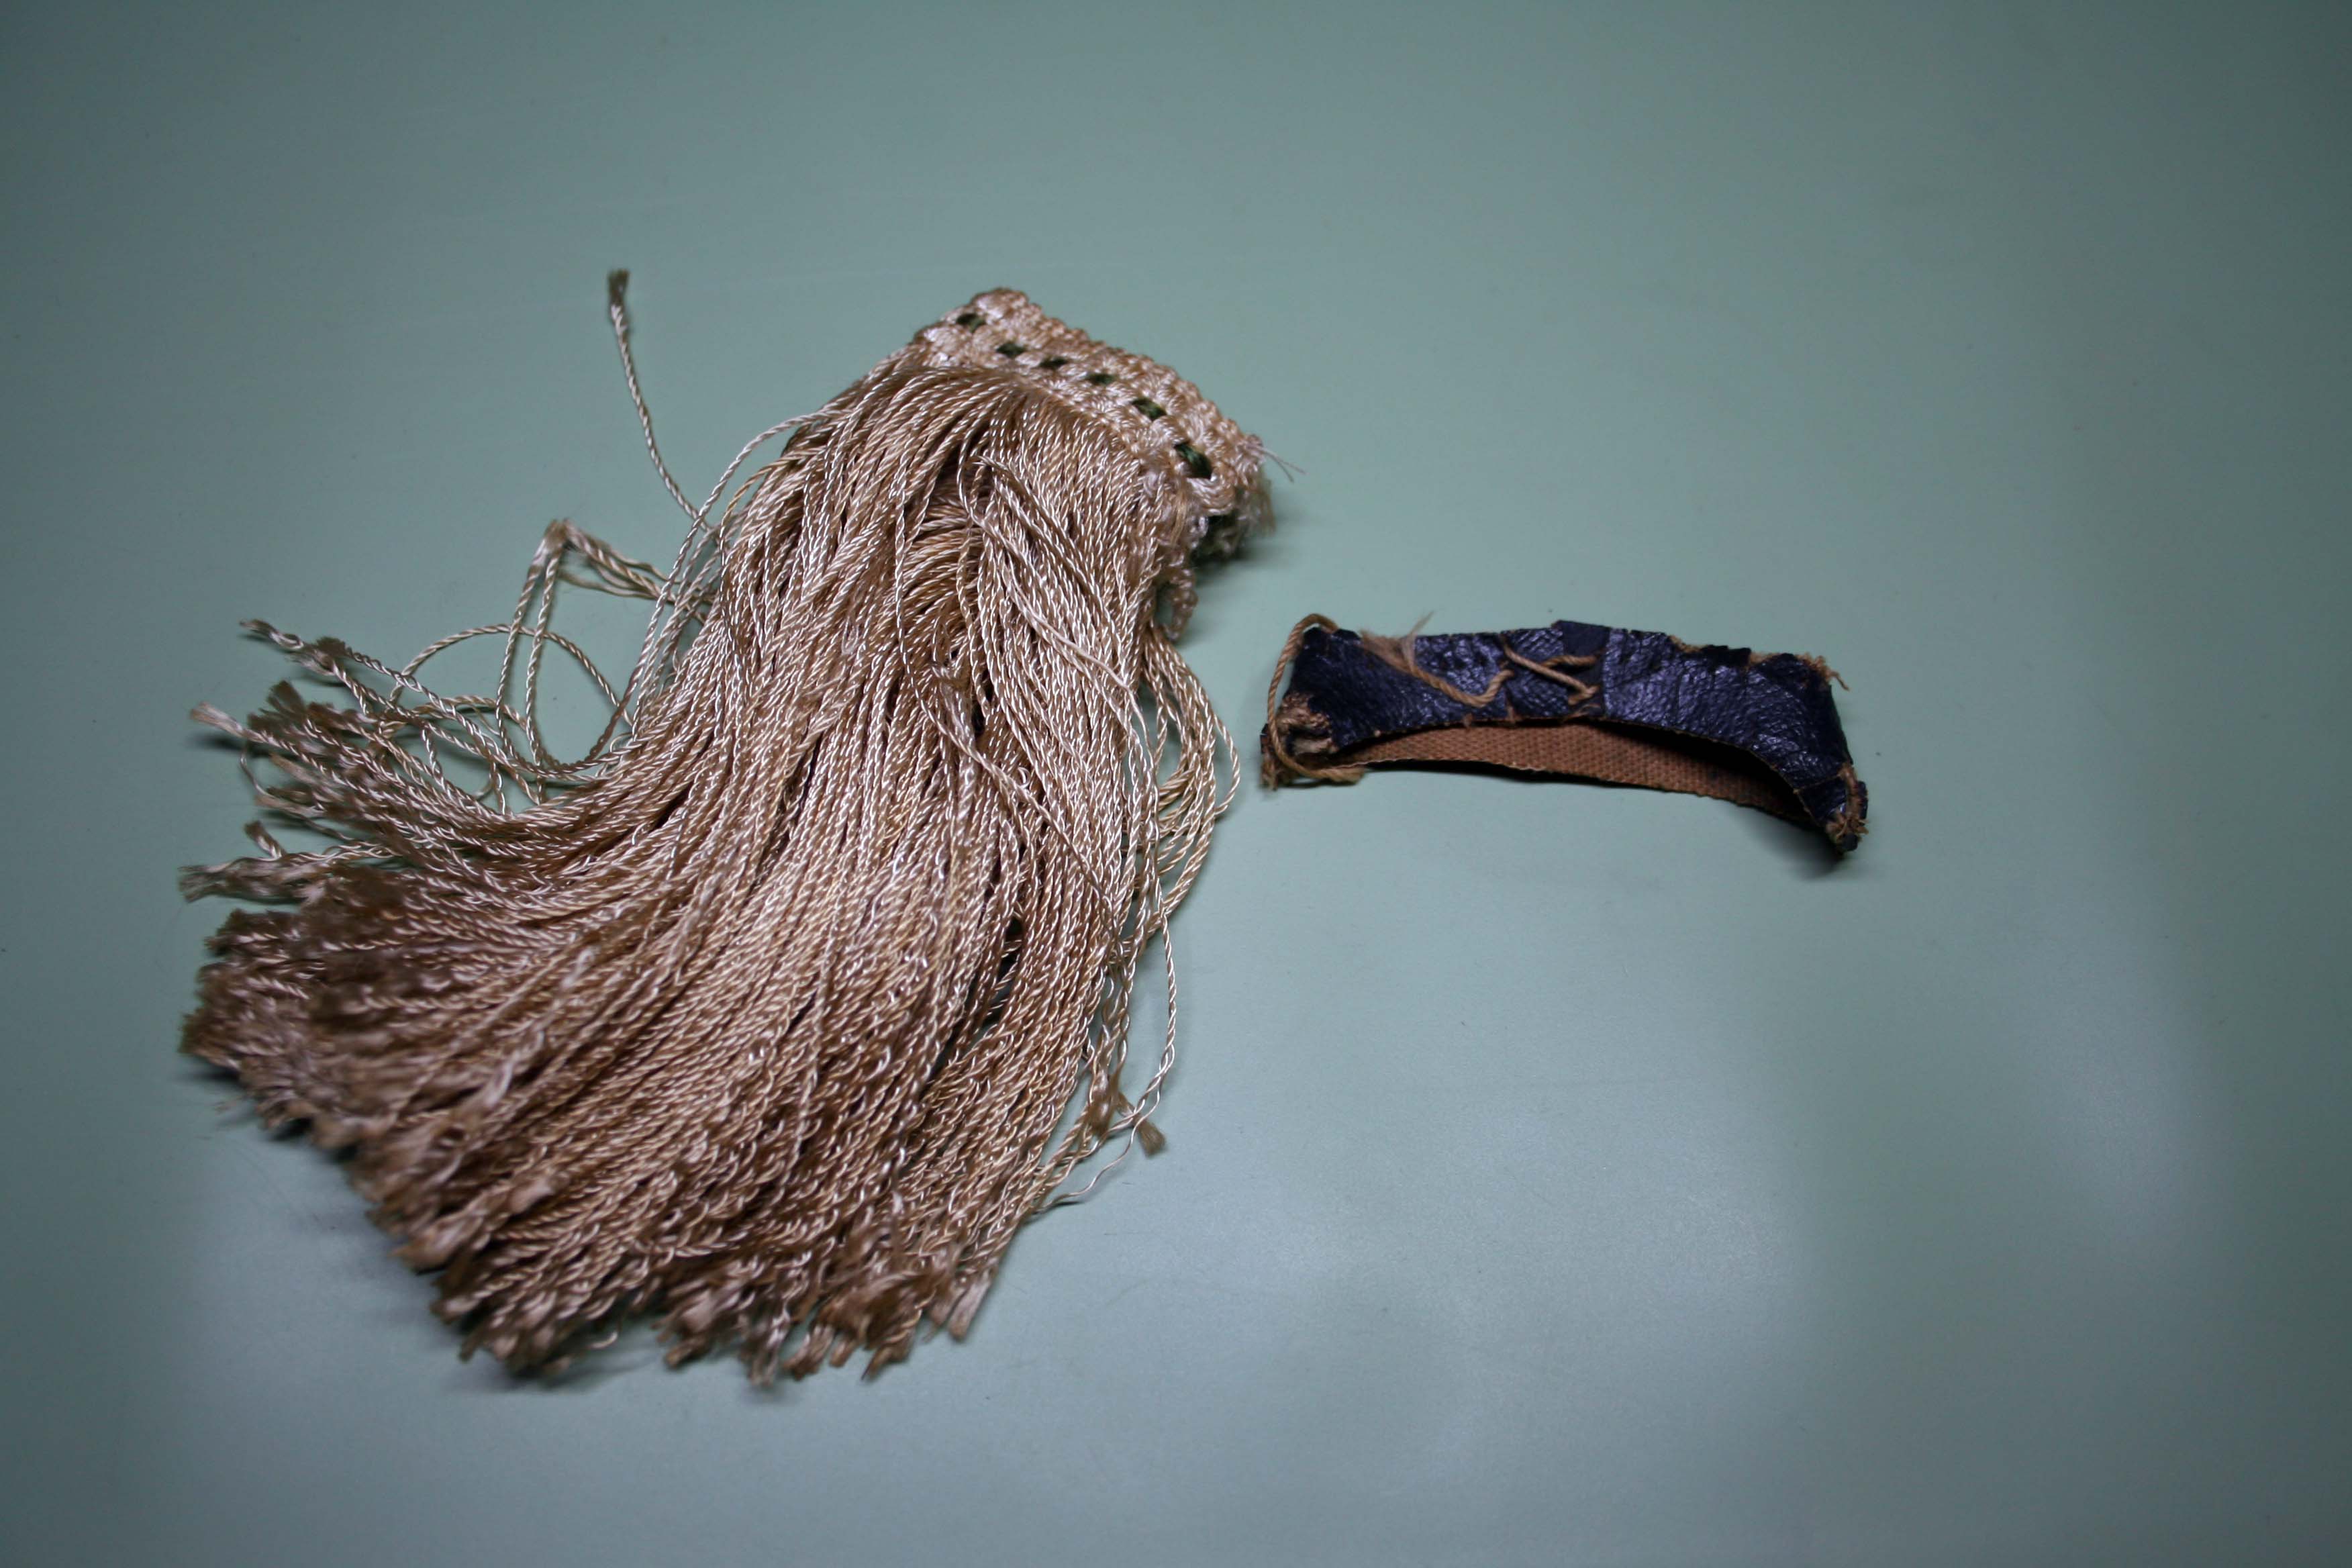
Using the original as a template, I cut a new leather band from some upholstery material my wife had left over from another project. This was just the right stuff as one side of the material had a soft felt texture which would go easy on the lamp’s patina.
Finally the copper arrived and I was able to return to the original job. I cut a new skirt fastener from the copper and attached it to the cam using a screw and nut assembly (as I had in the earlier Hula Girl project).
I’d like to say the rest is history but with the project end in sight I was suddenly taken ill and following a two day stint in the hospital was returned home with a liquid diet and strict instructions to rest up.
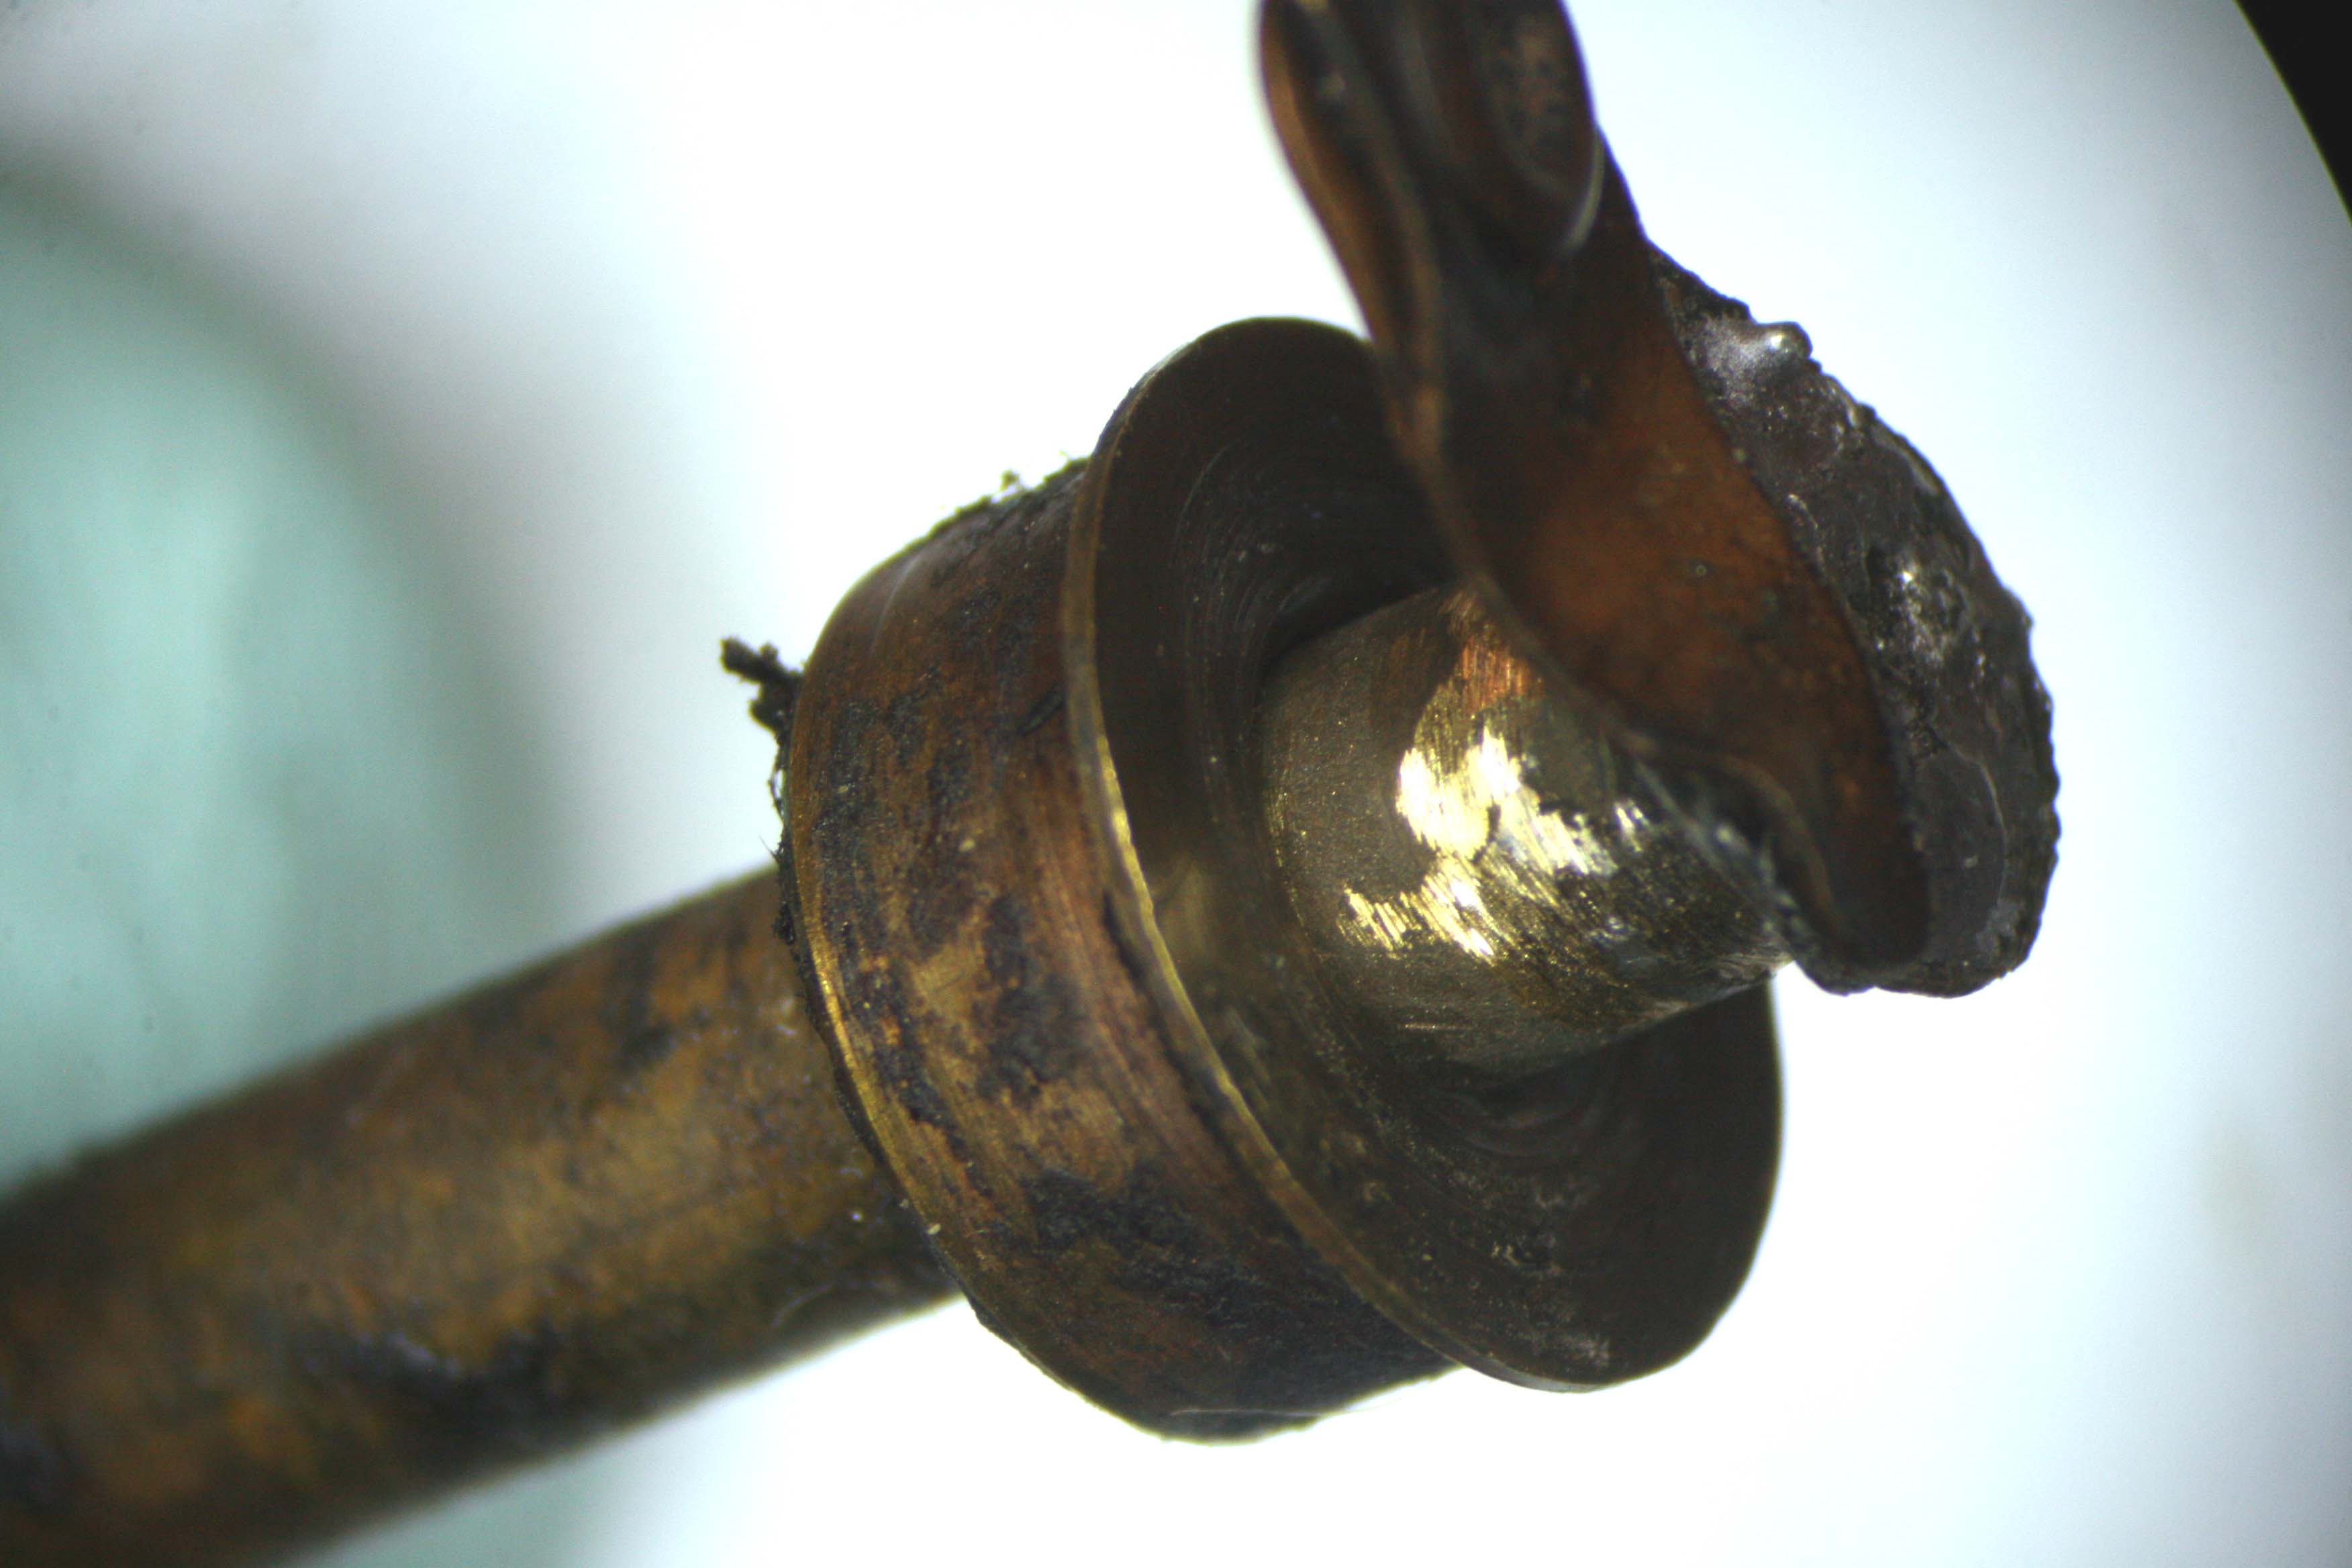
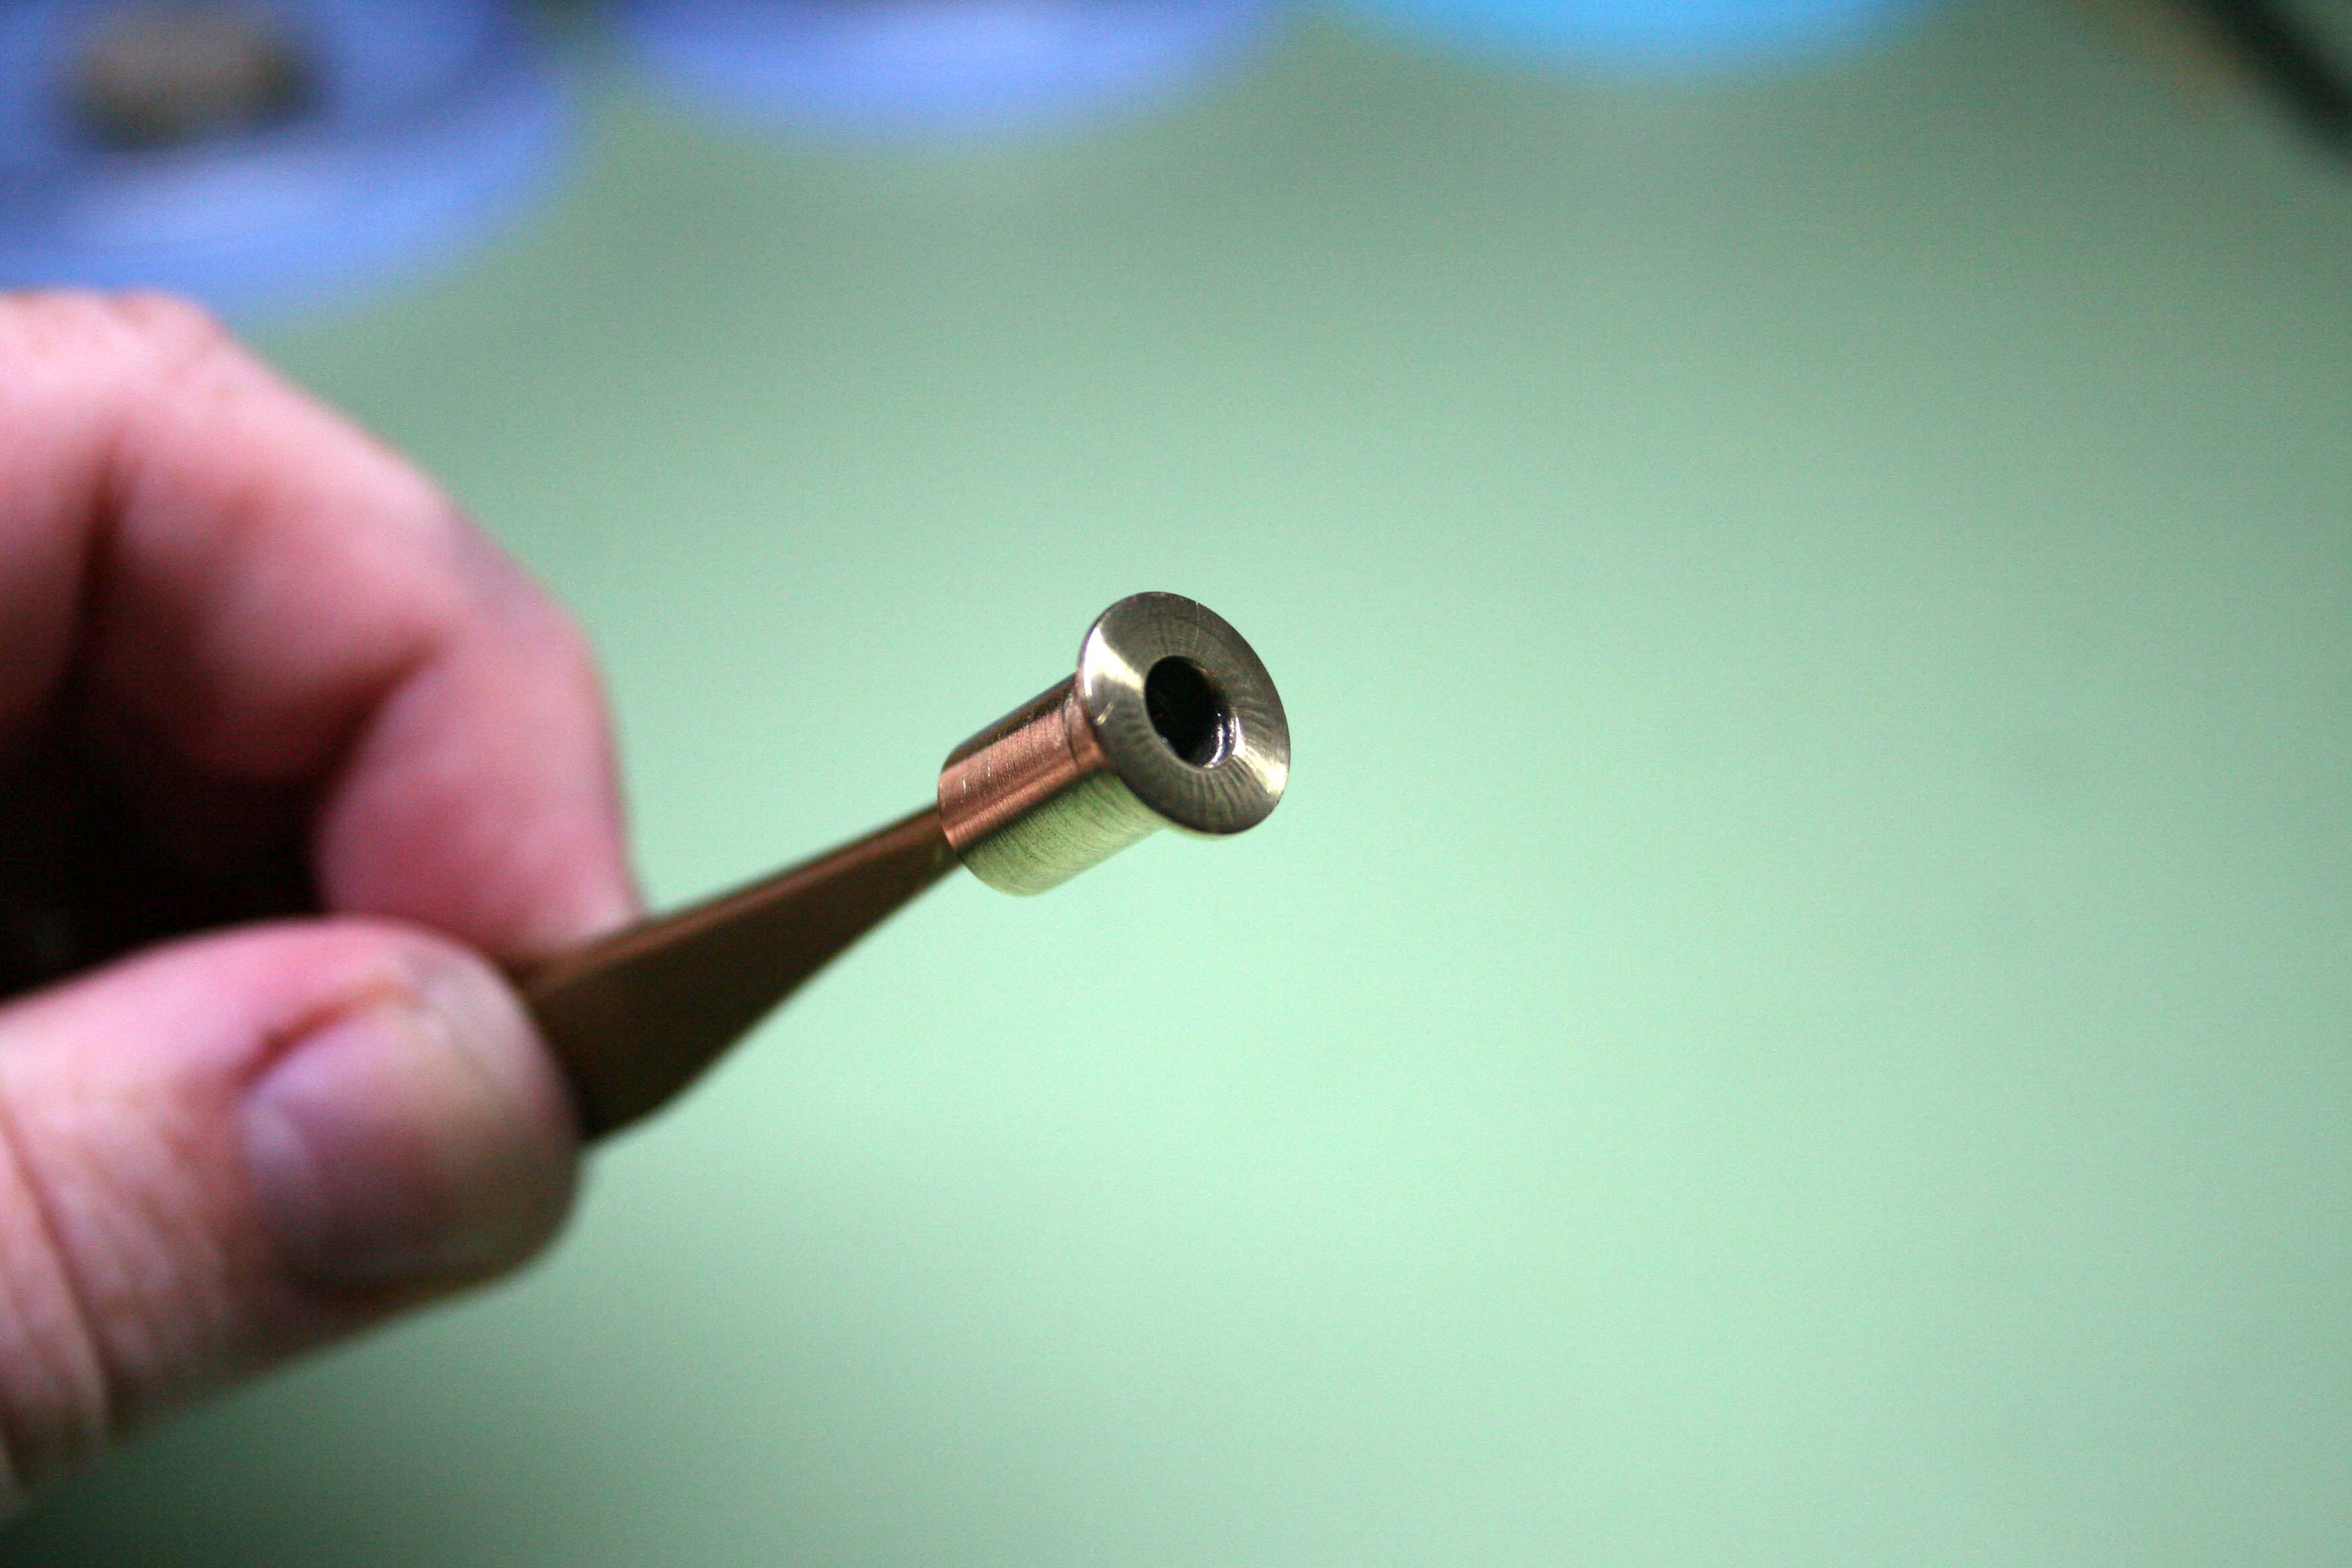
Upon returning to the lamp I discovered a new problem which wasn’t apparent earlier. The bushing for the longitudinal shaft (from the motor up to the crank) had become loose and the slack was enough to keep the gears from meshing. Sometimes this would cause the the whole works to seize up.
The bushing was probably initially friction fitted but old sticky grease had glued it to the shaft and as the motor turned the shaft the bushing slowly wore away the softer spelter. The solution was to either find a new larger friction fit bushing or a flanged bushing.
After a bit of hunting, I managed to locate some bushings outside the US which had the dimensions needed (5mm ID, 9mm OD) but after waiting a few days for delivery I got anxious and opted to try my had at an alternative solution.
Plan B was to solder a small brass washer to the top of the original friction fit bushing. The washer would work as a flange and hold the bushing in center.
The new plan worked as hoped, so I buttoned up the lamp and reattached the skirt.

I’d love to say this project went smooth from start to finish but there were certainly some challenges. Two attempts to rivet the fastener to the cam ultimately failed- the second when I came back to the job a little too soon and undid my own work with jittery hands (apparently it’s best to work when you’ve eaten something in the preceding four days). The unexpected gremlin had me scratching my head for a bit too, but in the end, the lamp came out wonderfully and I’m quite proud of the result; I think this hula girl is set to do many more years of dancing!

Great post.
Have a wonderful summer !
Scot
LikeLike
Thanks Scot!
LikeLike
Do you live on Oahu as I need my lamp repaired
LikeLike
No, I’m afraid I’m in Sunny California.
LikeLike
can you build a motor for a dodge hula girl I just bought without a motor?
LikeLike
No, I’m afraid that’s a bit beyond my skill level. I can manage some things mechanically but electrics are a who different ball game!
LikeLike
Hi Roy are you still doing work on hula girl lamps I am in California too.
LikeLike
I do repairs for others when requested. Right now things are a bit crazy as I’m moving shortly and there’s a global pandemic, but hopefully things will settle down in a bit.
LikeLike
Hey,
Just wondering how the skirt attaches to the clips? Do the clips bend over the leather band. I have one missing a bushing and the end pieces and the skirt. I want to try to make my missing parts but I don’t have any templates to use. Any measurements on the stuff you made?
LikeLike
Hi,
My question is the same as Jim above (Dec. 23 2019) I also have the same lamp as yours however the skirt is missing. I am having a hard time trying to figure out how the clips fit onto the skirt. I was wondering if I can get a photocopy of the waste band or the size. Please help me.
I have to say you did an excellent job repairing this hula lamp. I was really impressed. Thank you for your time.
-Frank
LikeLike
Hi. I have a dodge hula girl as well that needs I think the same service. I’m located in Santa Monica and left you an Inquiry via your contact us page. Would you mind letting me know if you would be willing to take a look at her?
Thanks so much!
Mike
LikeLike
Just wow! You clearly know the ins and outs of these lamps. I have one that I’d love repaired. Do you offer this service by chance?
LikeLike