

Even though months have passed by since my last post on this blog I have been keeping busy. In addition to making accommodations at home and at work for the Covid-19 pandemic and moving to a new house, I’ve also been diligently whittling away at the backlog of broken watches on my workbench and today I’m pleased to tell the story of a Seiko automatic chronograph from the late seventies which I just finished servicing.
Now as I’m sure I have relayed in earlier posts, I’m in the process (the laborious process) of working through every type of chronograph I can get my hands on from the what I refer to as The Golden Age (for chronographs, roughly 1940 – 1979). I’ve managed to service many chronographs from this period but up to this point have been limited to those which were designed and manufactured by the fine watchmakers of Switzerland. This is unfortunate as it is well known that Japanese watchmakers were turning out exceptional timepieces during the same period and that by 1969 they had developed an automatic chronograph mechanism which could compete with anything coming out of Switzerland.
The chronograph movement designed by those engineers in 1969 was the venerable Seiko 6139 which has become famous among collectors for powering the Seiko Speedtimer affectionately known as the “Pogue”. This movement was designed and manufactured by the Suwa-Seikosha factory and is notable for being one of, and perhaps even the first, automatic chronograph to come to market.
Judging from the dial, a 6139 powered chronograph differed from the rest. All chronographs provide a method for recording elapsed time usually with small sub-dials or “sub-registers” which display the elapsed minutes and hours when the chronograph is activated. A 6139 powered chronograph had only a single sub-dial (at the six o’clock position) for recording up to 30 elapsed minutes and there was no sub-dial for displaying the running seconds. This was quite a departure from the typical 3-6 or 3-6-9 multiple sub-dial arraignment.
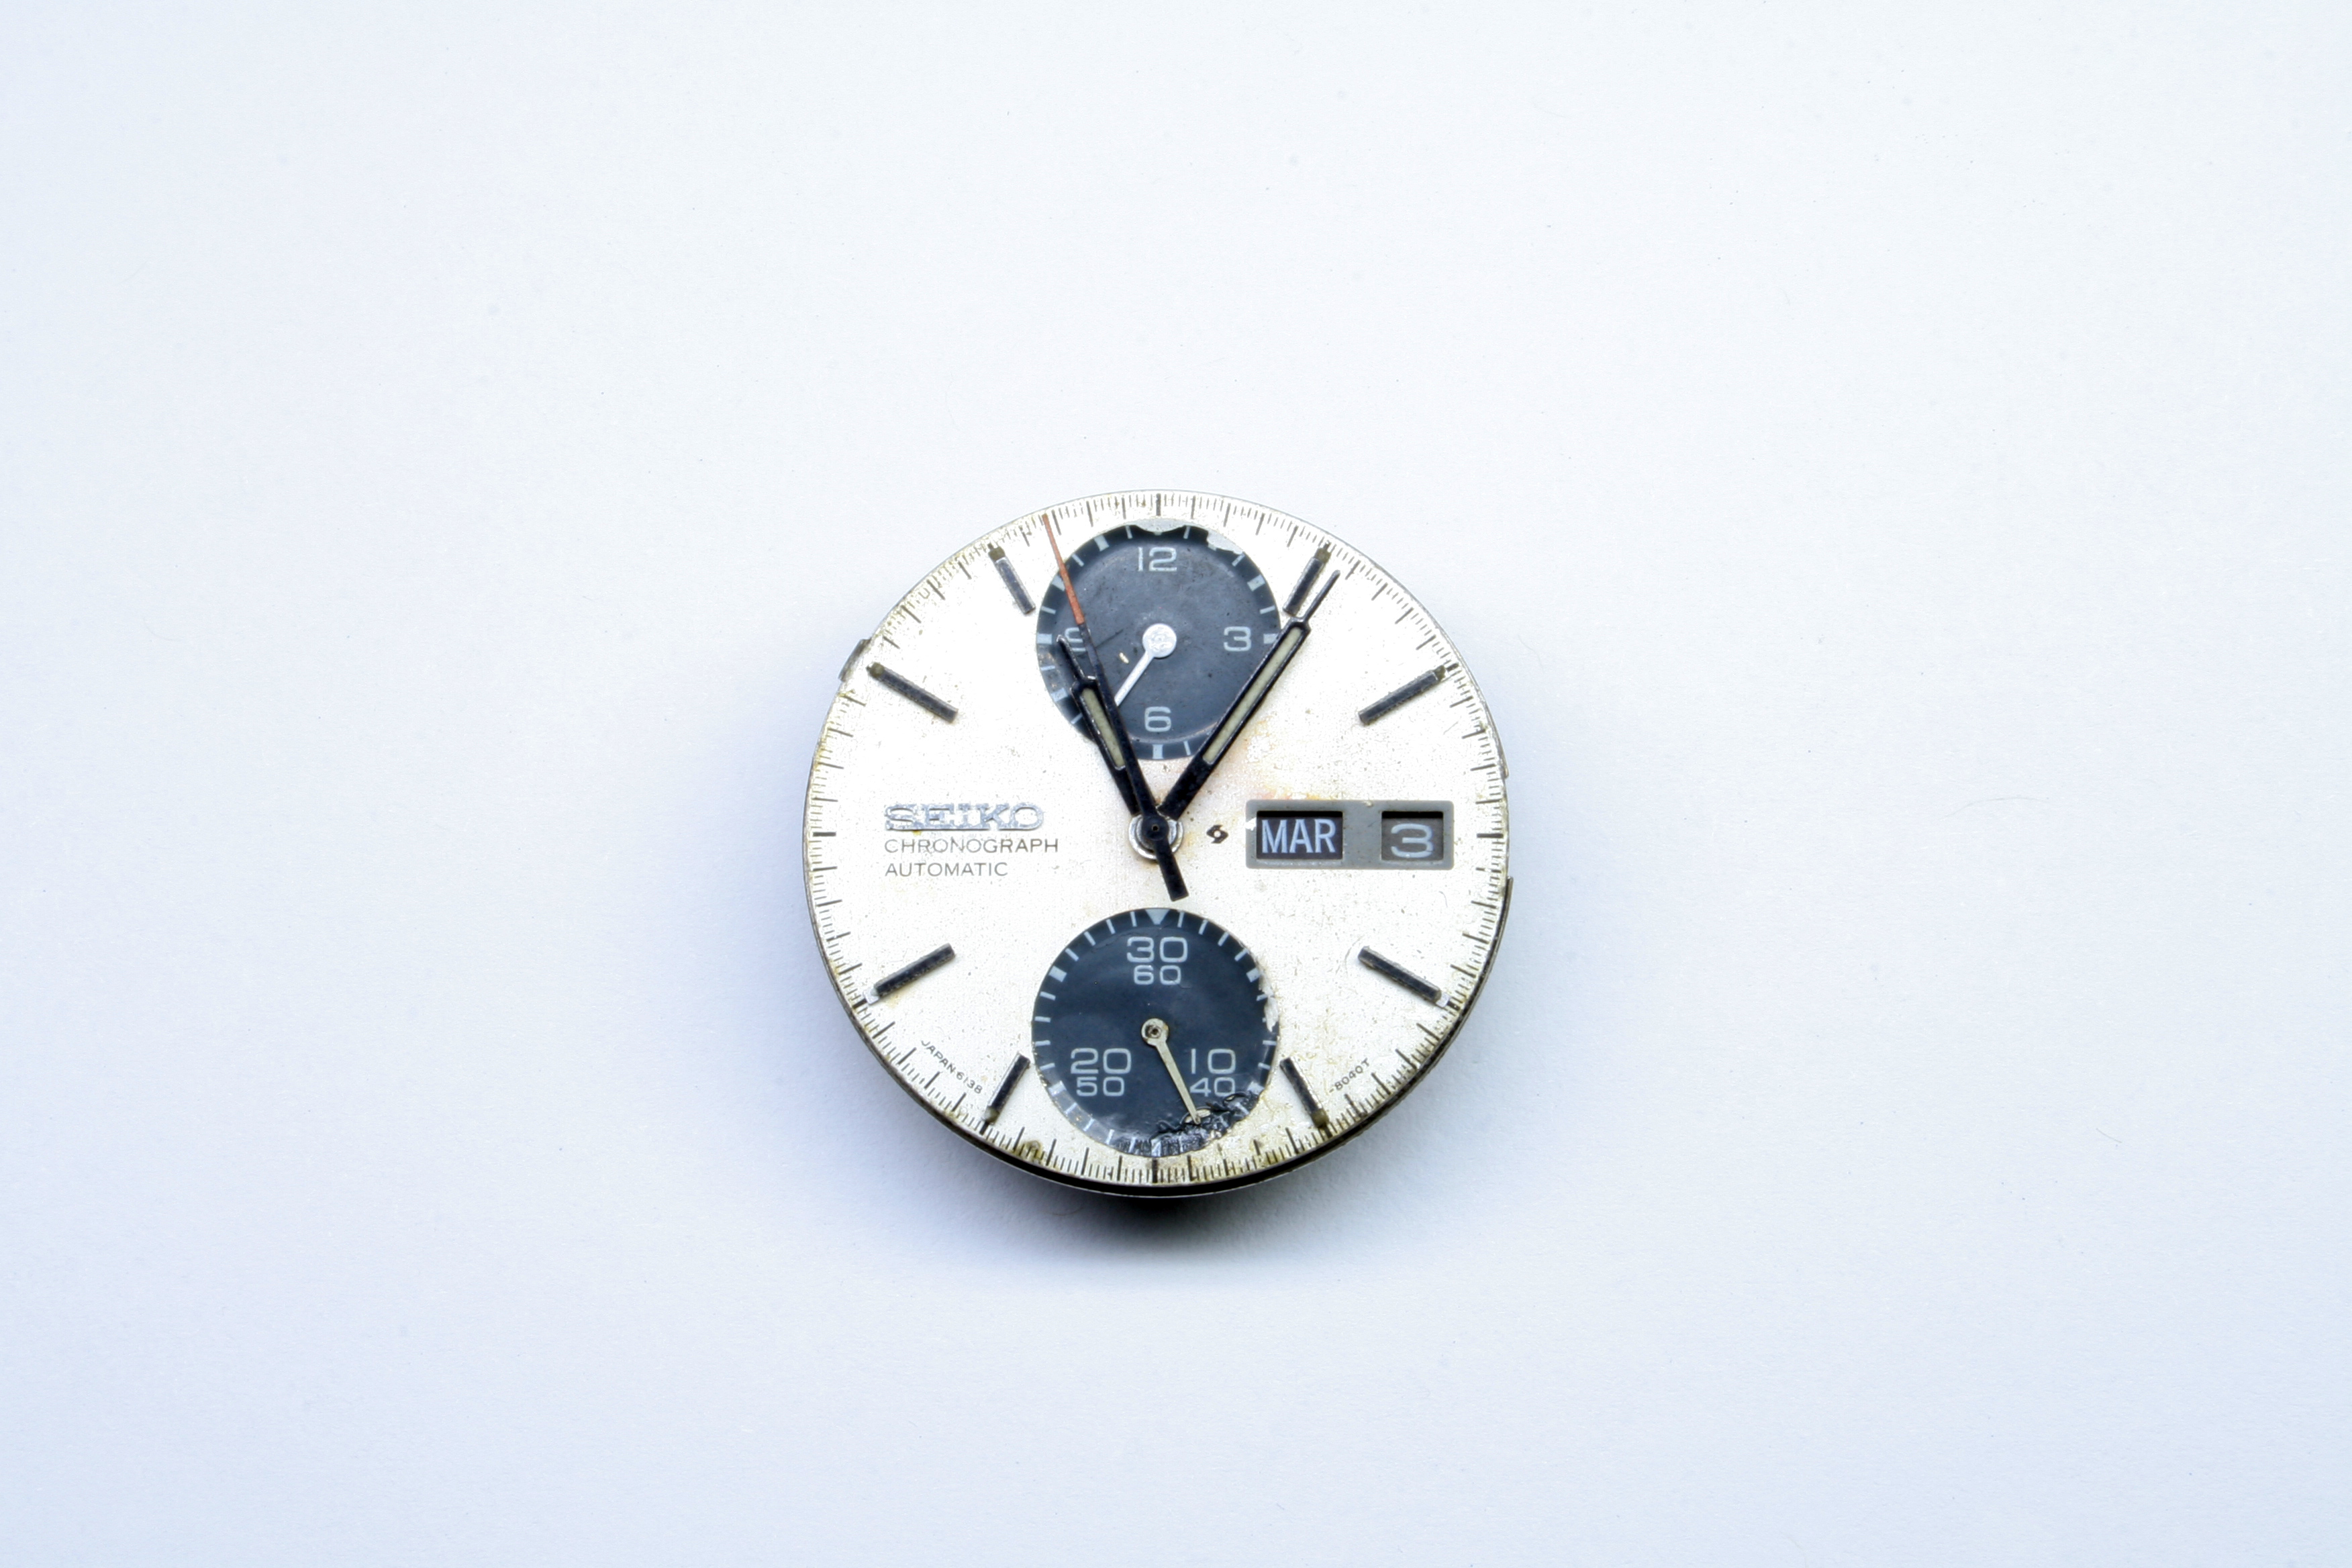
Beginning in the early 1970’s the watchmakers at Seiko developed the next iteration of the 613x chronograph family- the 6138 movement. This movement rectified the missing elapsed hours sub-dial problem by adding it at the 12 o’clock position and thus balancing out the dial. Seiko produced several chronographs with this movement, varying the case and dial combinations. The model sporting a white dial and dark grey sub-registers, colloquially known as the “Panda” among today’s collectors; it the one that I recently serviced.
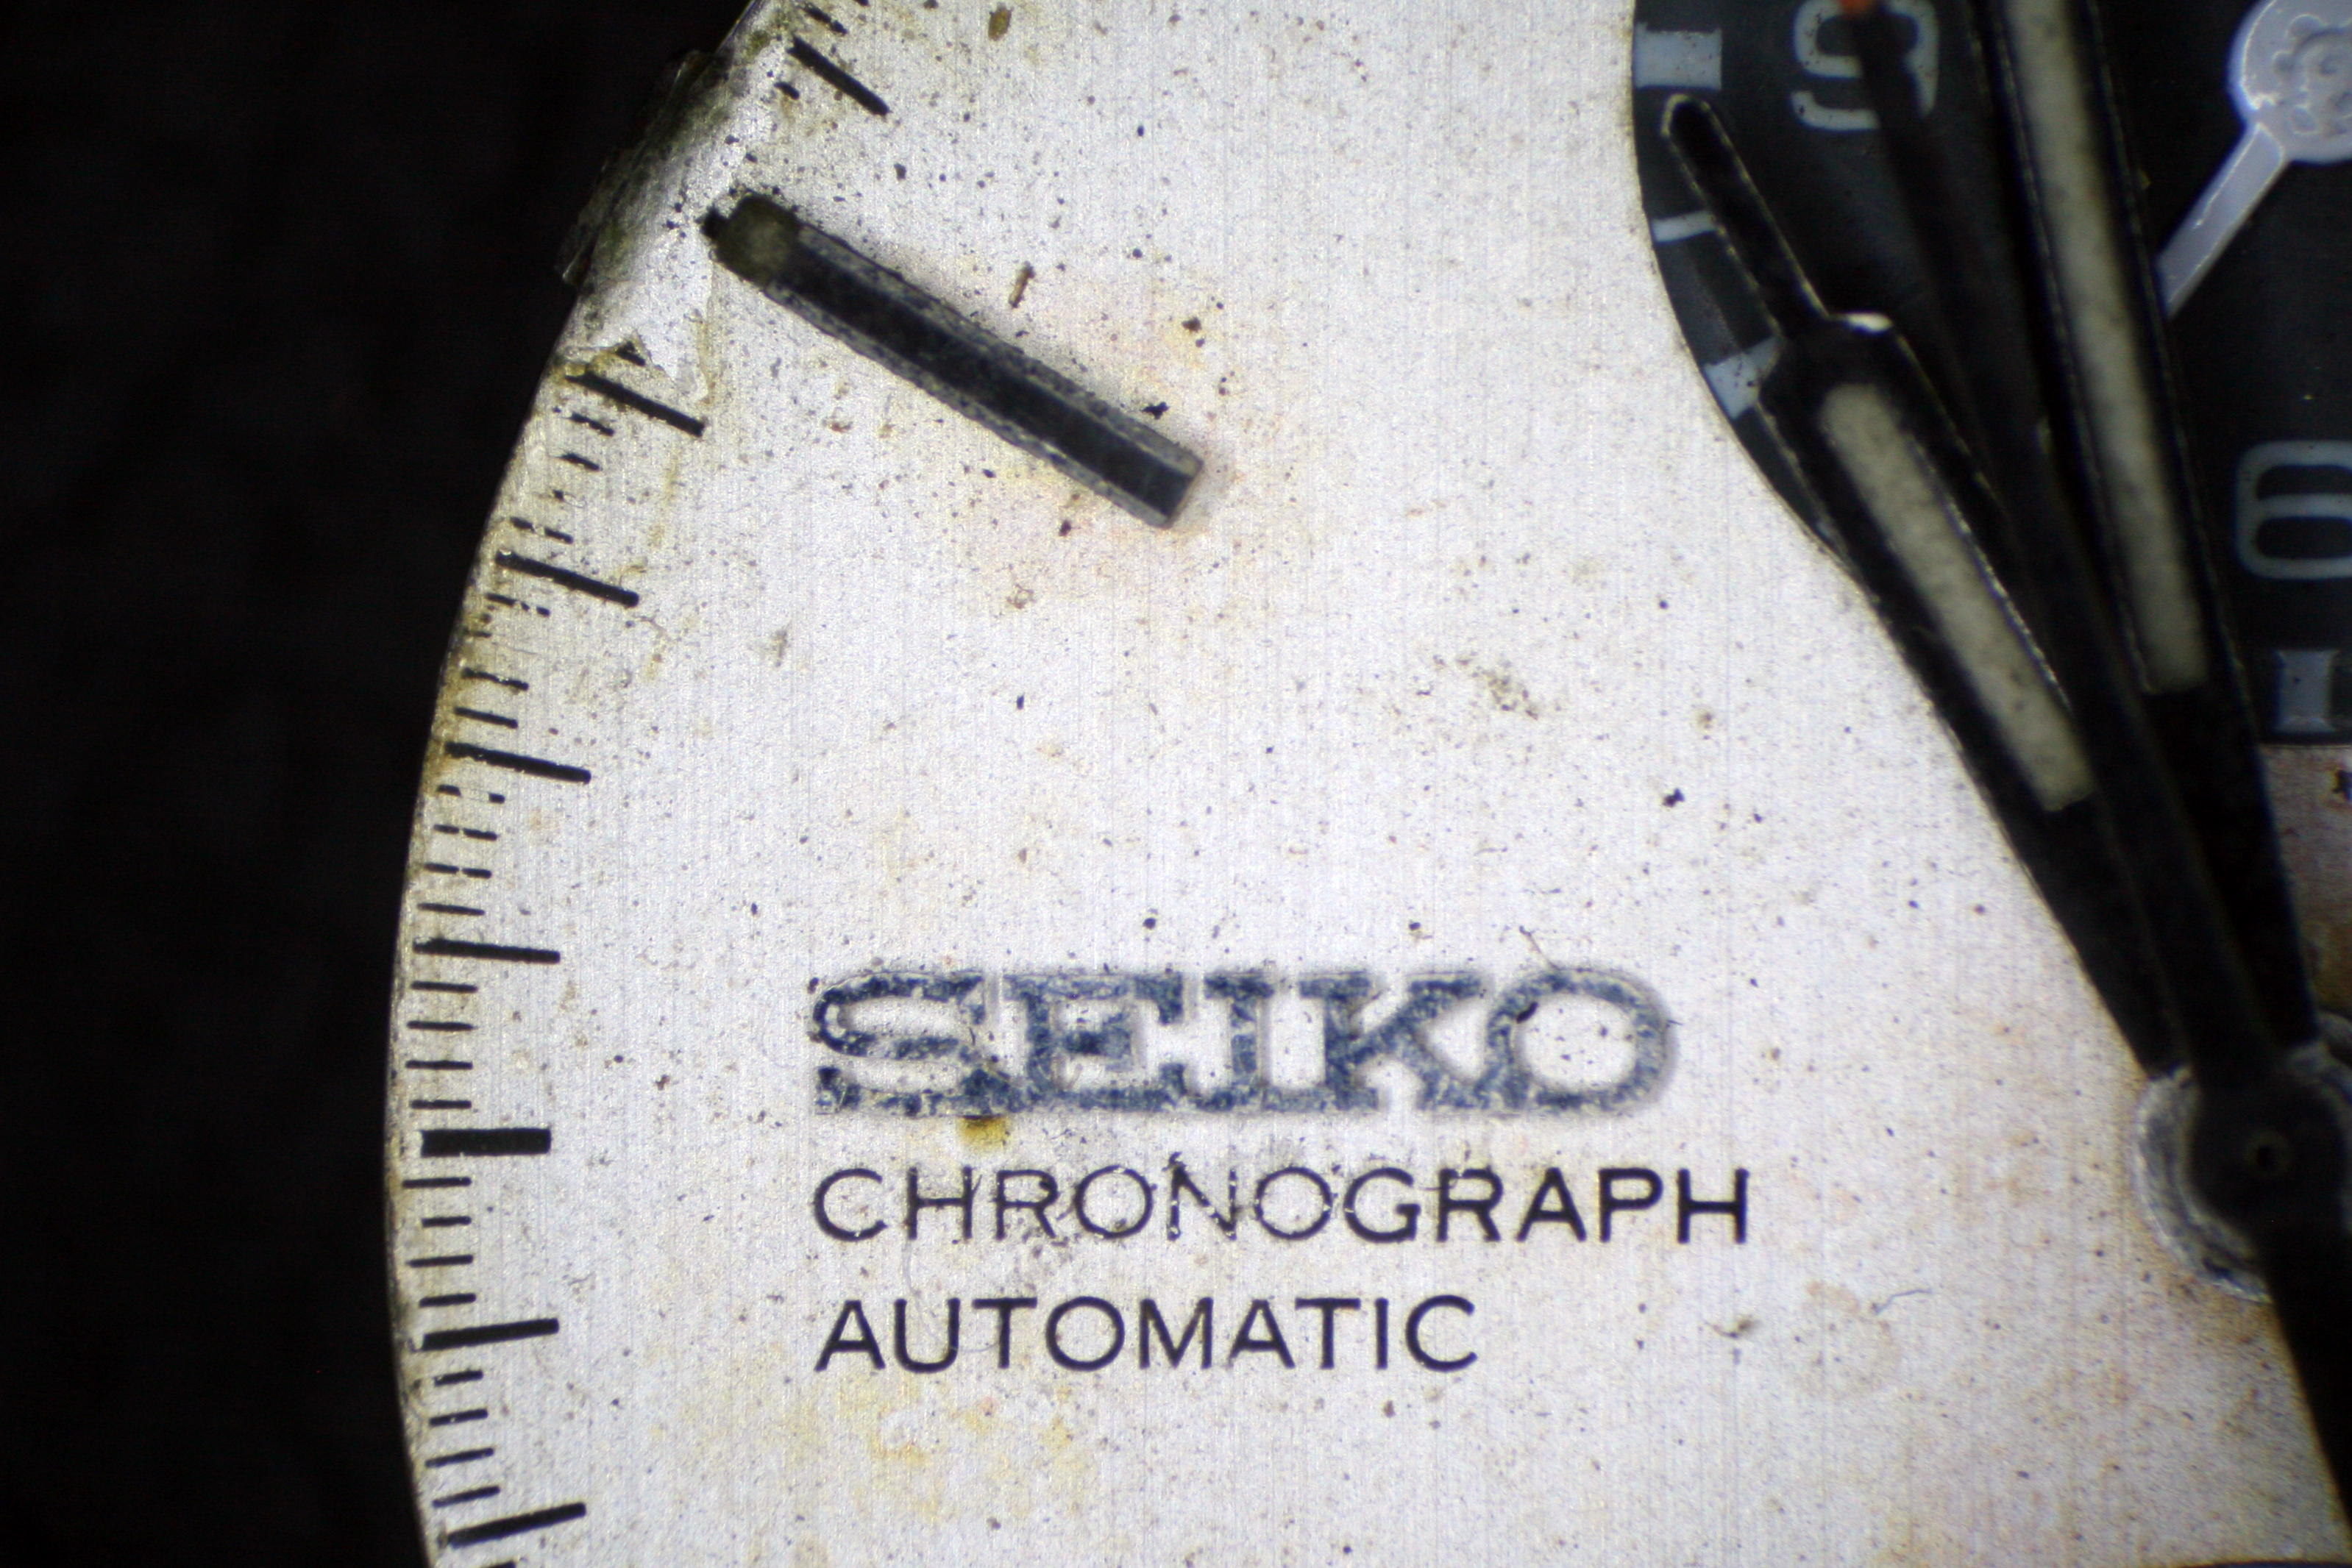
 I’m always on the lookout for vintage chronographs and have been on the hunt for a good Seiko for some time now. The timepieces which tickle my fancy can be described as classic, timeless, or even subdued; I usually shy away from watches produced in the 1970’s which are bold and colorful. Seiko produced many watches with vibrant dials and bulky cases during this period but they also produced the rather simple 6138-8021 Panda pictured here.
The watch came to me from South America with obvious problems but still ticking. I could see the dial was in poor condition and the small hand for the hour sub-register was either repainted or an aftermarket replacement. Also of note was the tachymeter ring which framed the dial and was rotated about forty-five degrees out of position. Despite these issues most of the visible bits appeared to be original.
Once in hand, I deduced quickly that the issue with the tachymeter ring was the result of an improper crystal installation. The correct crystal, manufactured by Seiko (model 350T02ANS), is quite tall in order to accommodate the tachymeter ring beneath it. Sadly it’s no longer being manufactured and new-old stock replacements have become scarce and can be quite pricey when found.
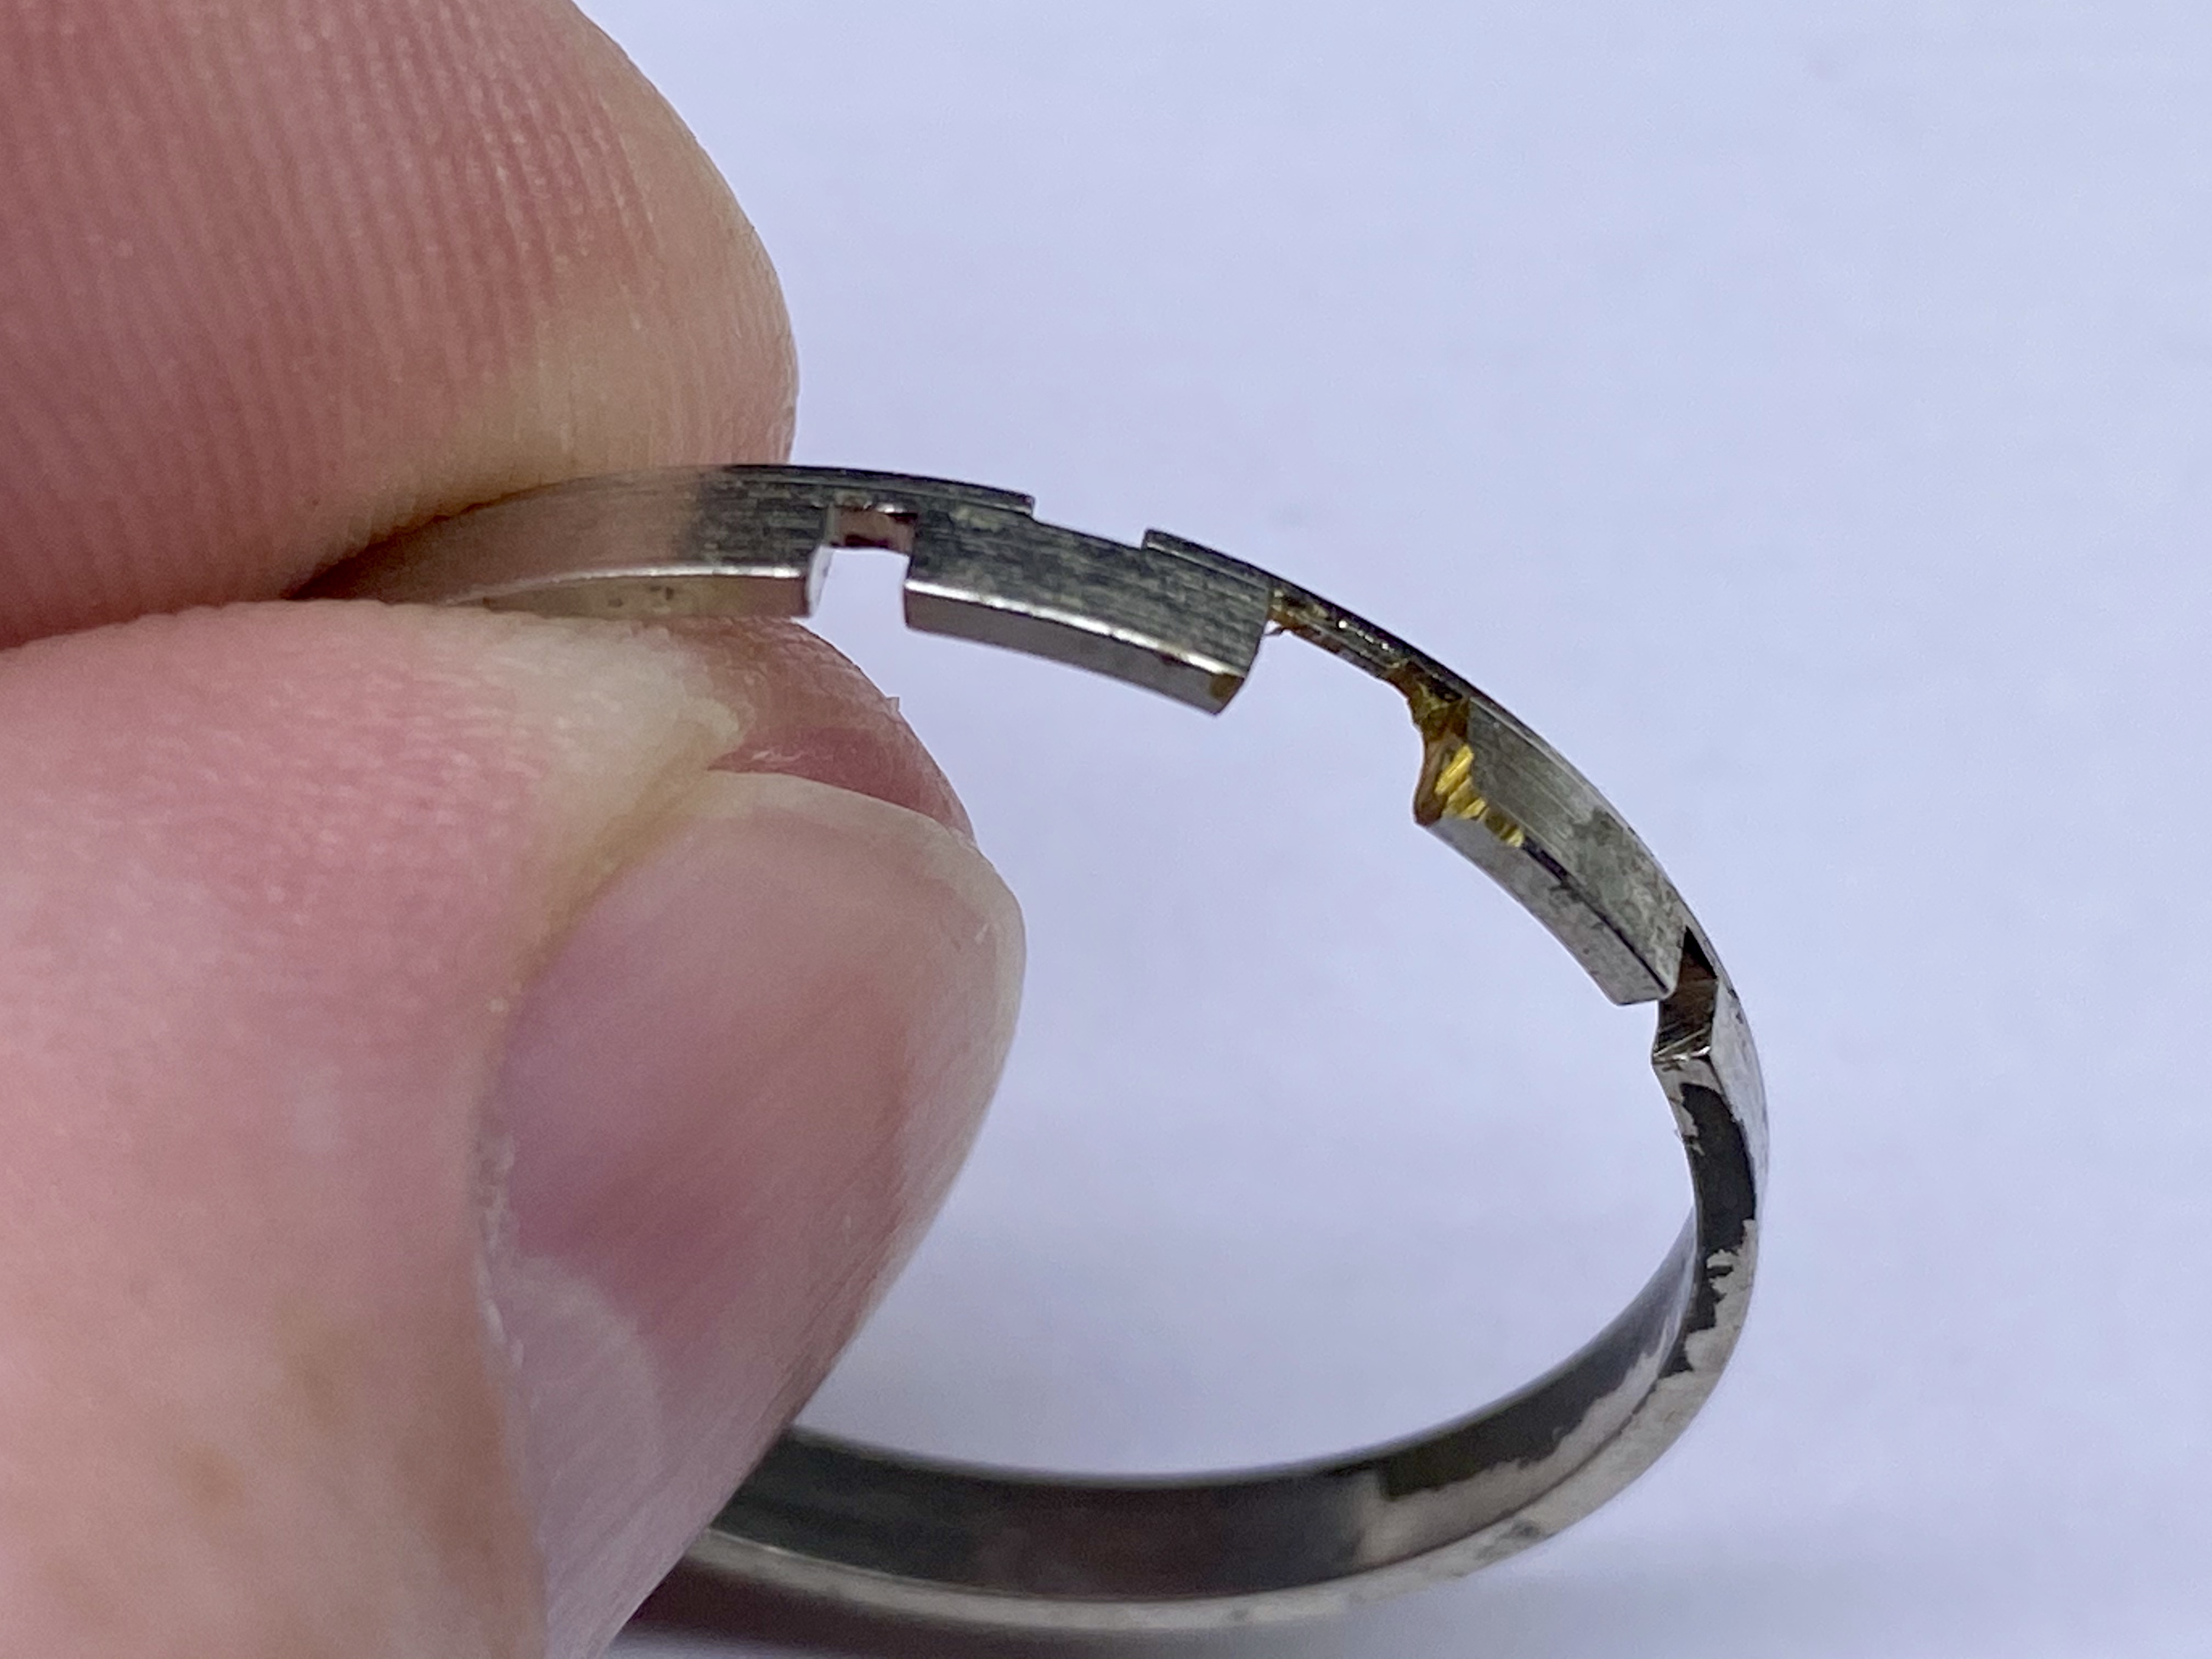
The tachymeter ring is normally is held in place by a tab on the edge of the dial extending outward from the ten o’clock position. By forcing the ring beneath the wrong crystal the tab on the dial was bent significantly out of shape.
A byproduct of utilizing an incorrect crystal was that the watch case was not effectively sealed and this allowed moisture in which significantly damaged the dial and caused the paint from both sub-registers to flake.

An attempt had been made at some point to reverse the degradation to the paint but that only resulted in further damage to the dial. It’s a real shame too because the value of a vintage watch lies almost entirely in the condition of the dial and case.

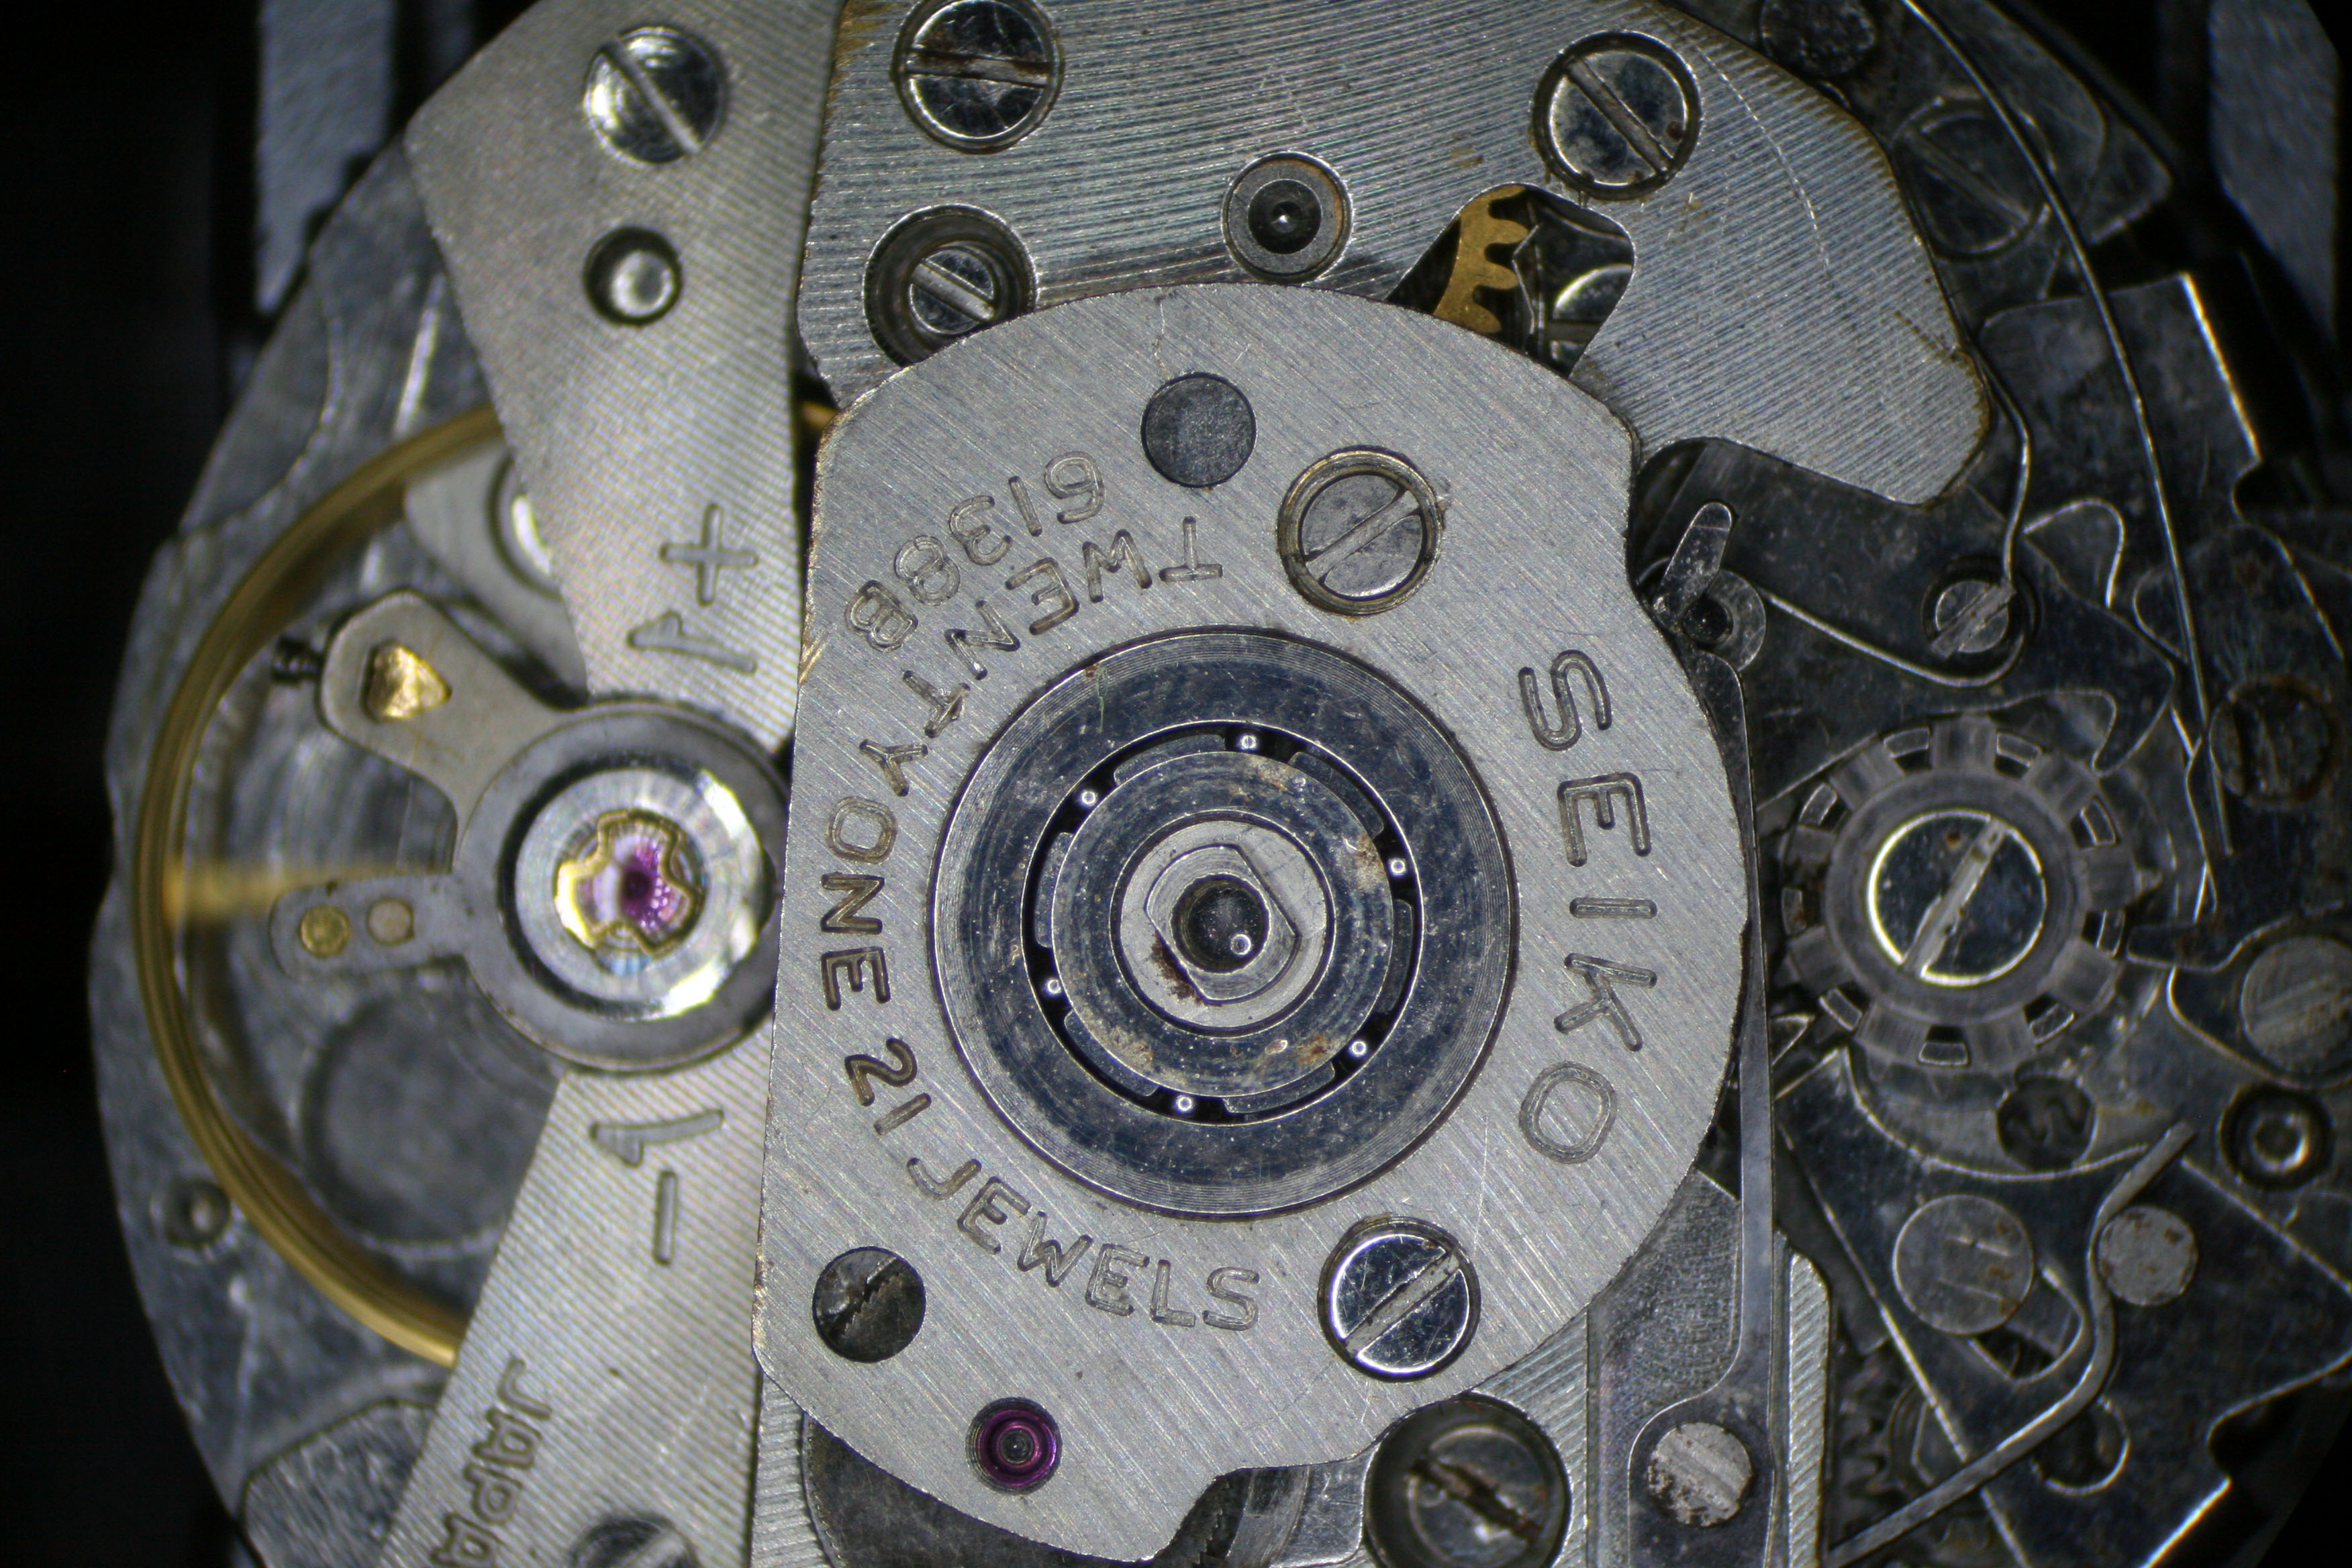
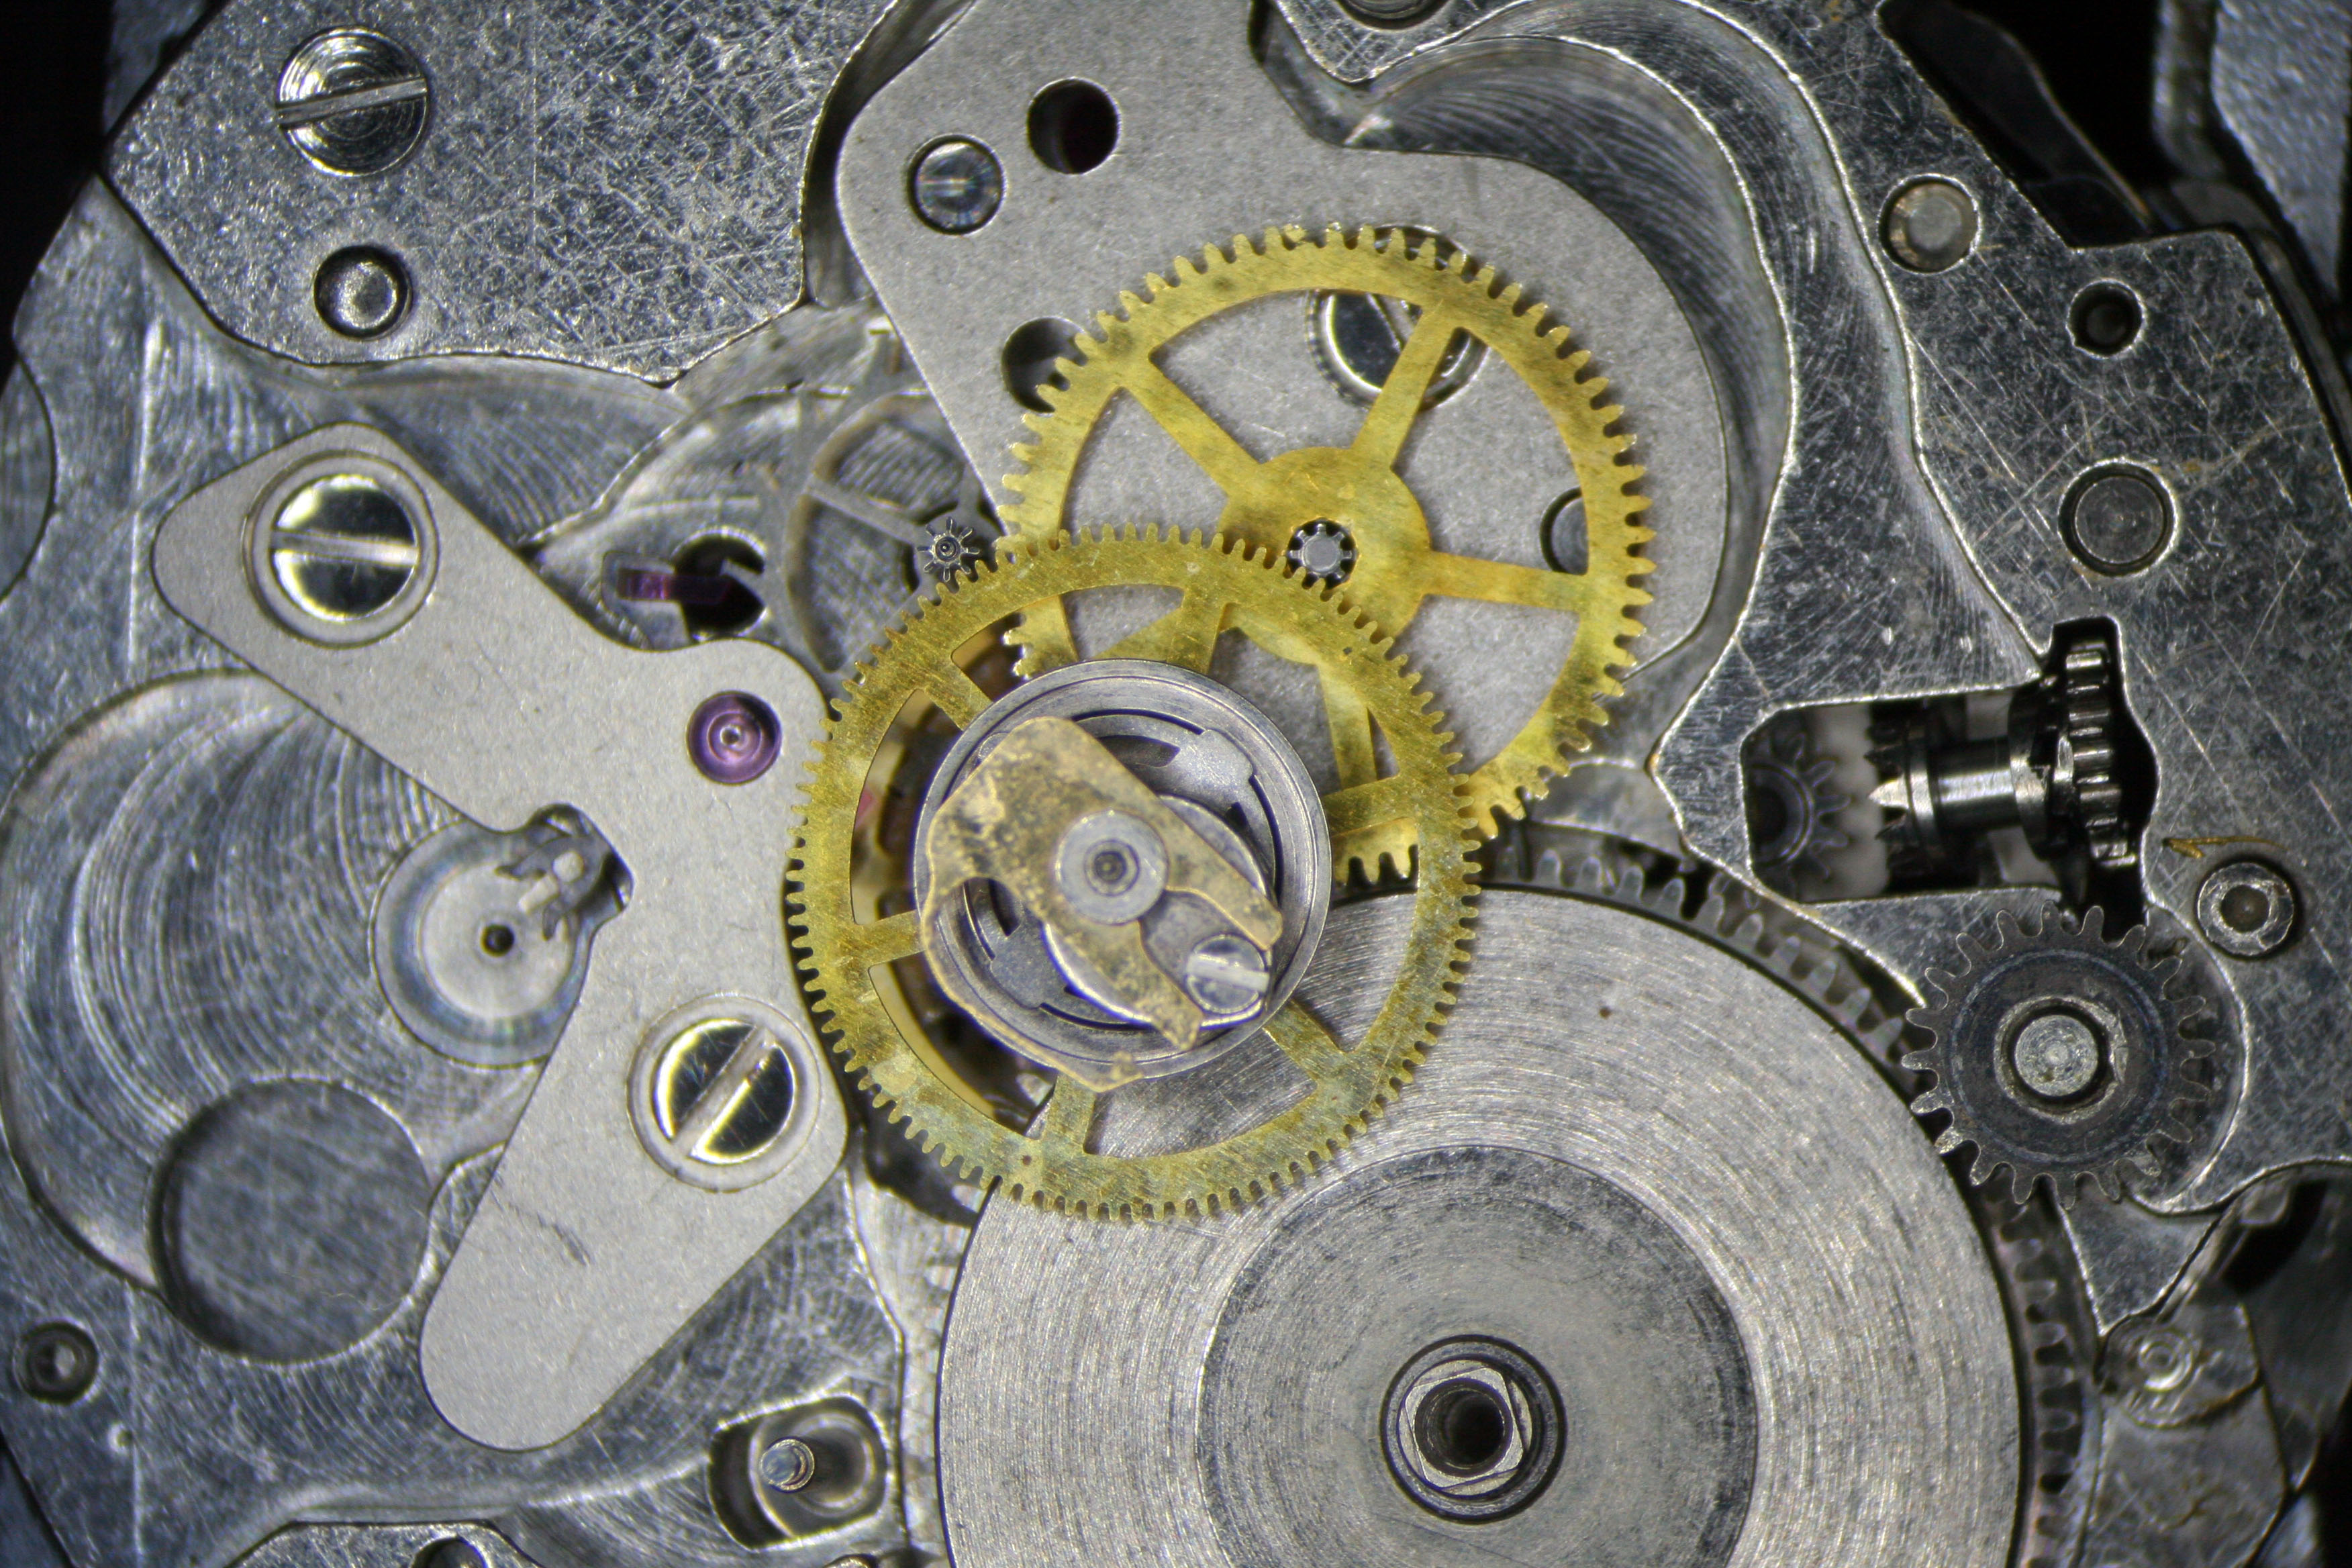
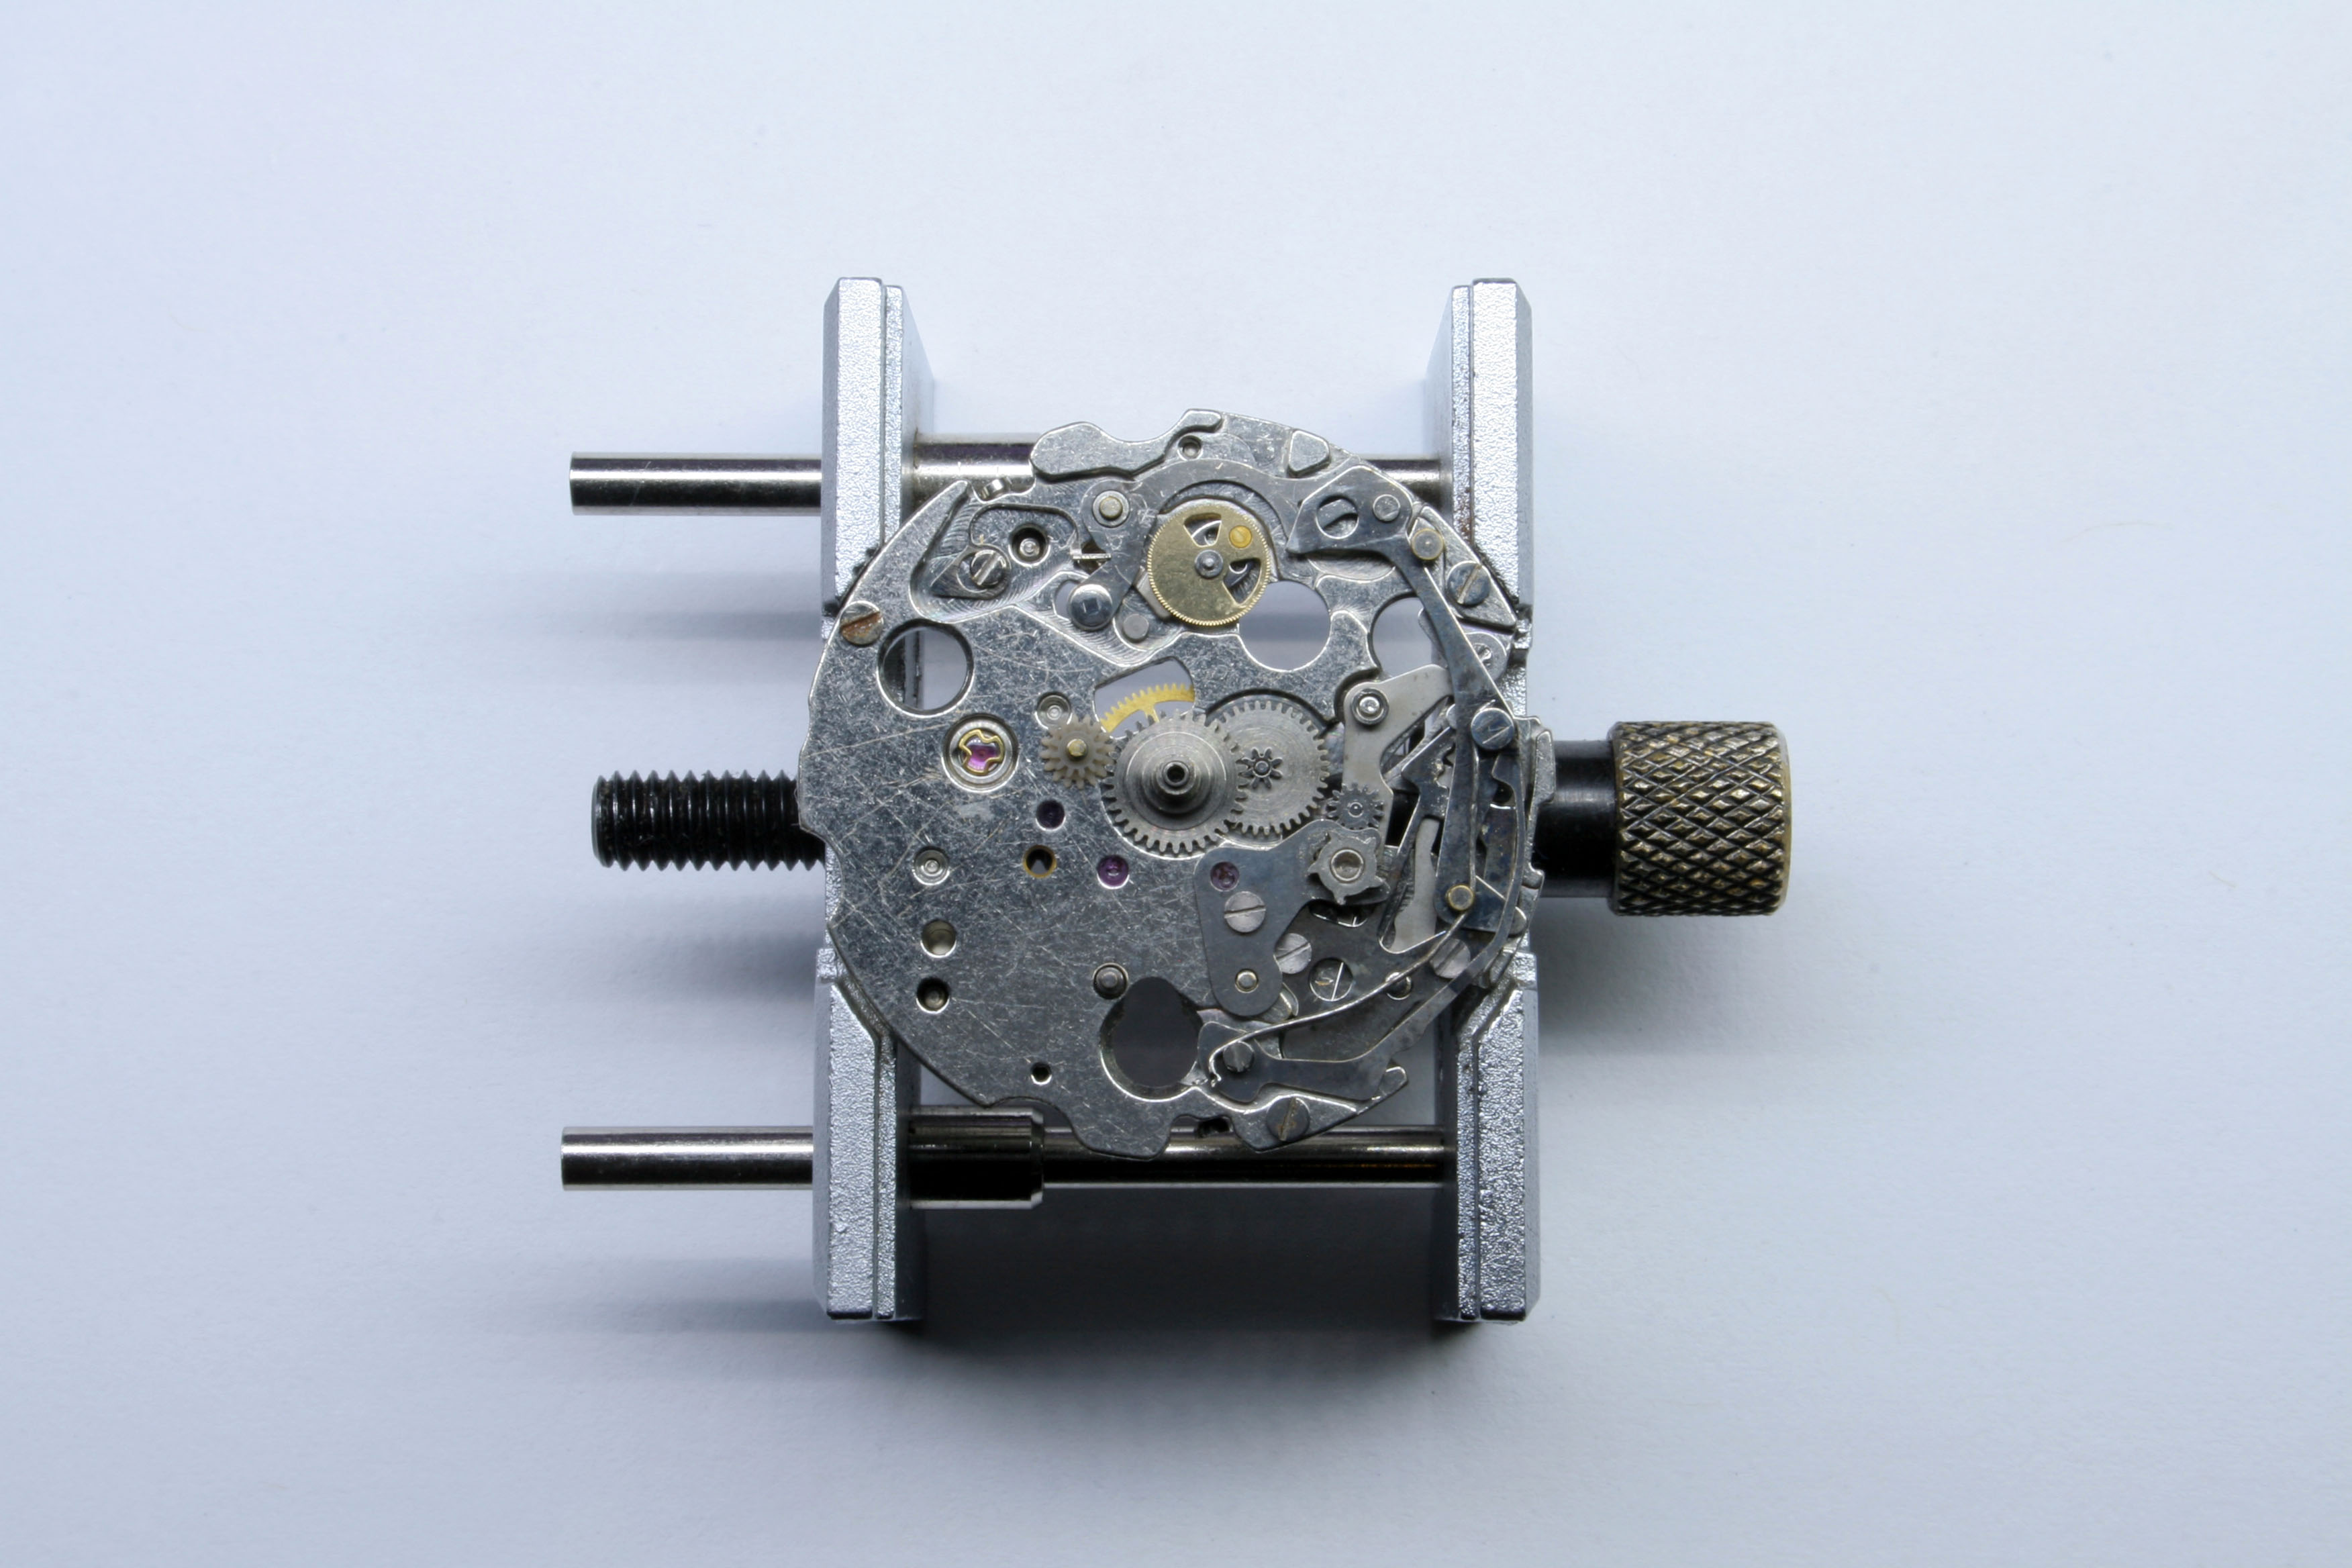
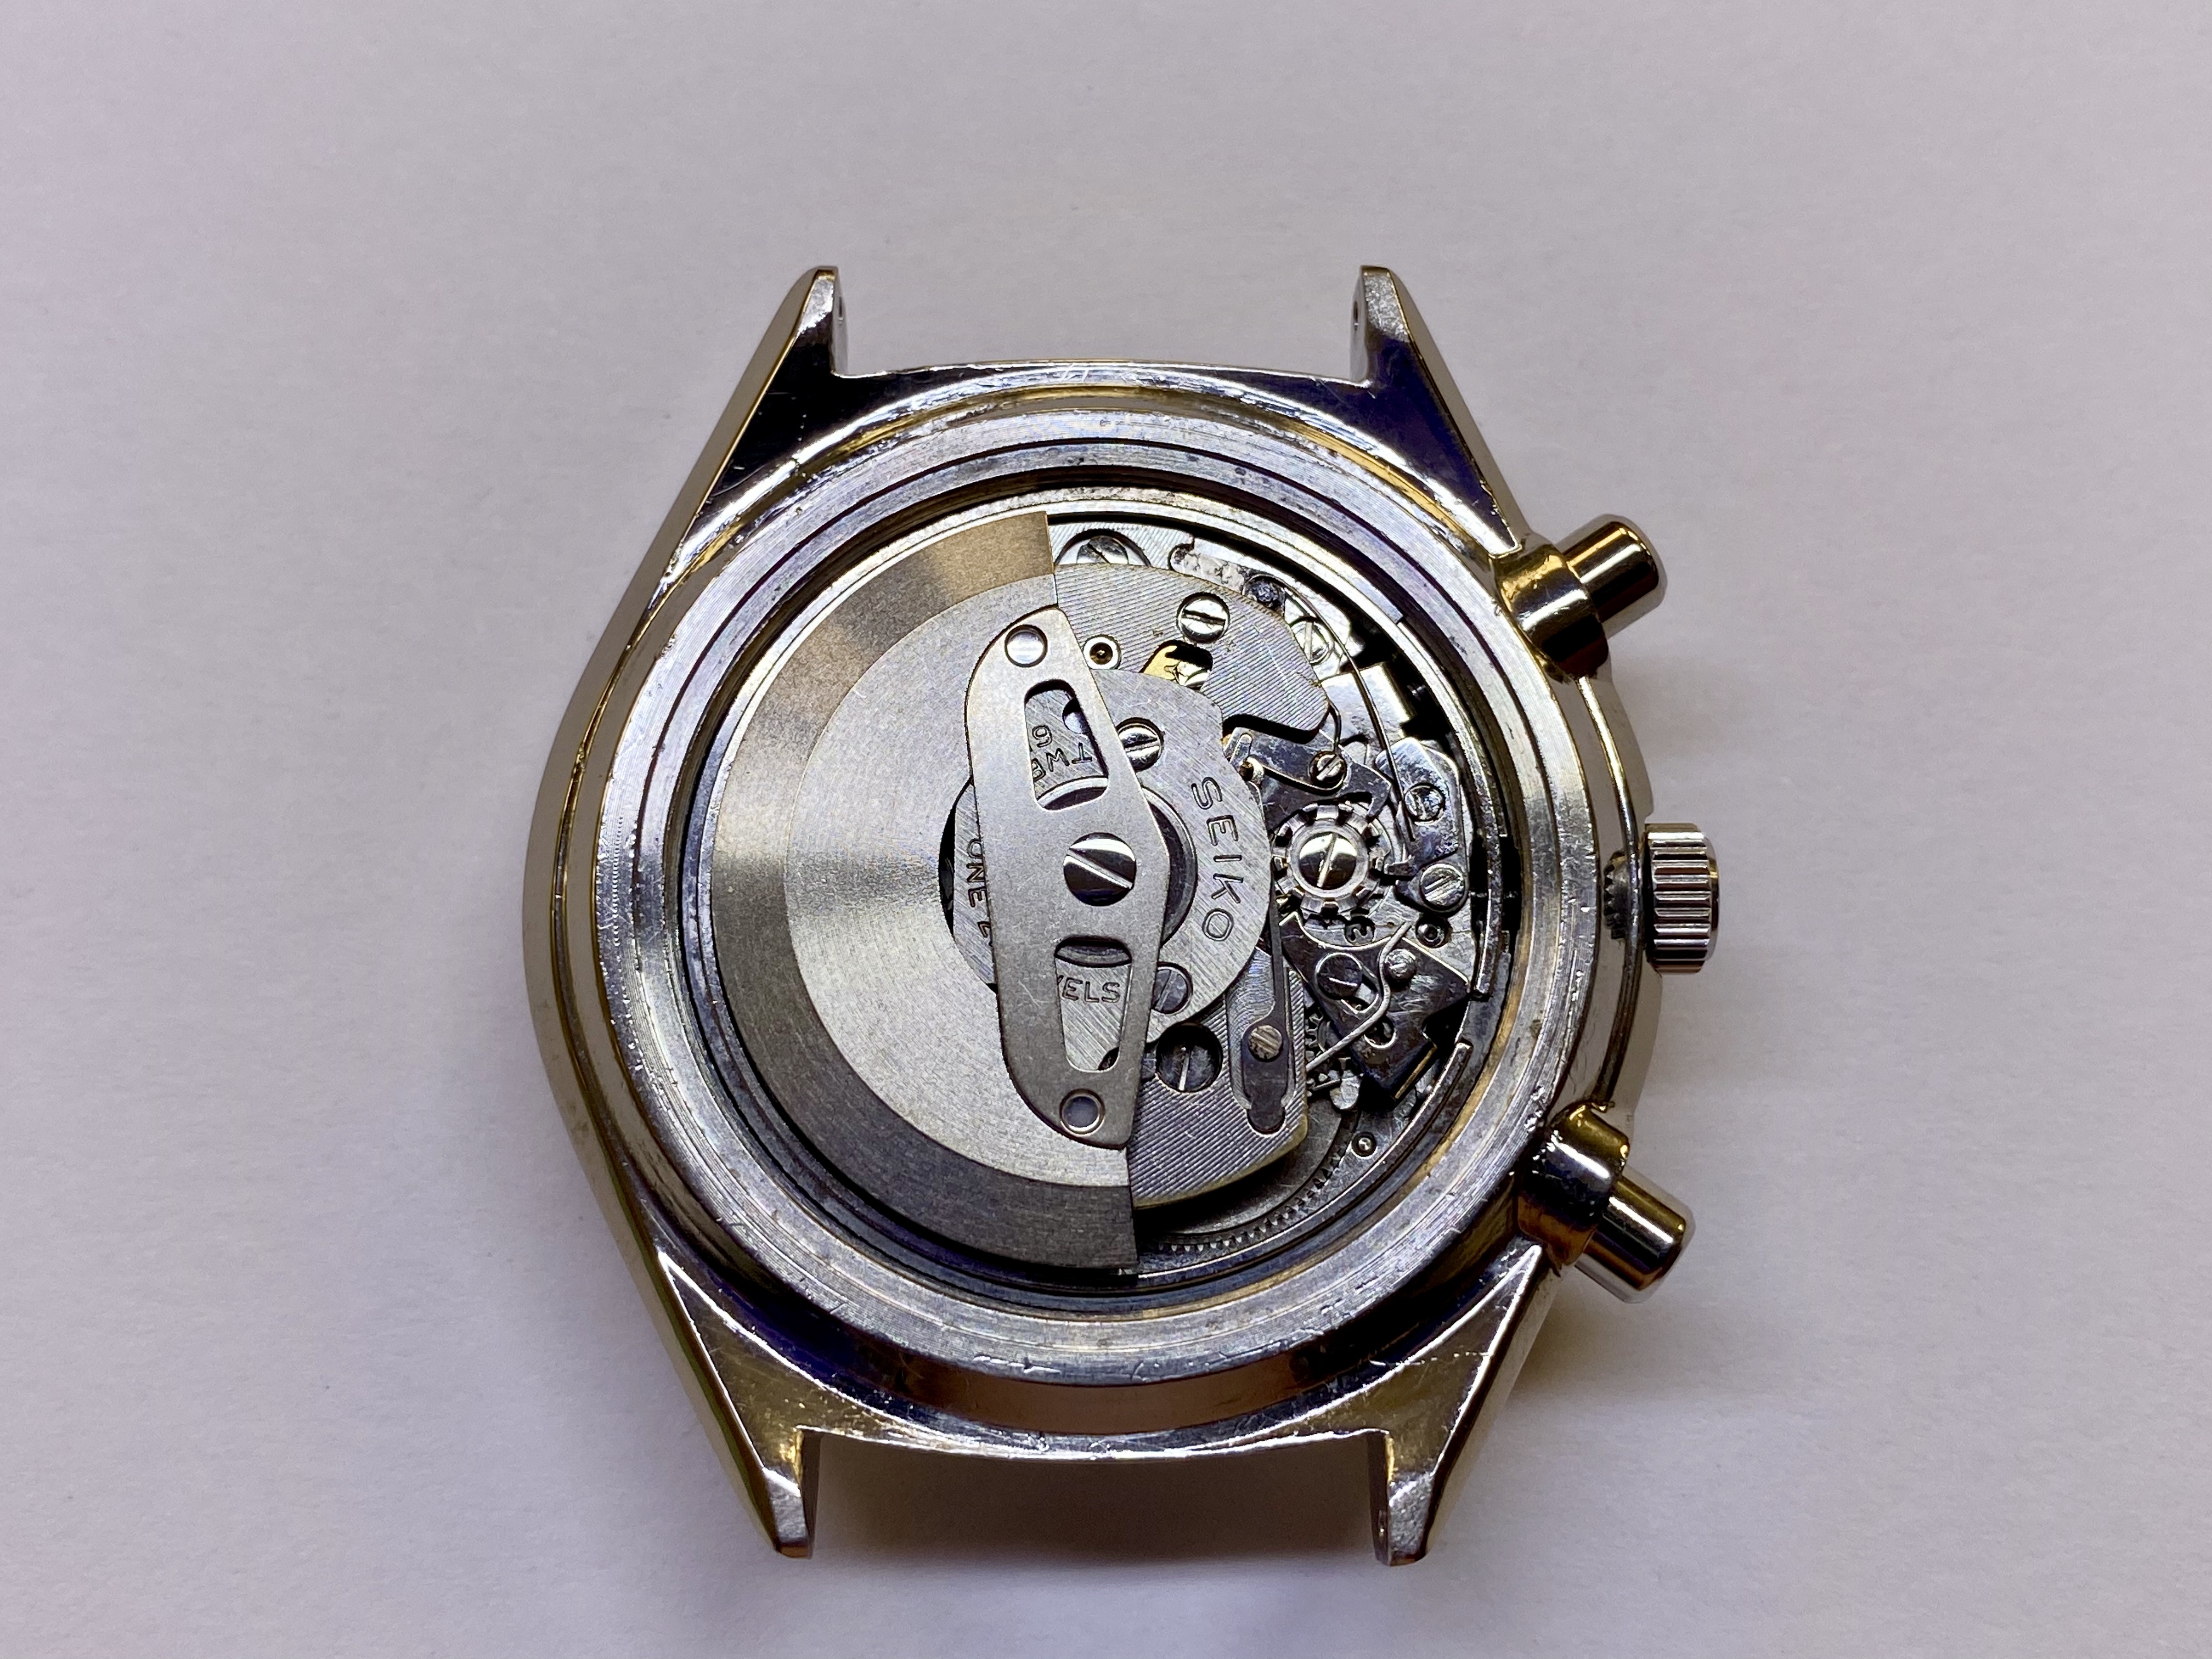
Removing the caseback gave me my first look at the movement, a Seiko 6138B which was running but quite grimy.
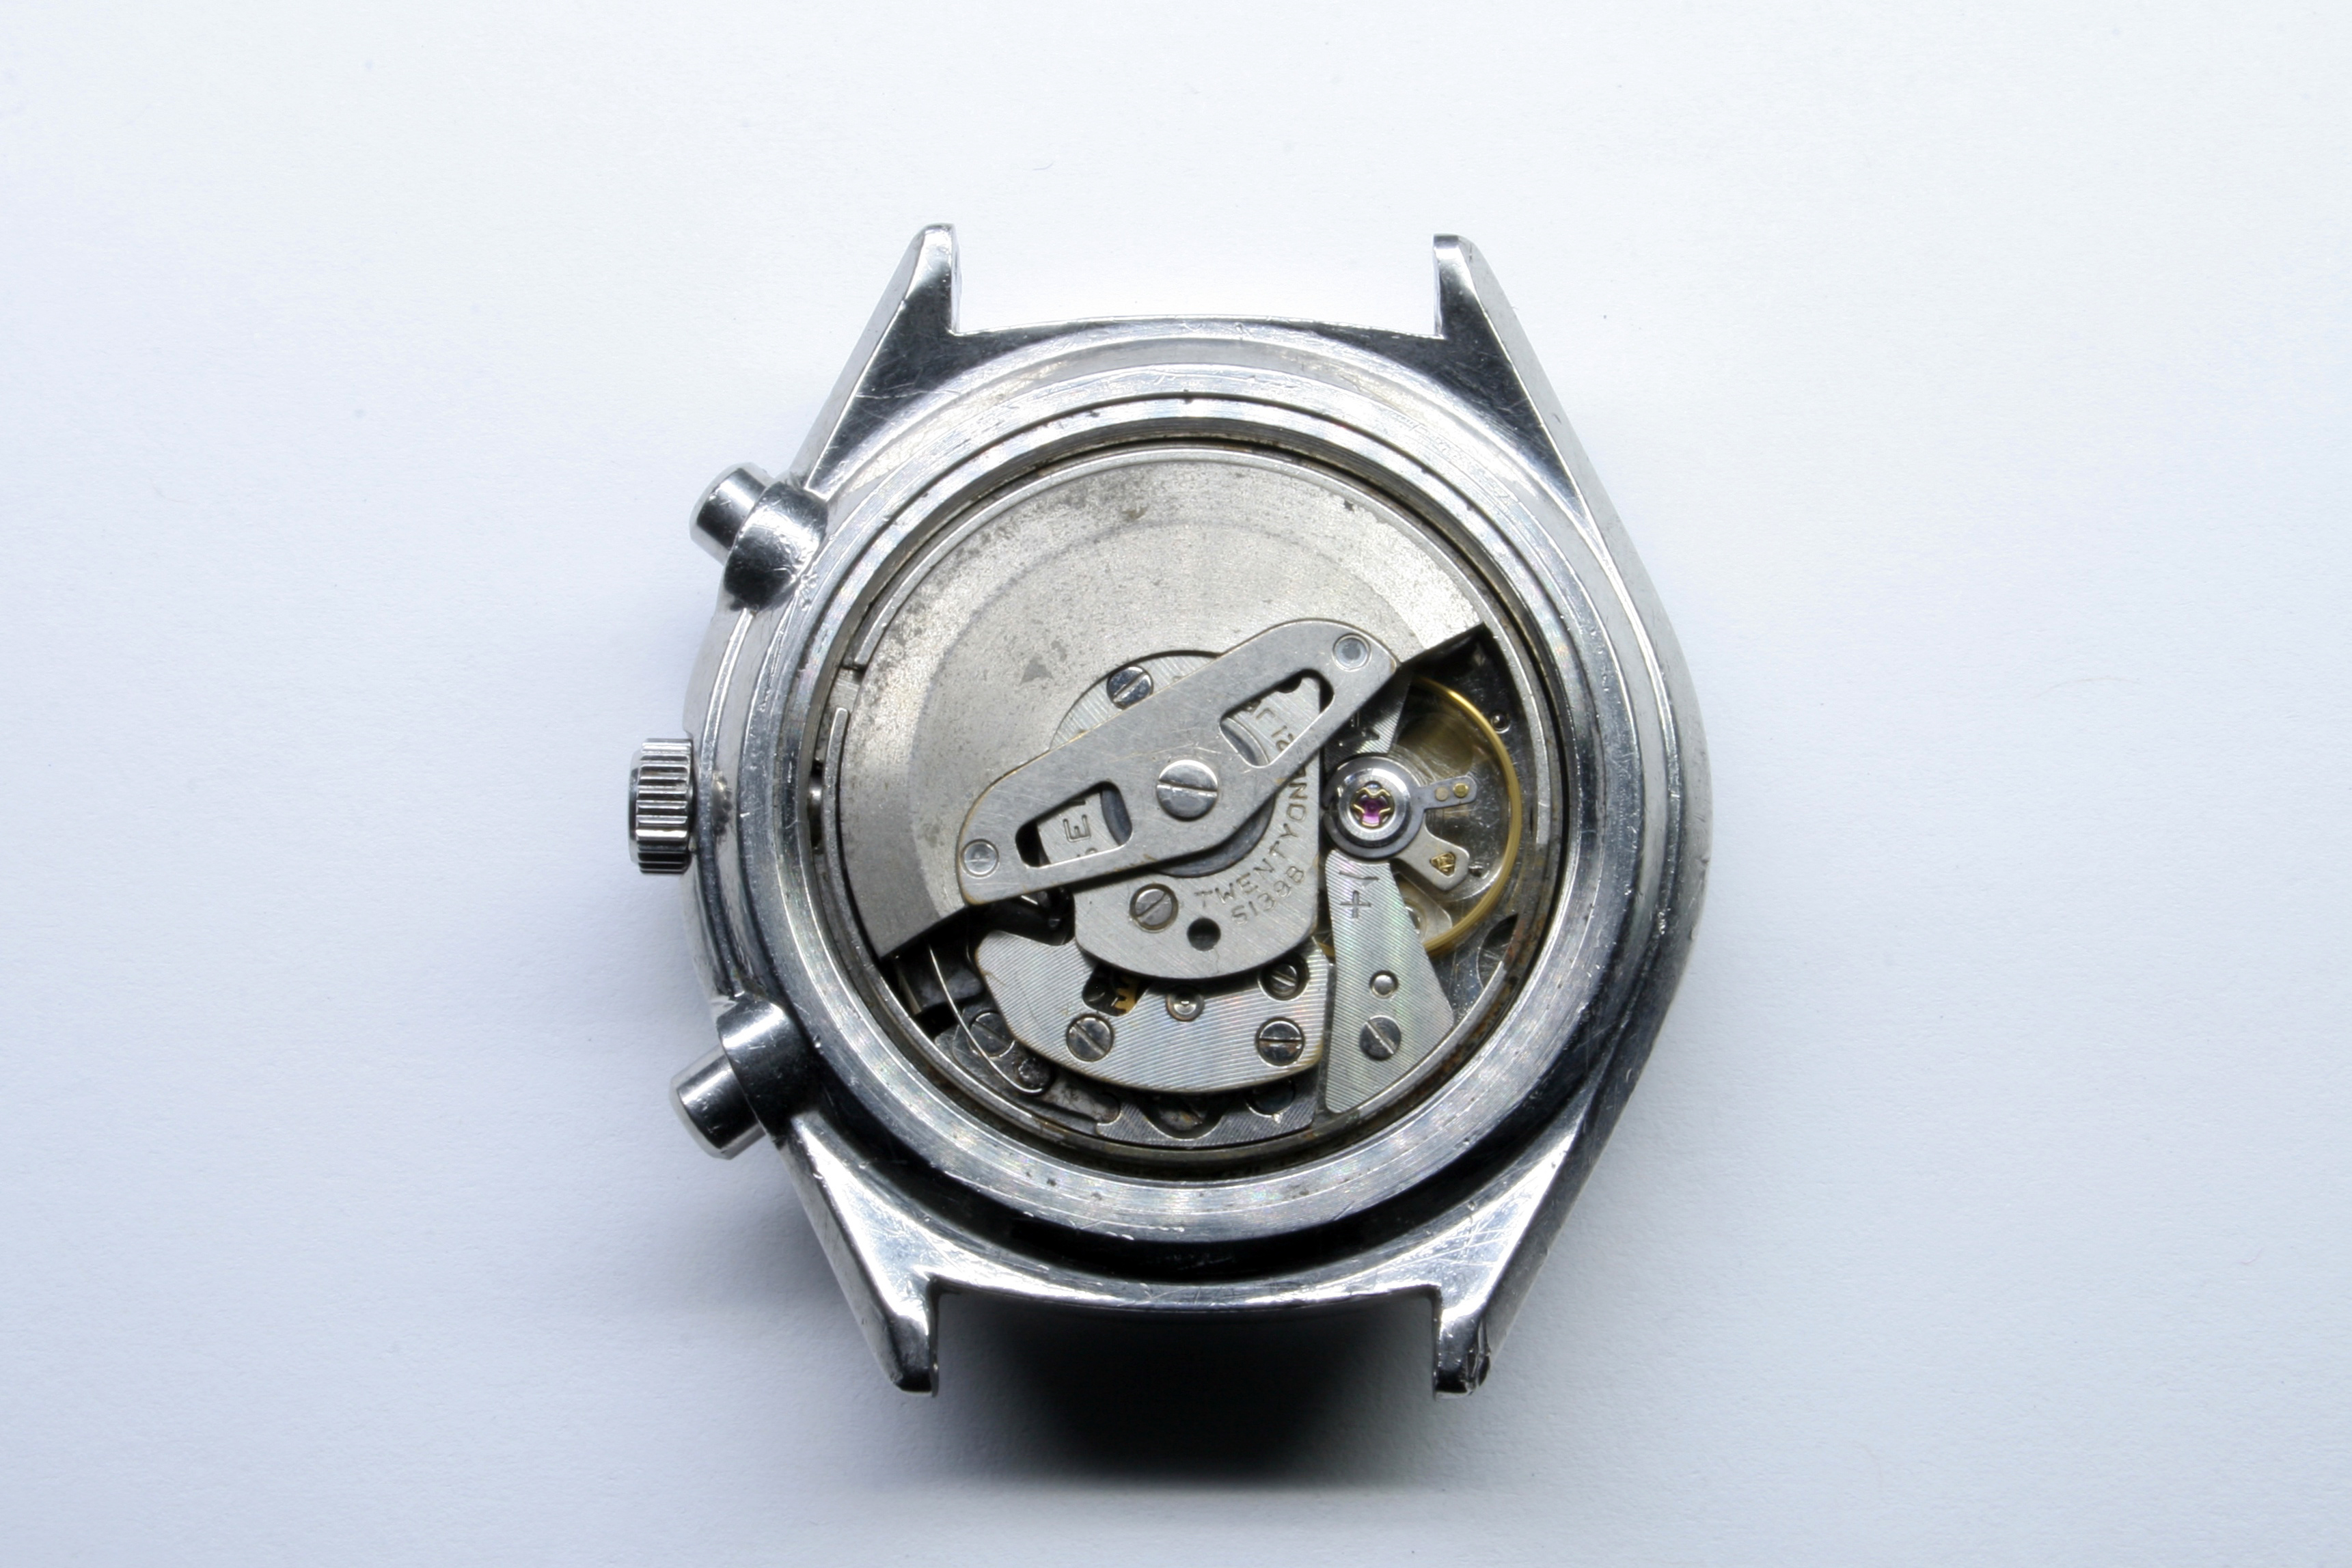
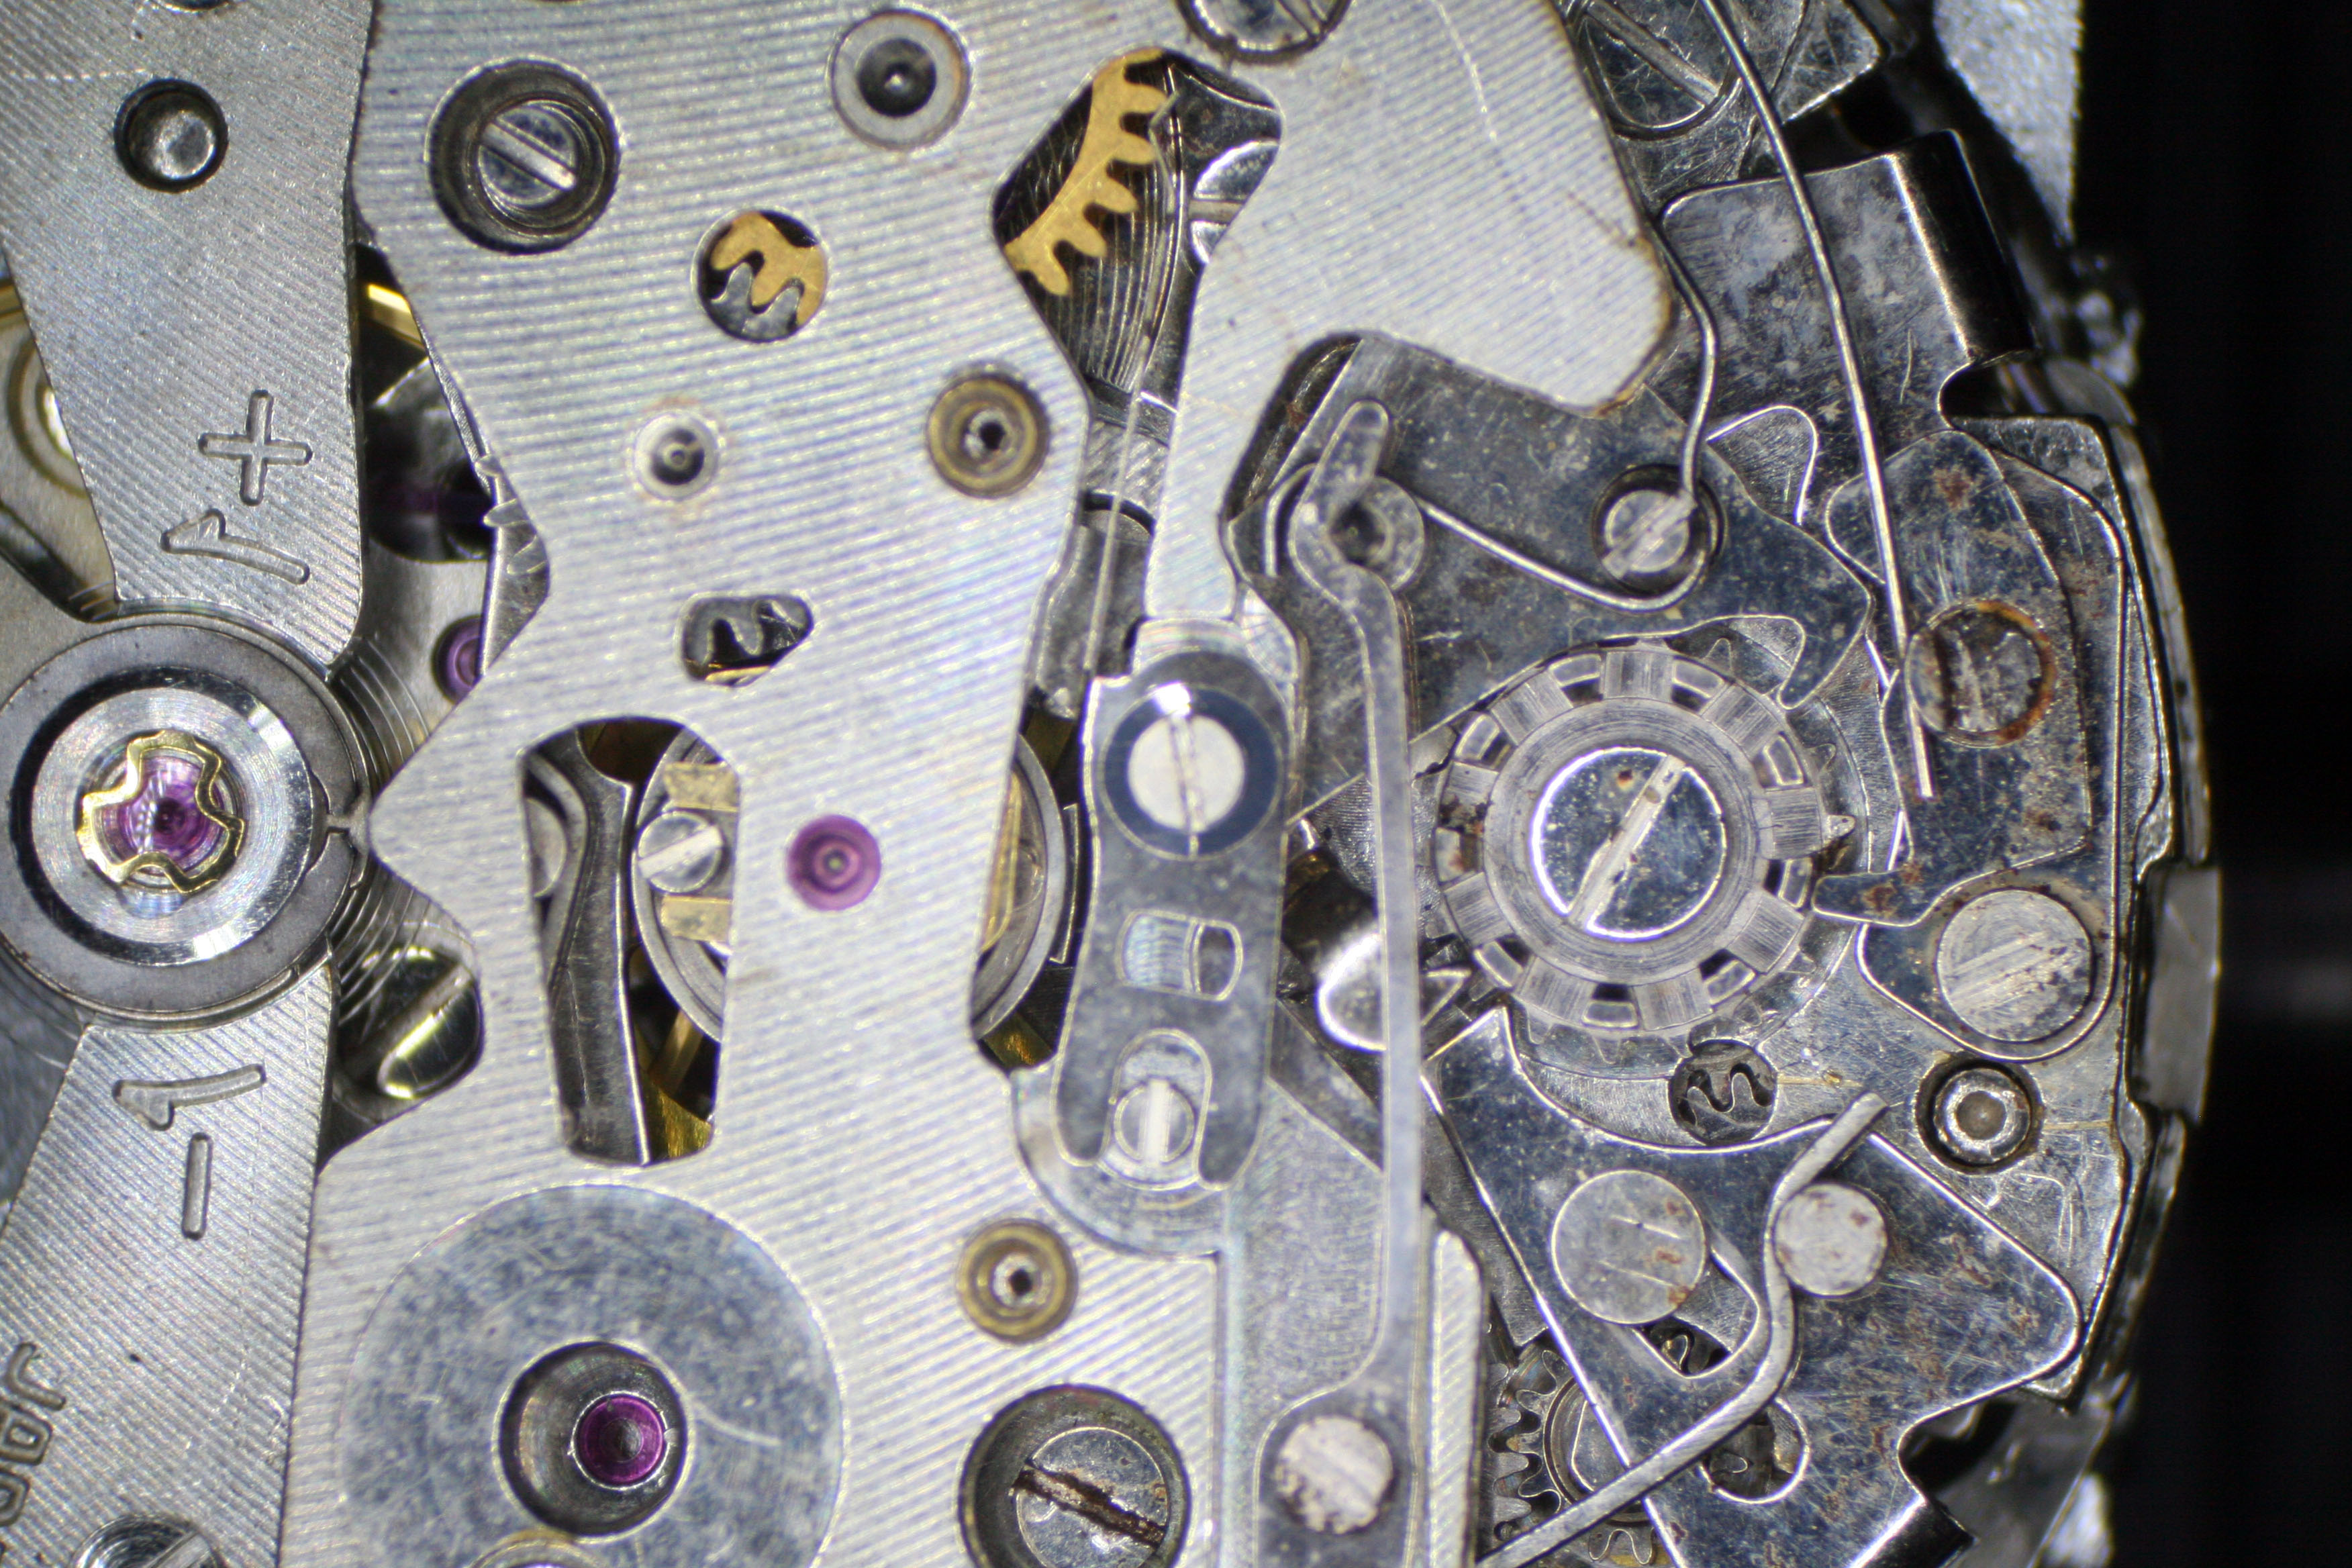
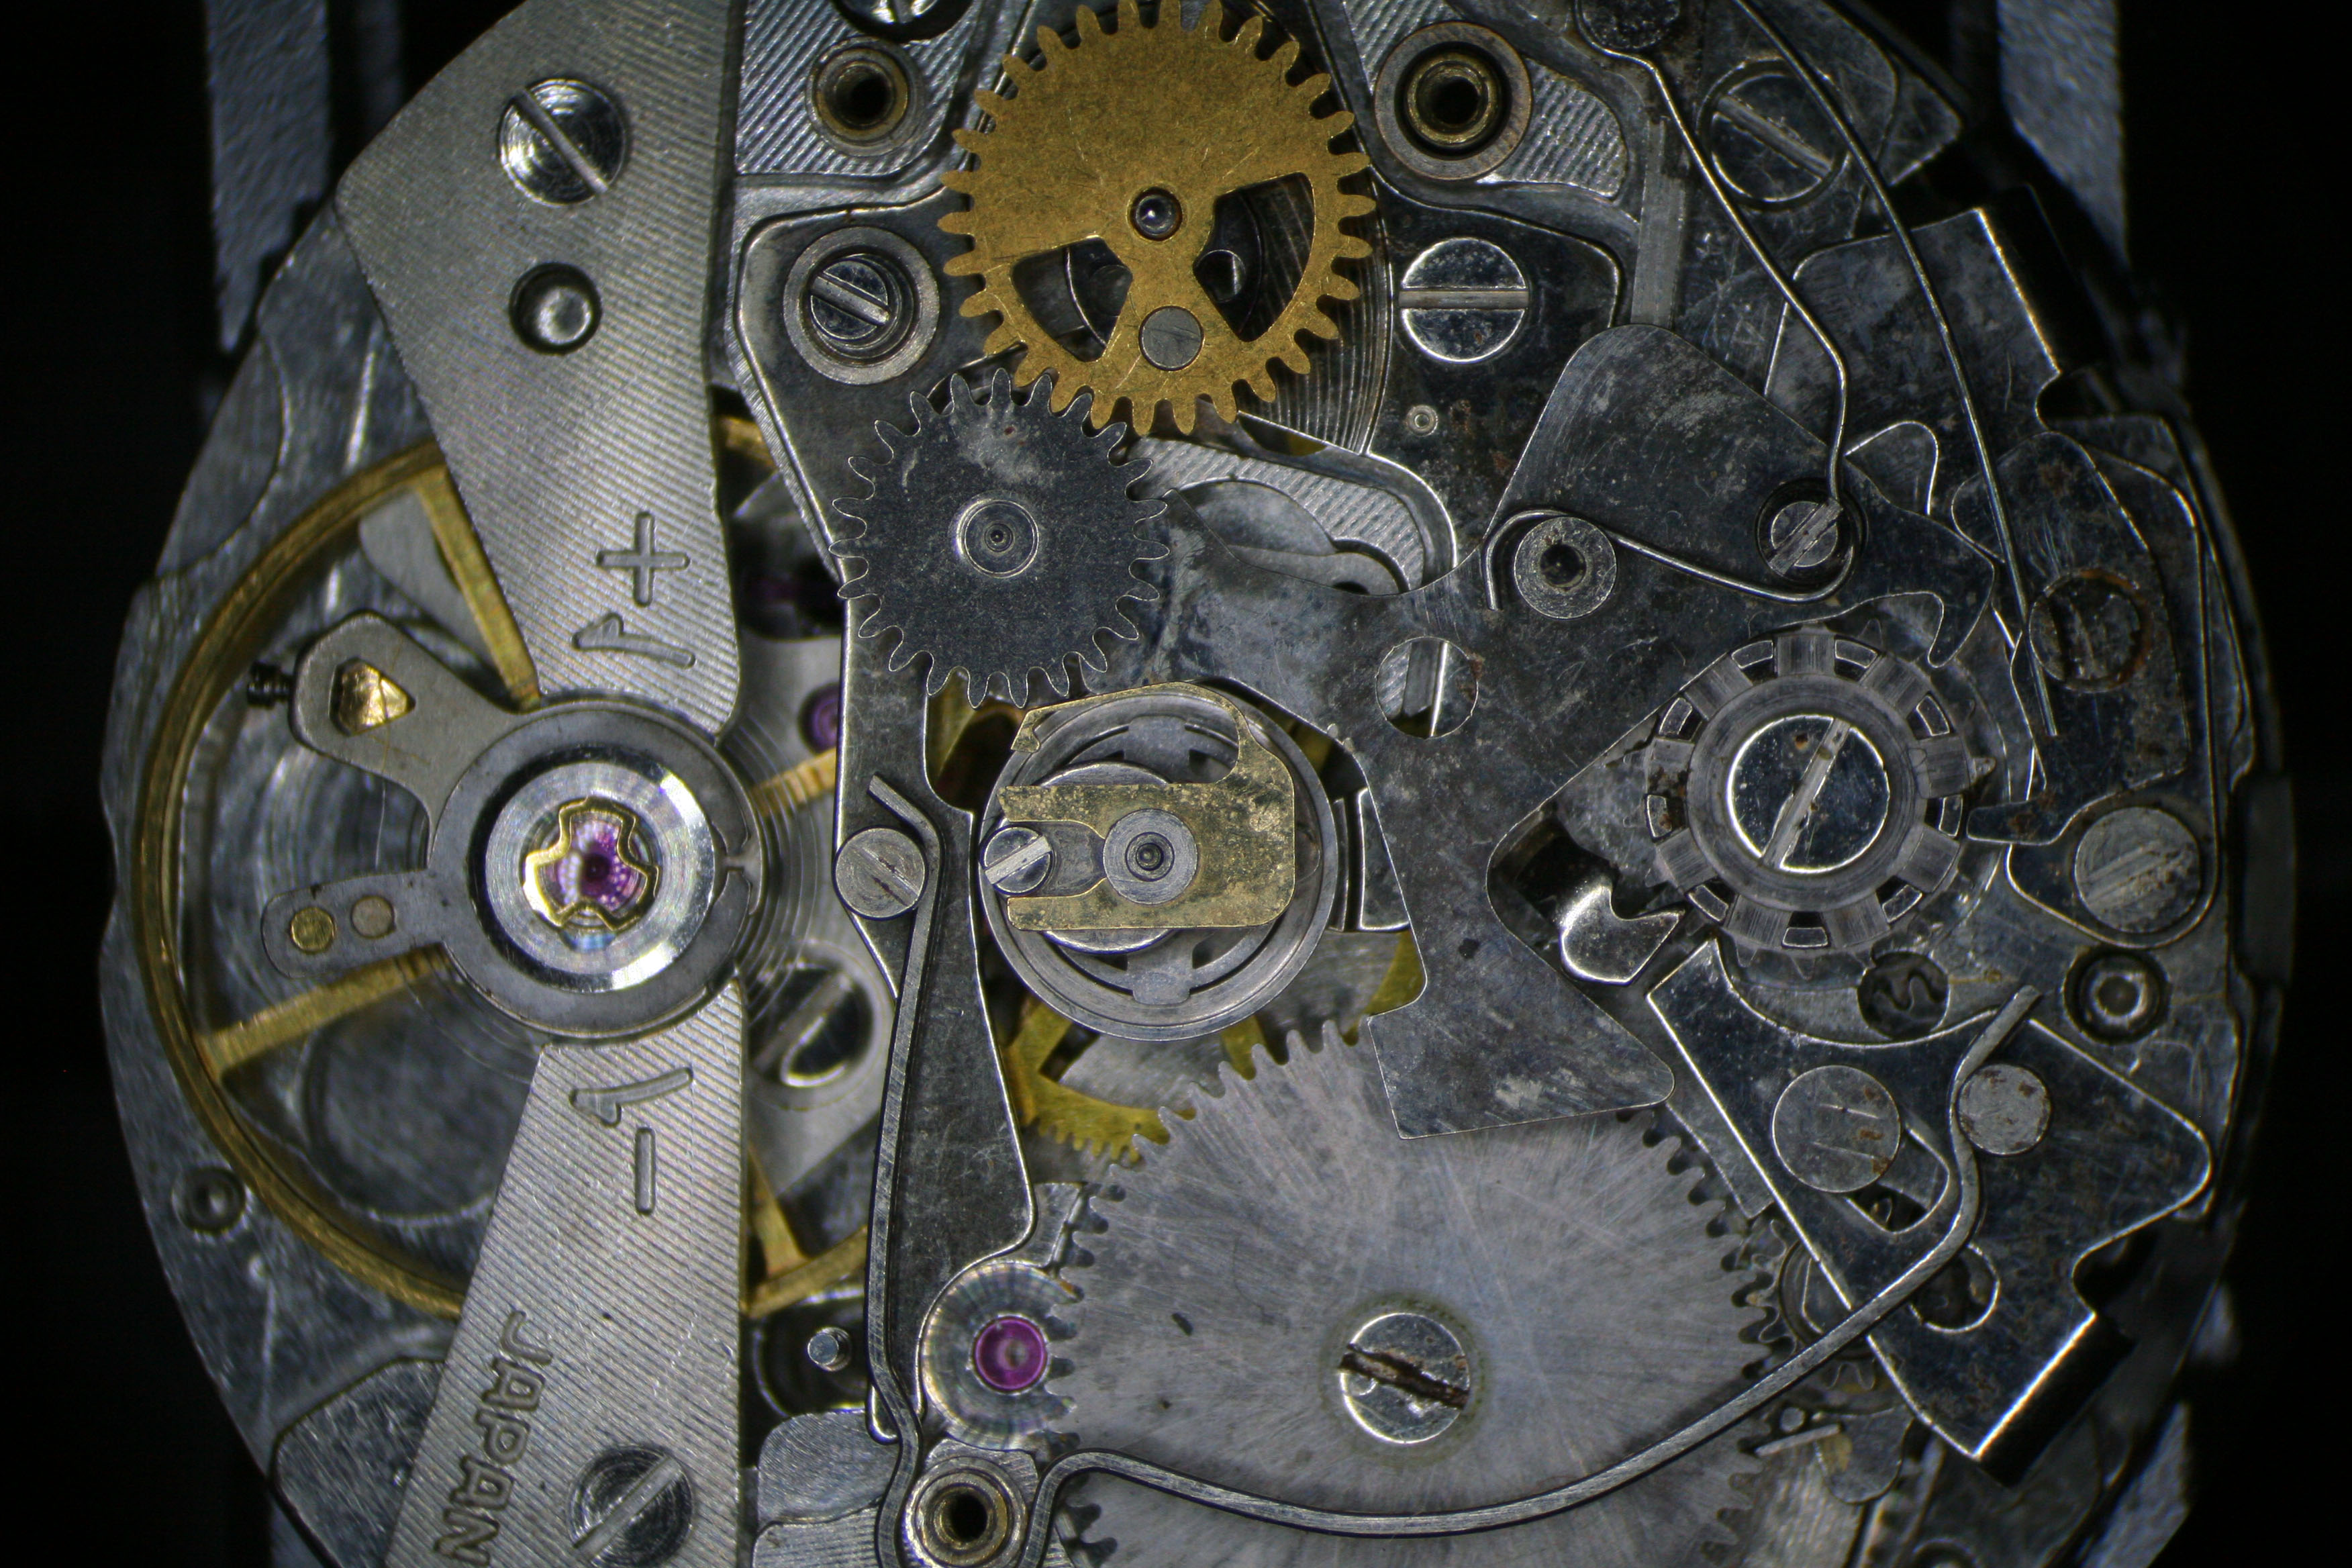
With the Oscillating Weight removed the chronograph works were only partially obscured by the bridge for the automatic winding mechanism. A bit of oxidation in the area of the keyless works was visible. This is fairly typical of old watches as the gasket in the crown will harden over time allowing moisture into the case.

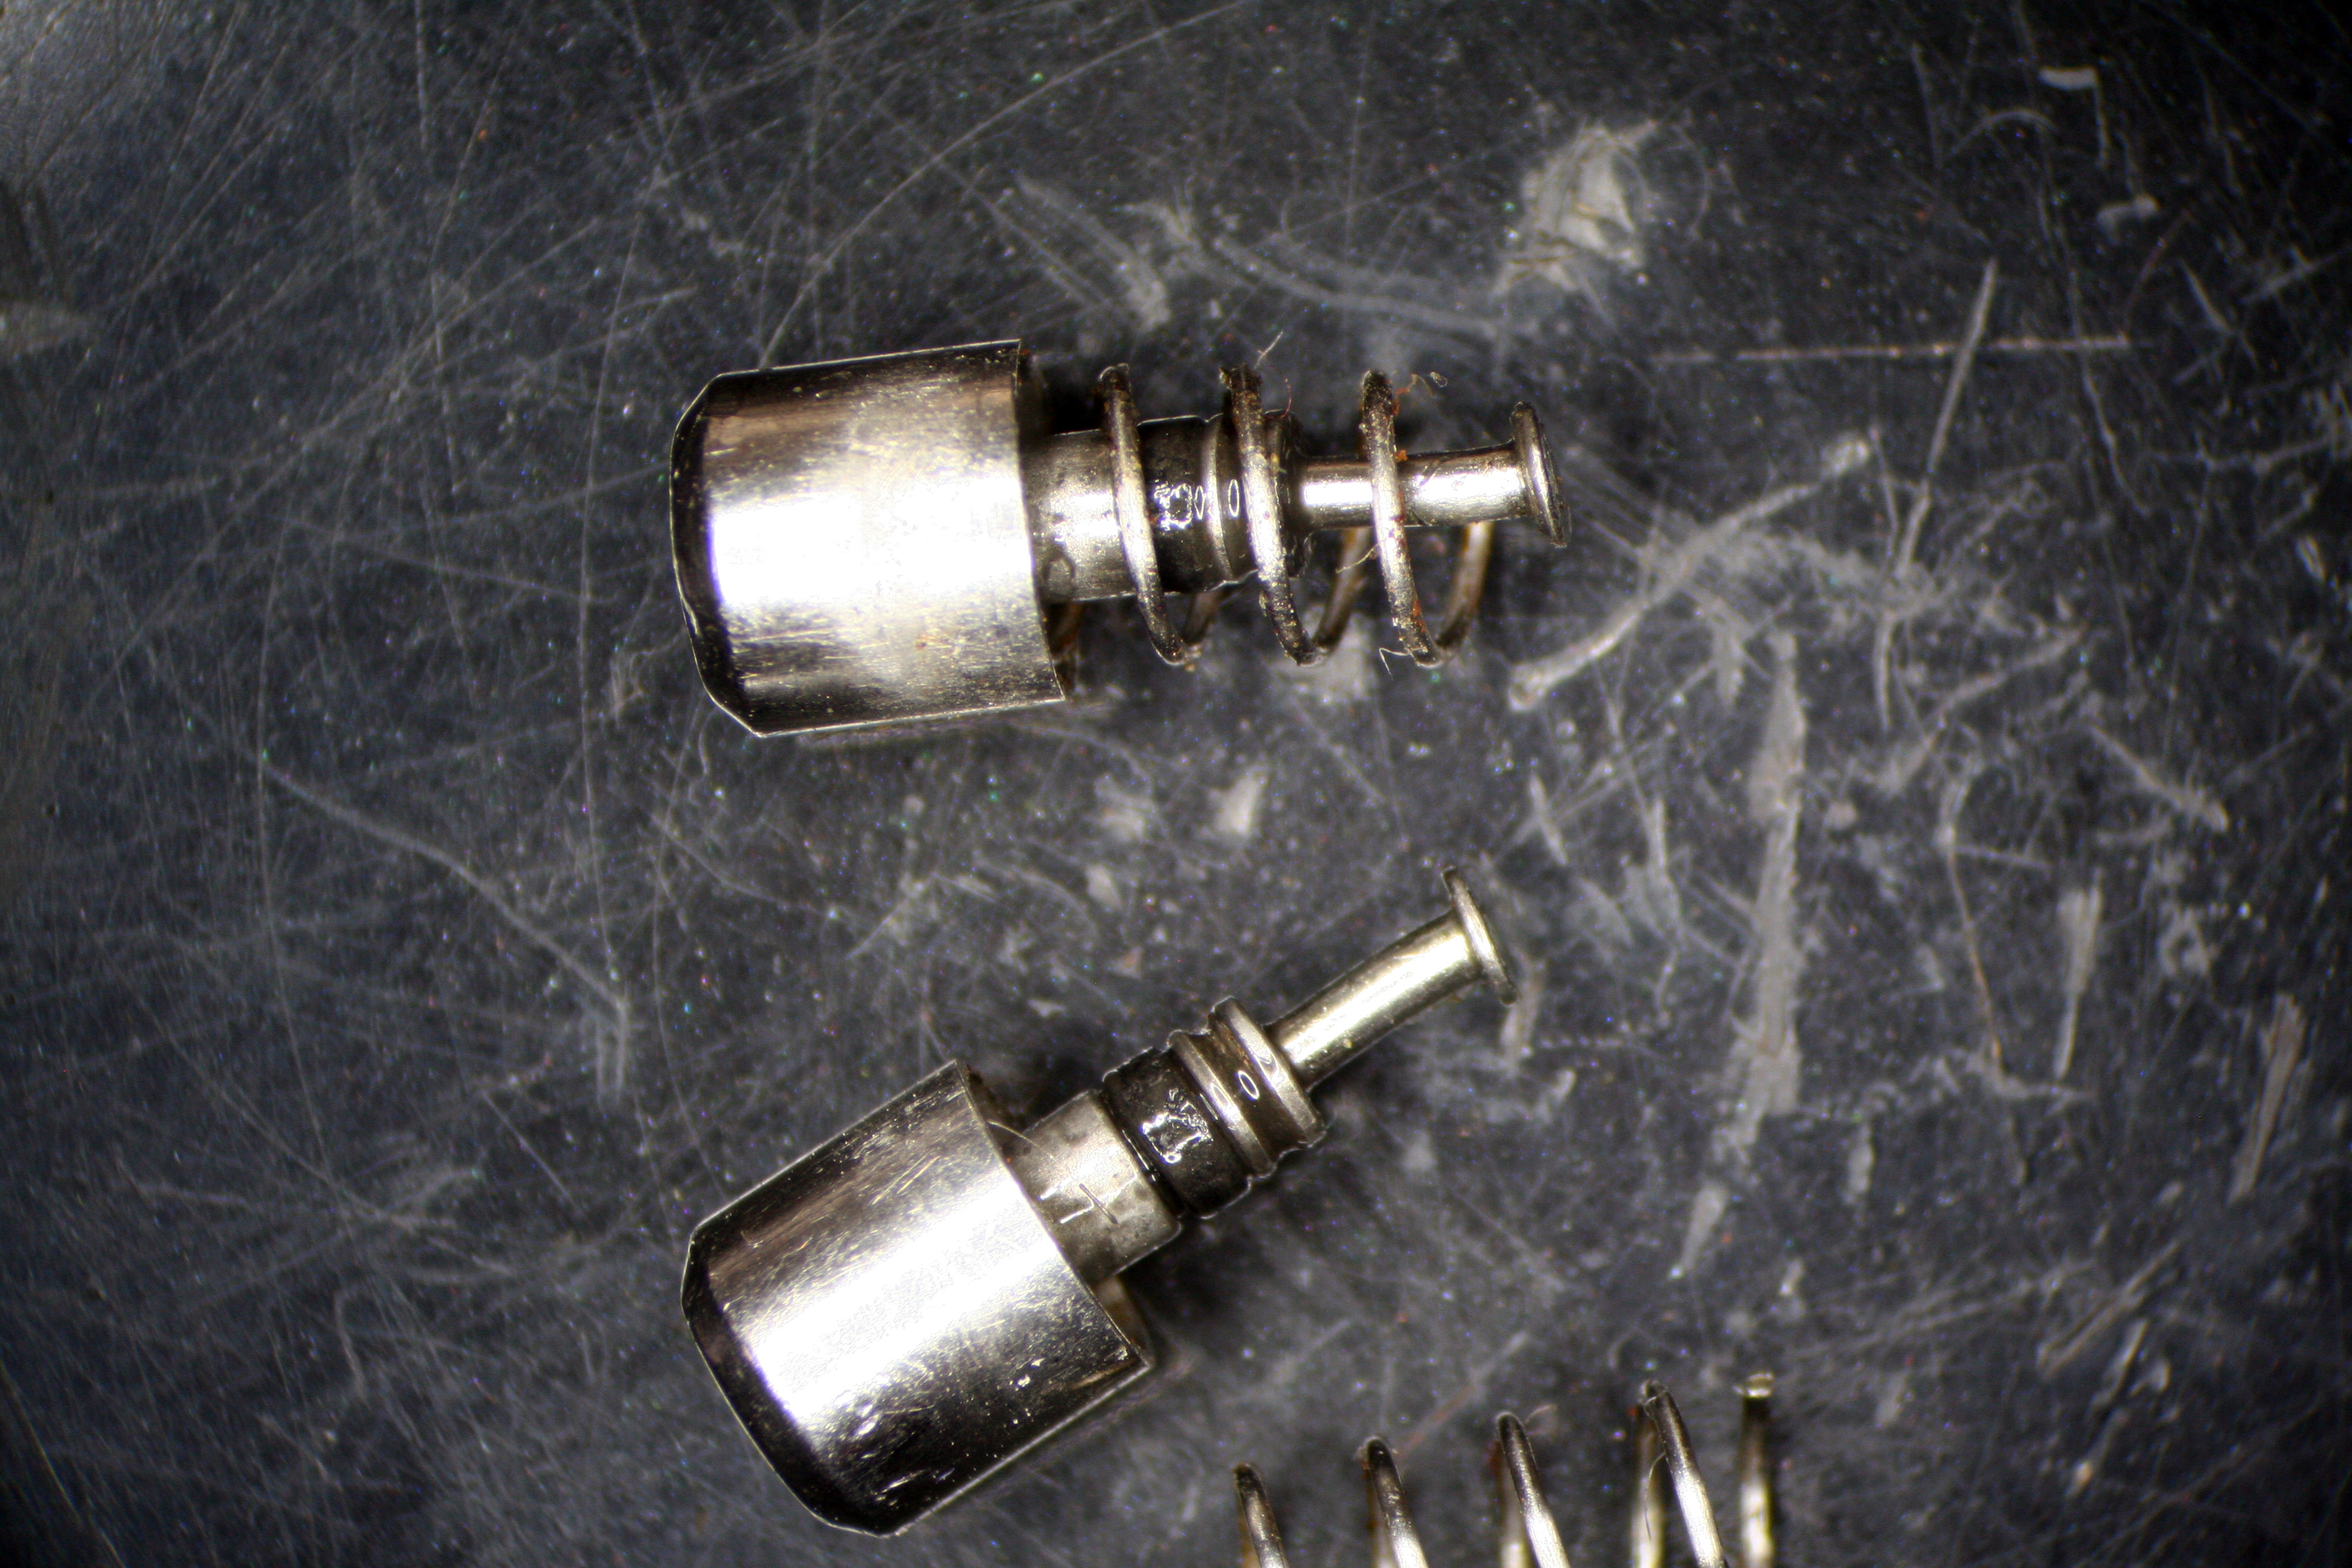
A Movement Ring is used to both secure the movement and Chronograph Pushers in place; it was clear the ring used in my watch was a modified replacement and this resulted in bent pushers. I would need to locate a proper OEM (Original Equipment Manufacturer) replacement.
Out of the case the dial didn’t look too bad but I soon discovered most of the paint on the perimeter had lost its adherence. The markers on the second and minute track came away with ease.
Closer examination of the crystal still seated in the case confirmed the fit was so poor that glue had been used to hold it in place. Often times an aftermarket crystal can be found that meets the specifications of the original but this is not always the case. When a correct replacement cannot be found compromises are made, sometimes with grave consequences.

The dial came off the movement easily; stamped on the rear is the number sixty-three which, if I understand my Seiko markings correctly, means the dial was manufactured in March of 1976. That would make this about as close to being “Birth Year Watch” as I’ve yet seen.

I broke the case down to its constituent parts, scrubbed them with a bit of Dawn detergent with warm water, and ran them through the ultrasonic cleaner. The case was now clean but scars of an eventful life were clearly visible.


About this time I had been reading up on the history of the Grand Seiko and King Seiko models and had stumbled across the Instagram account for the Lapinist. The Lapinist is a one man workshop (Kamil Dunkowski) located in Poland which has been restoring vintage Grand Seiko cases for collectors. I was so intrigued with the quality of Kamil’s work that I queried whether he might be able to refinish the case for my Panda. Receiving a response affirming he could, I immediately packed up the case for shipment knowing full well it would be several months before I would see it again.
This created a dilemma for me though. Aware the case was going to come back looking almost as good as new forced me to reconsider my approach to the dial. Initially I didn’t want to touch it, but putting such a well worn dial in a near perfect case wouldn’t look right. I could have the dial repainted but that would destroy its value entirely and the quality of a refinished dial is really hit and miss. A third option would be to utilize an aftermarket replacement which are readily available. The quality of aftermarket parts for Seiko watches can be exceptional and the aftermarket Panda dial is pretty darn good. This option seemed the most palatable, so I ordered up an aftermarket dial and got back to the movement.
I had expected many gremlins inside but was surprised to see the biggest problem was simply mismatched screws.

There was a bit of oxidation on the Hammer Lever which is riveted to the Barrel Bridge, I cleaned it up as best I could but to do any better I would need to replace the entire bridge which rarely can be found in the secondhand market.
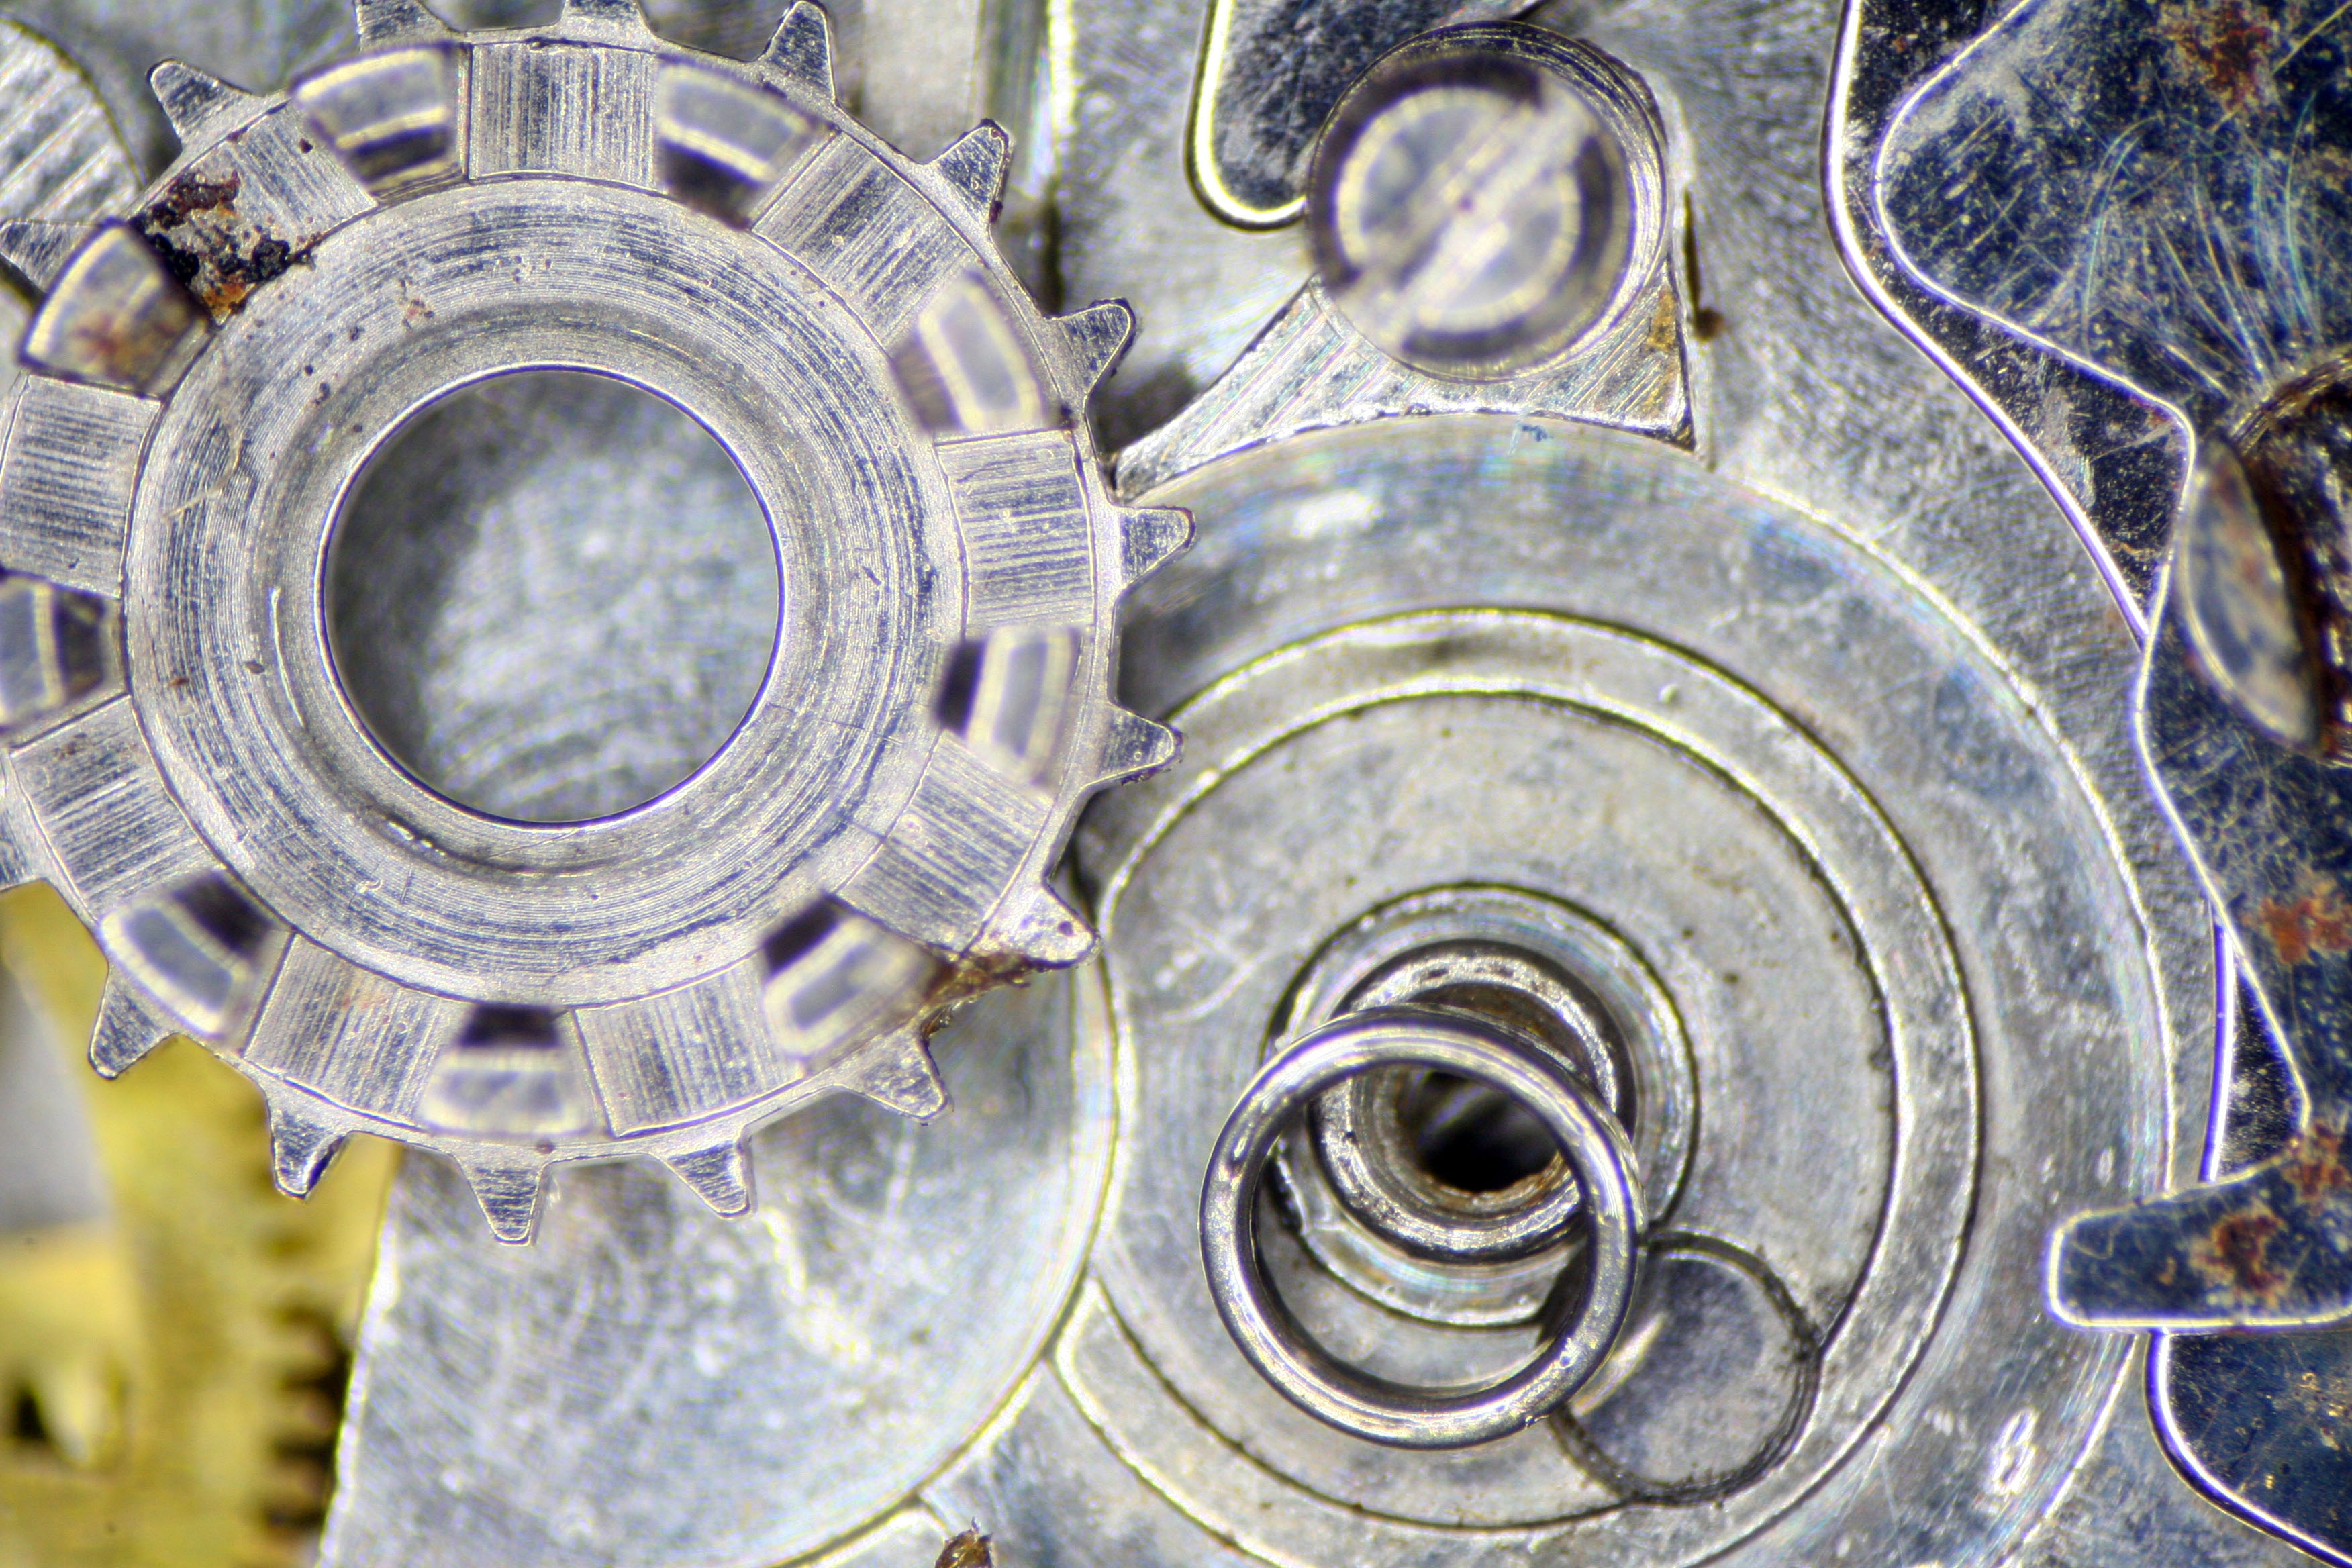
The Center Chronograph Wheel, which has an integrated clutch mechanism, was still in good working order and this was a relief as these wheels are fragile and can be very difficult to source today. The clutch is built into the wheel and engages much like the clutch in a car’s manual gearbox. They wear out over time and since Seiko hasn’t produced this movement in a few decades…
That leads me to a small aside- Martin, the Amateur Watch Fettler, has several posts on his blog which go into greater depth about the Seiko 6138 and 6139 chronograph movements and the vertical clutch solution Seiko invented for chronograph activation. I highly advise checking out all of his 6138 and 6139 tagged posts for specifics on Seiko’s engineering and some of the challenges faced repairing these movements today.

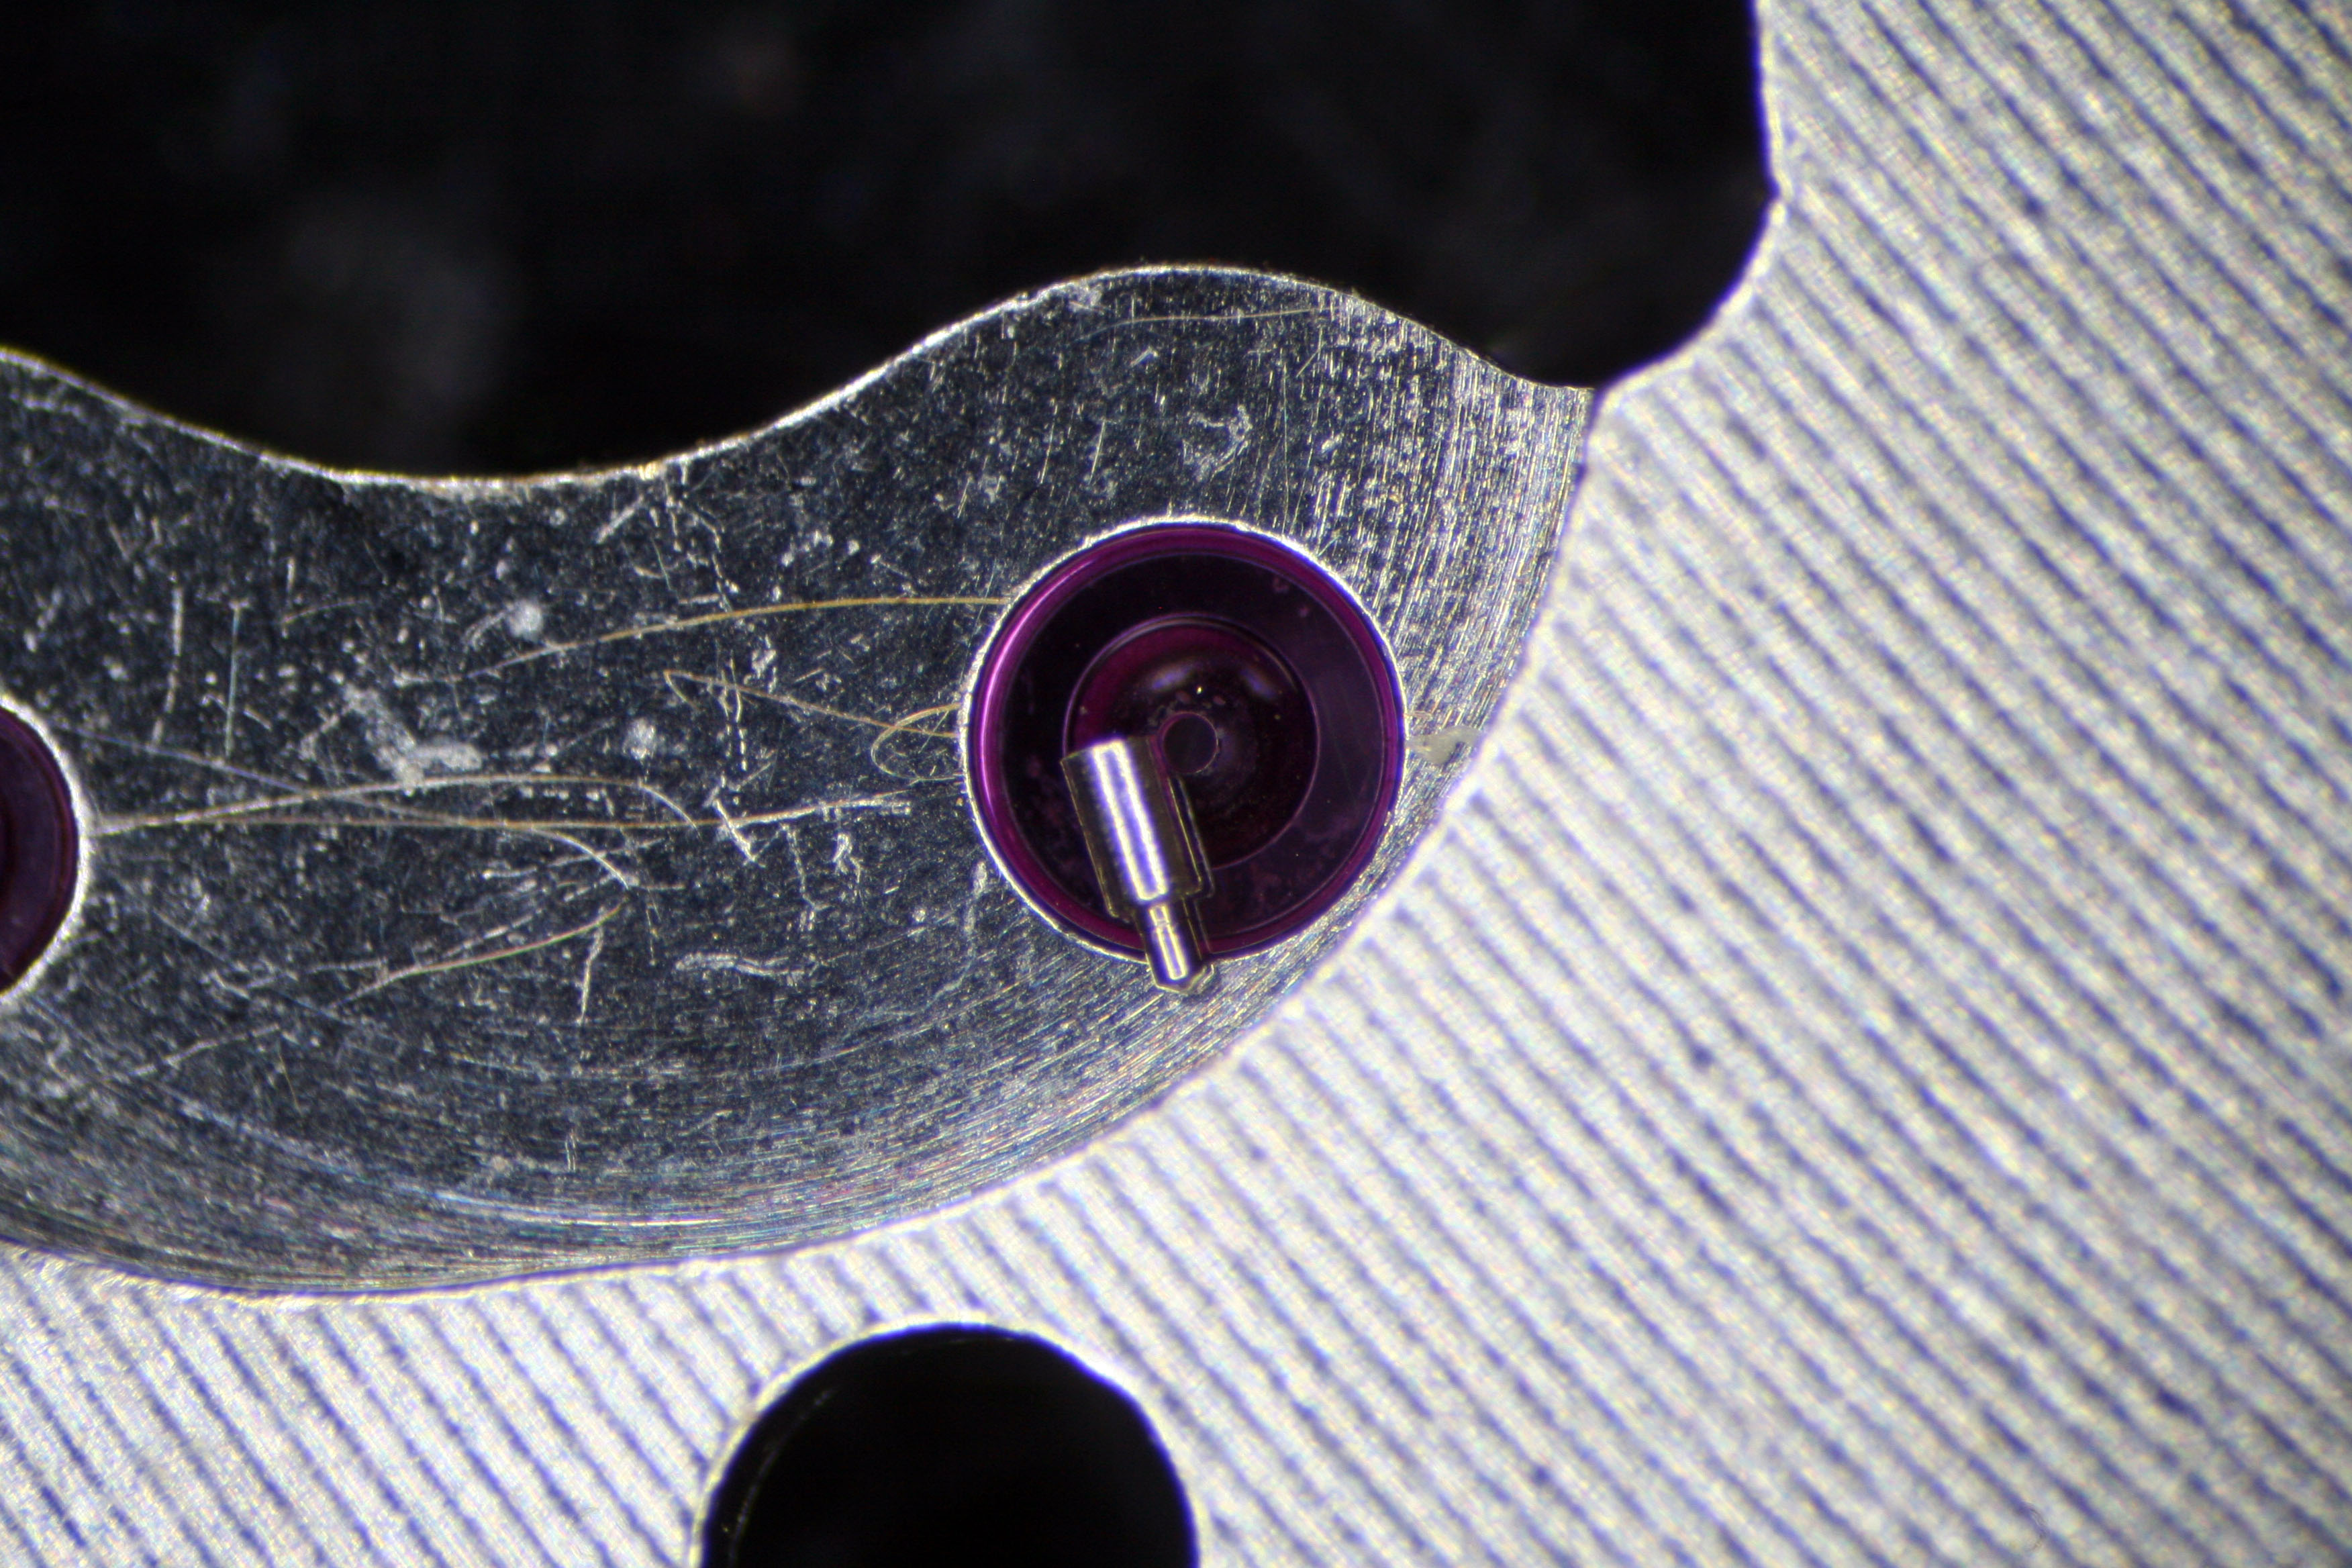
An unfortunate discovery was made as I removed the Barrel Bridge- a replacement Third Wheel would be needed as the pivot had sheared off cleanly but remained in place thanks to the jeweled bearing.
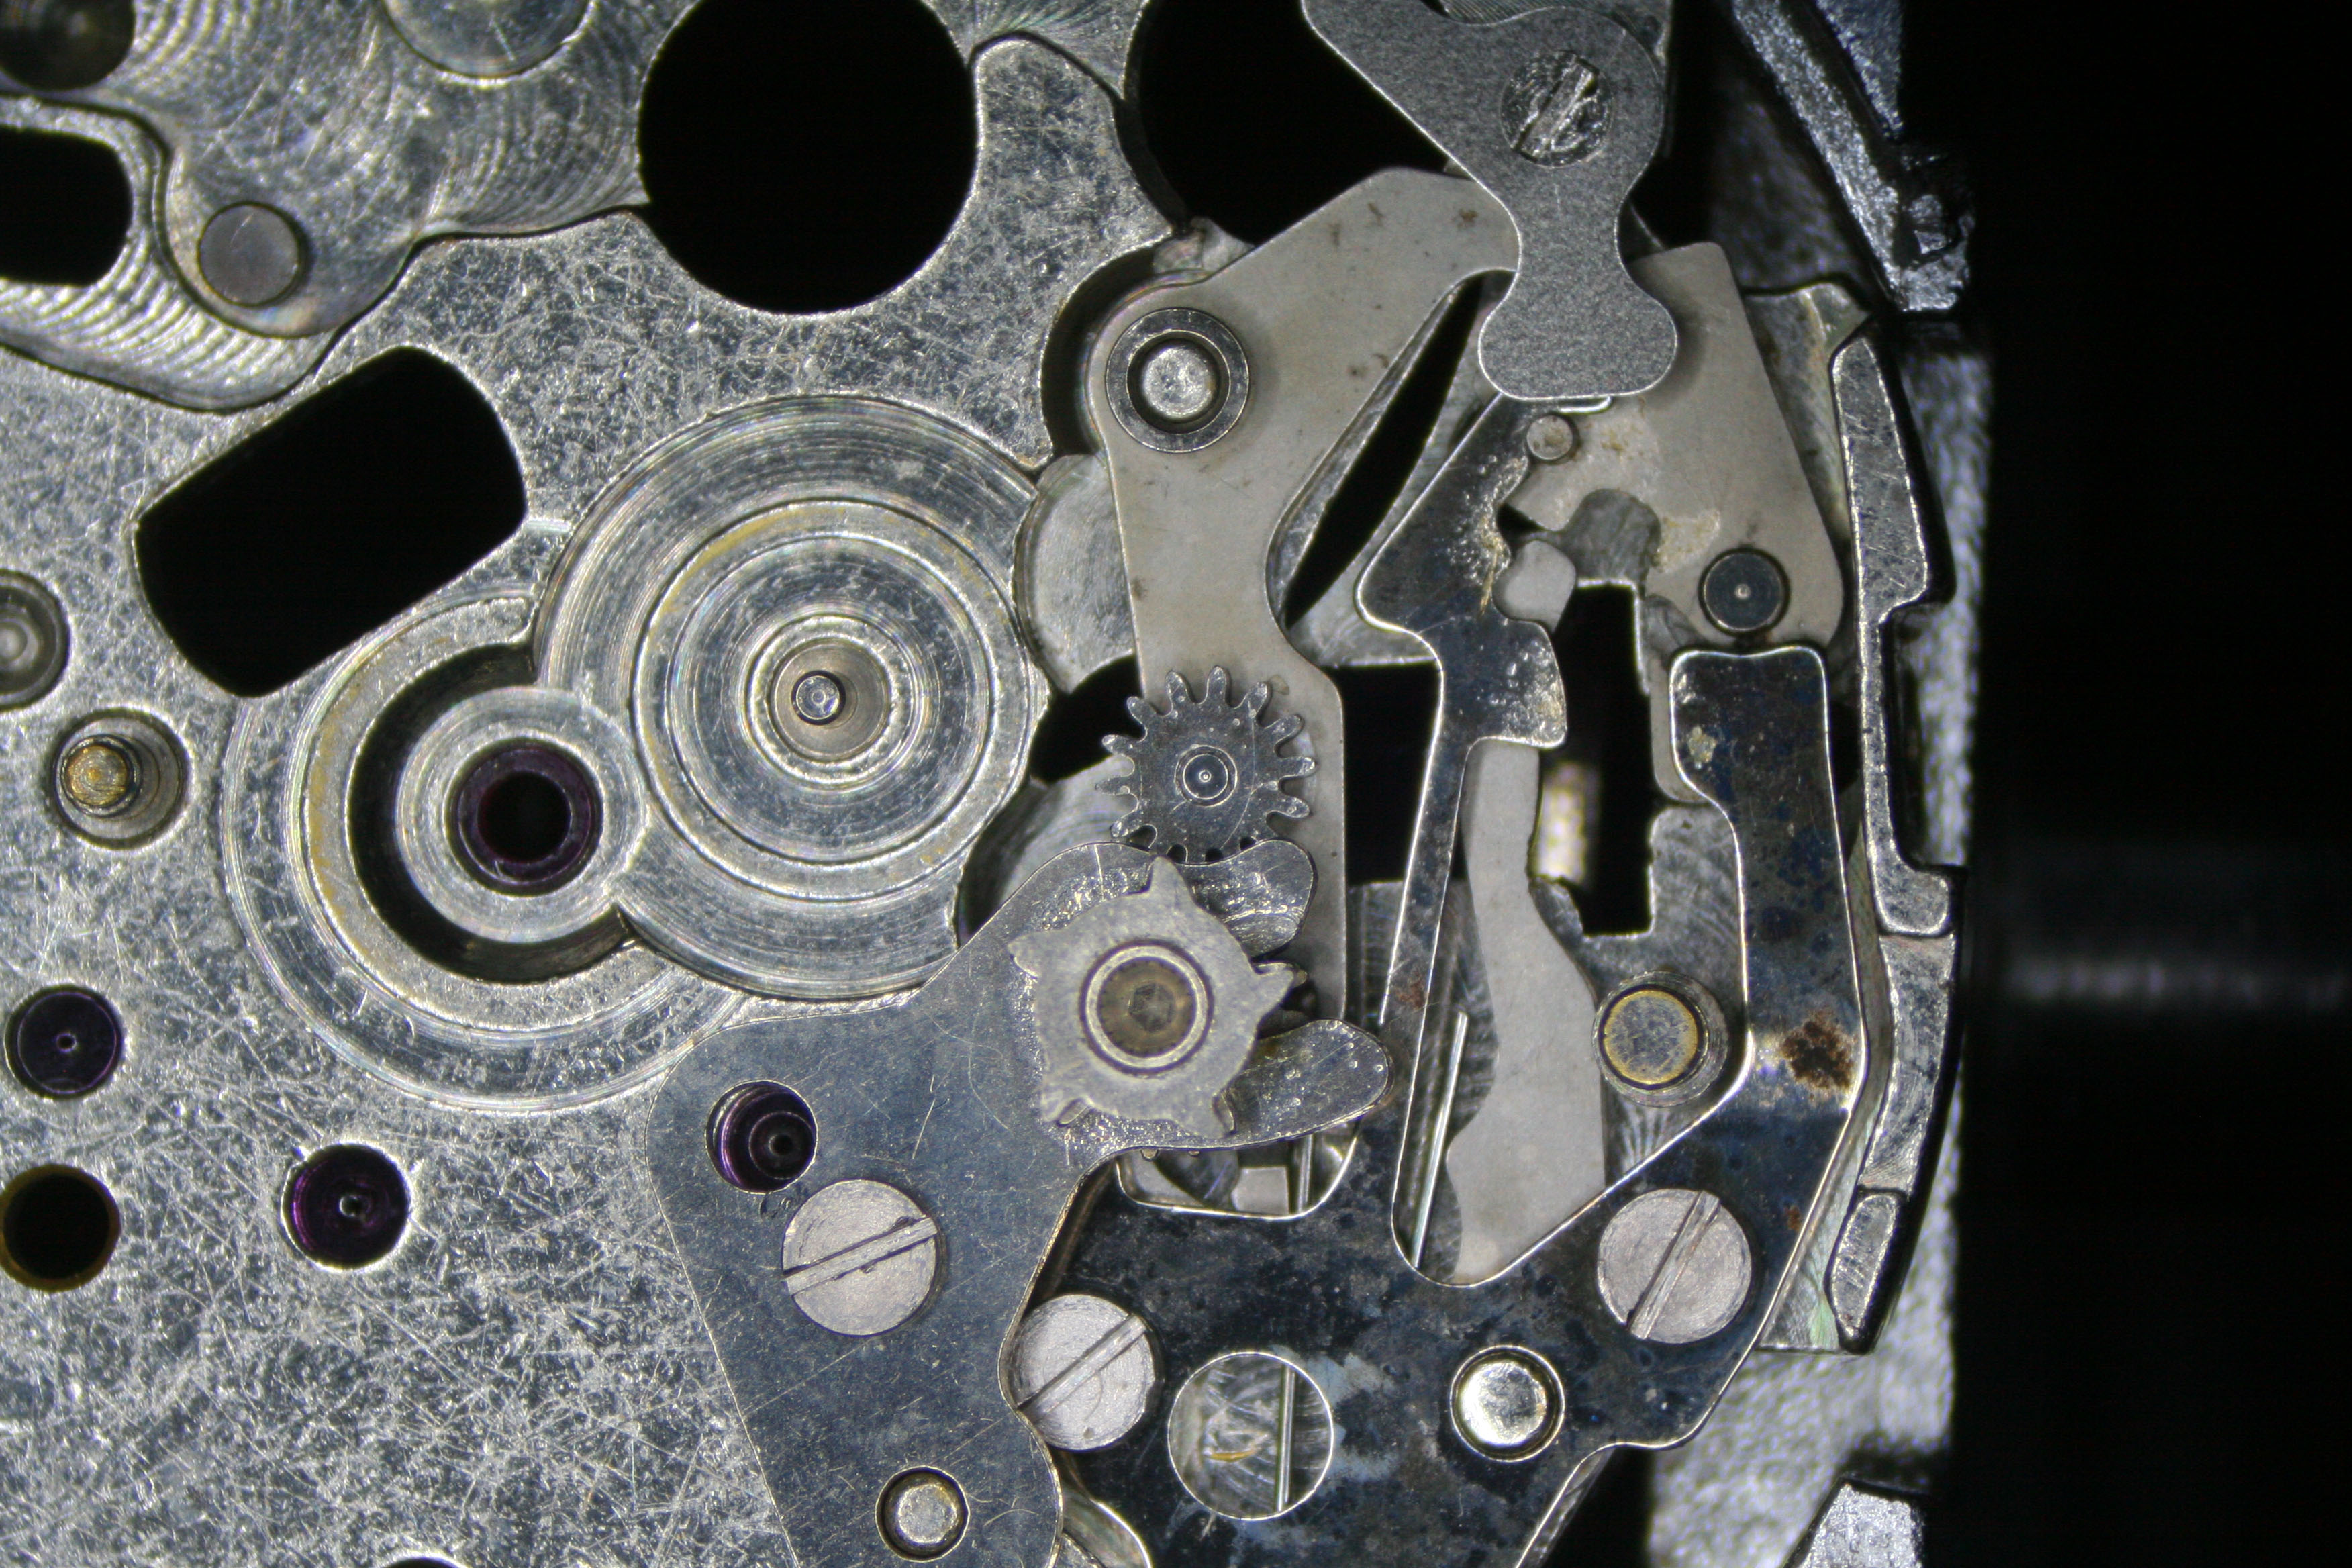
Noting the need for a new Third Wheel, I finished up work on the Top Plate and turned my attention to the dial side of the movement. Under the dial is the calendar works, keyless works, and hour recording mechanism. Things looked pretty tidy at first glance.

The 6138B movement displays the day and date so there is a printed wheel for both beneath the dial. Advancing the day or date is done by pulling the Crown out to the first position- clockwise rotation advances the day and counter-clockwise rotation advances the date.
I needed to pay very close attention to the location of the various levers and springs which enable this action in order to get the desired results after reassembly!
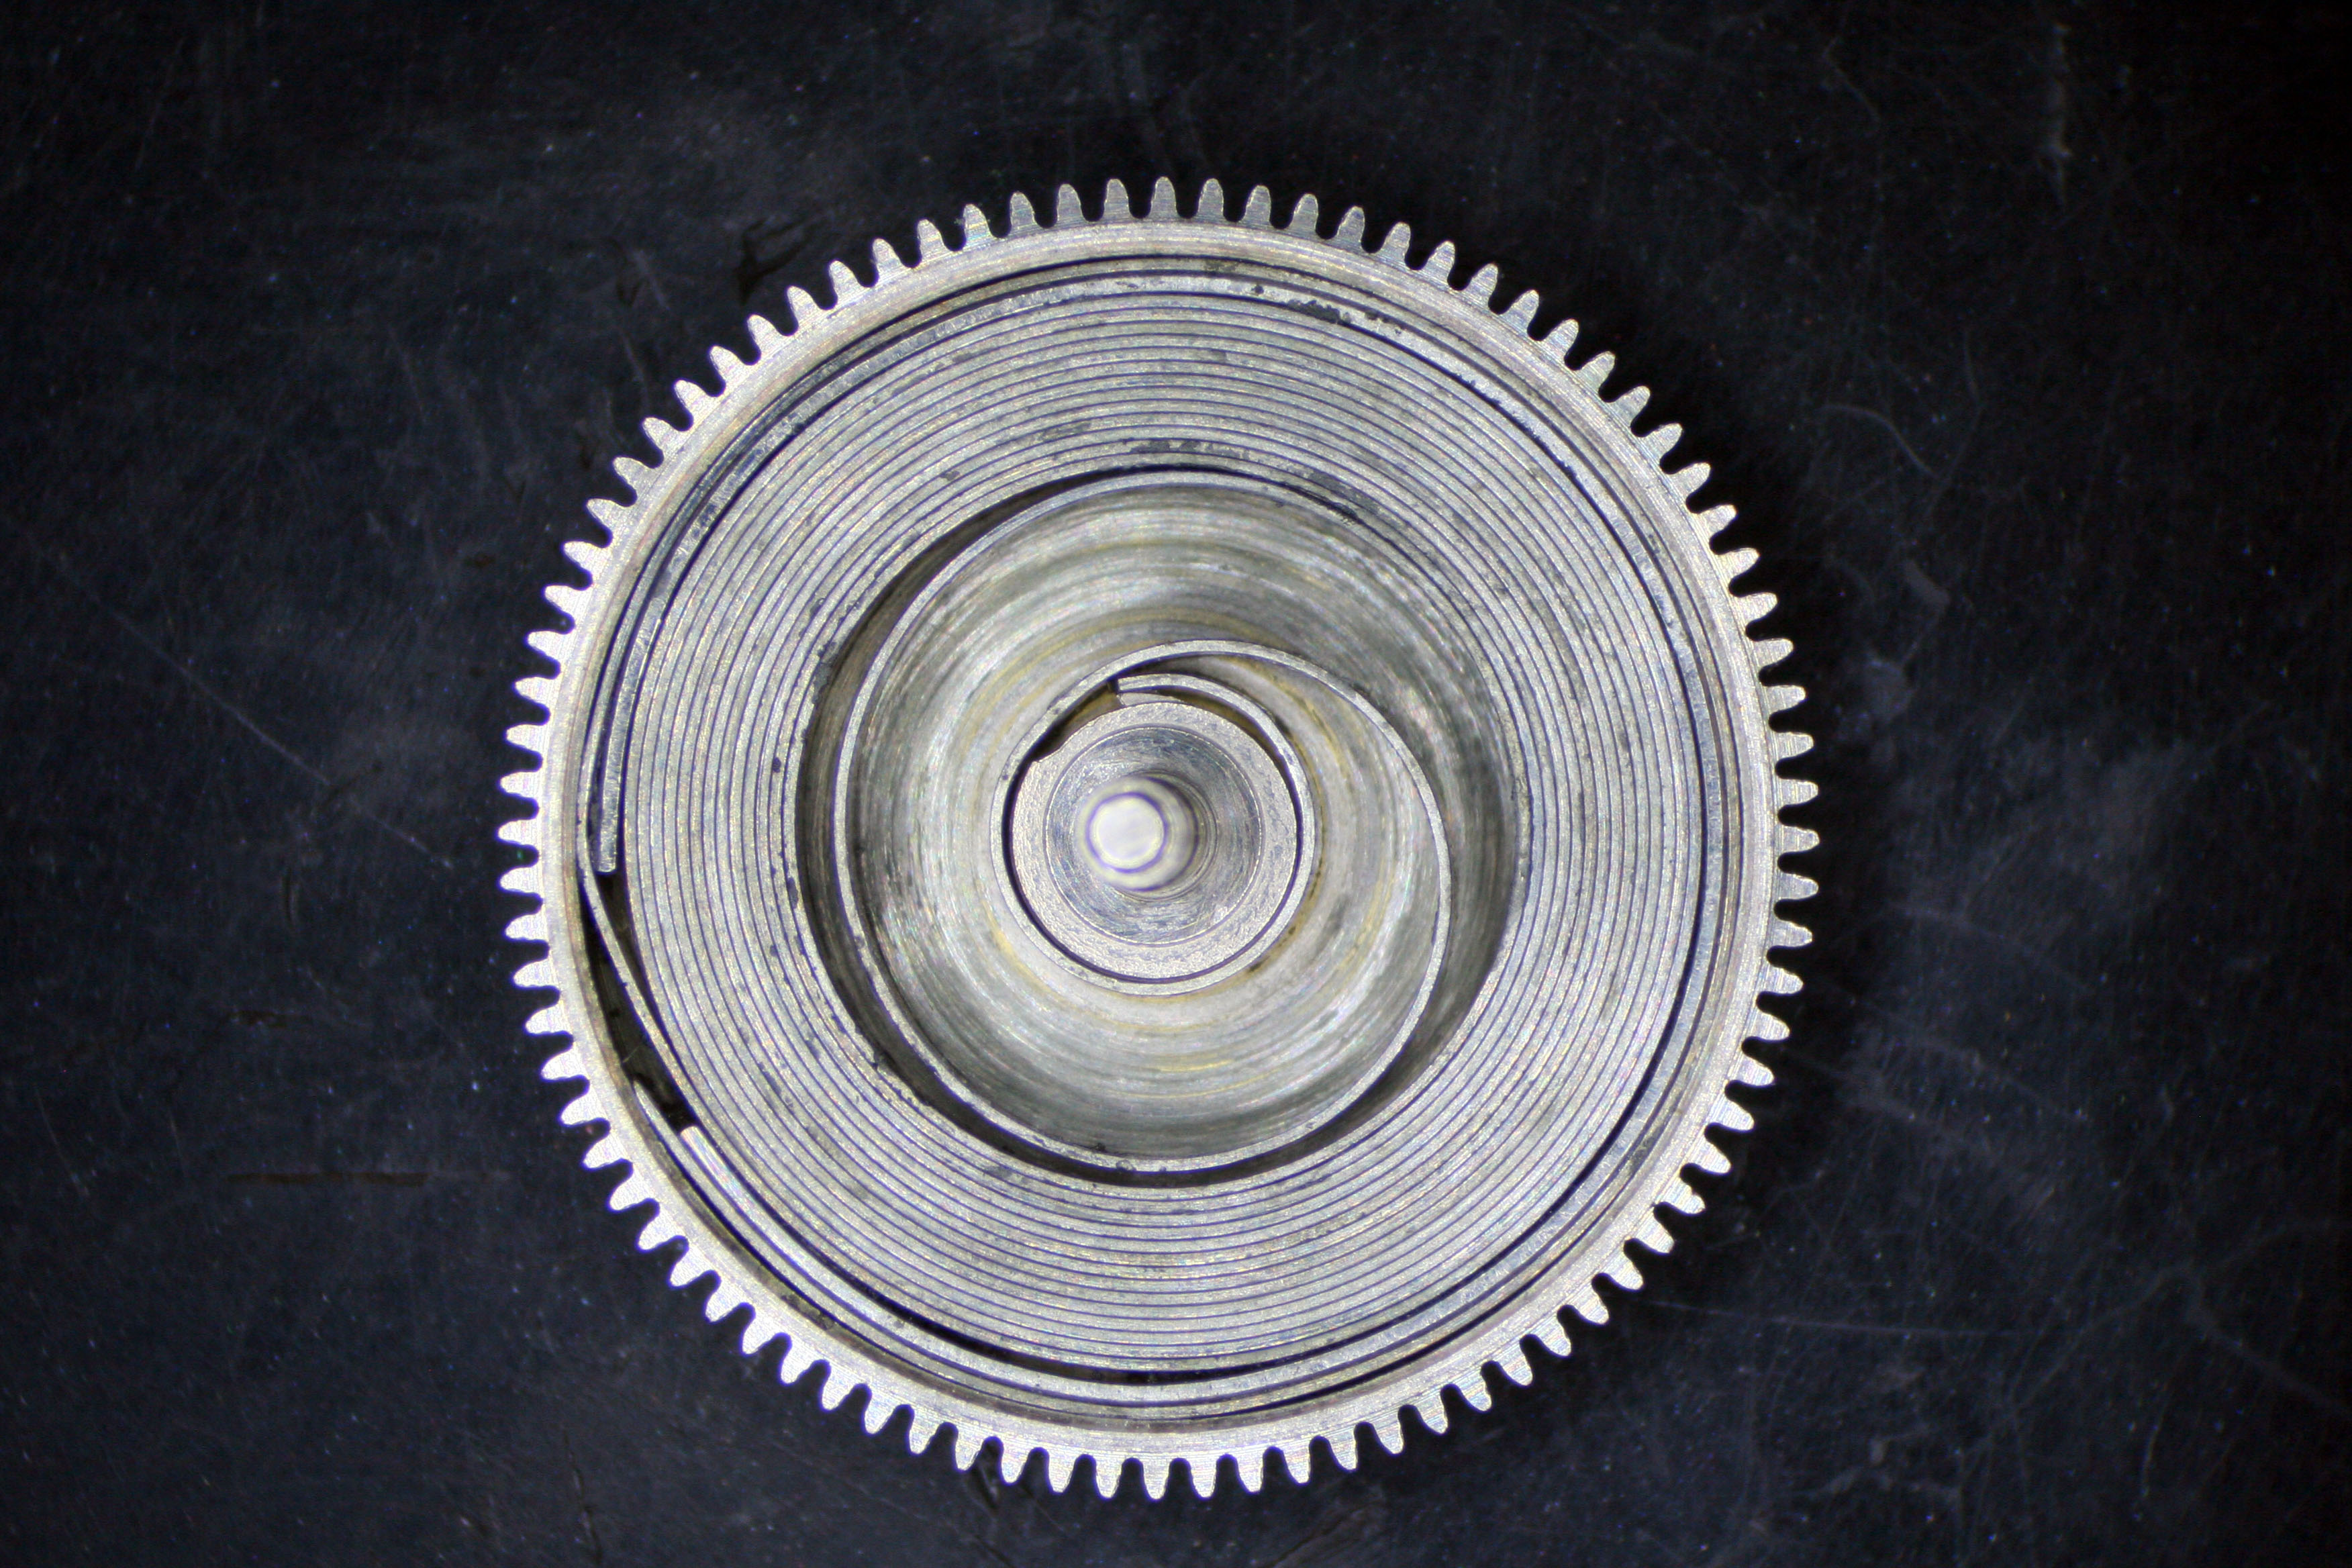
Opening up the Barrel I found the Mainspring was in good shape and was worthy of reuse.
The whole lot of parts went through the cleaner with multiple rinses to get everything tidy. The replacement Third Wheel arrived but it had issues that required immediate attention; even though it was New-Old Stock, I found rust on the pivot straight out of the package. This was corrected with a little burnishing via the Jacot tool.

While I awaited the return of the watch case from Kamil, I order a set of aftermarket pushers, a set of aftermarket hands (I only needed one small one), a new set of rubber gaskets, a NOS Oscillating Weight, Oscillating Weight Retaining Screw (the original had damaged threads), Hammer Spring (the one removed from the movement was custom made), and a Movement Retaining Ring.
Reassembly went smoothly except for the keyless works which gave me headaches as I had put the spring for the Day-Date Corrector Wheel Rocking Lever in the wrong position and this required me to tear down the calendar works entirely.
The parts cleaned up beautifully and I regret having not saved more of the reassembly images for this part of the story.


After reassembling the base movement and lubricating all of the pivots I checked the beat on the Timegrapher and the trace was not as clean as I’d normally like to see. I had noticed the Balance Assembly didn’t look quite right as it was kicked back and forth by the Pallet. I’m fairly certain the Balance Wheel has a slight warp and this may be contributing to the untidy trace on the Timegrapher.
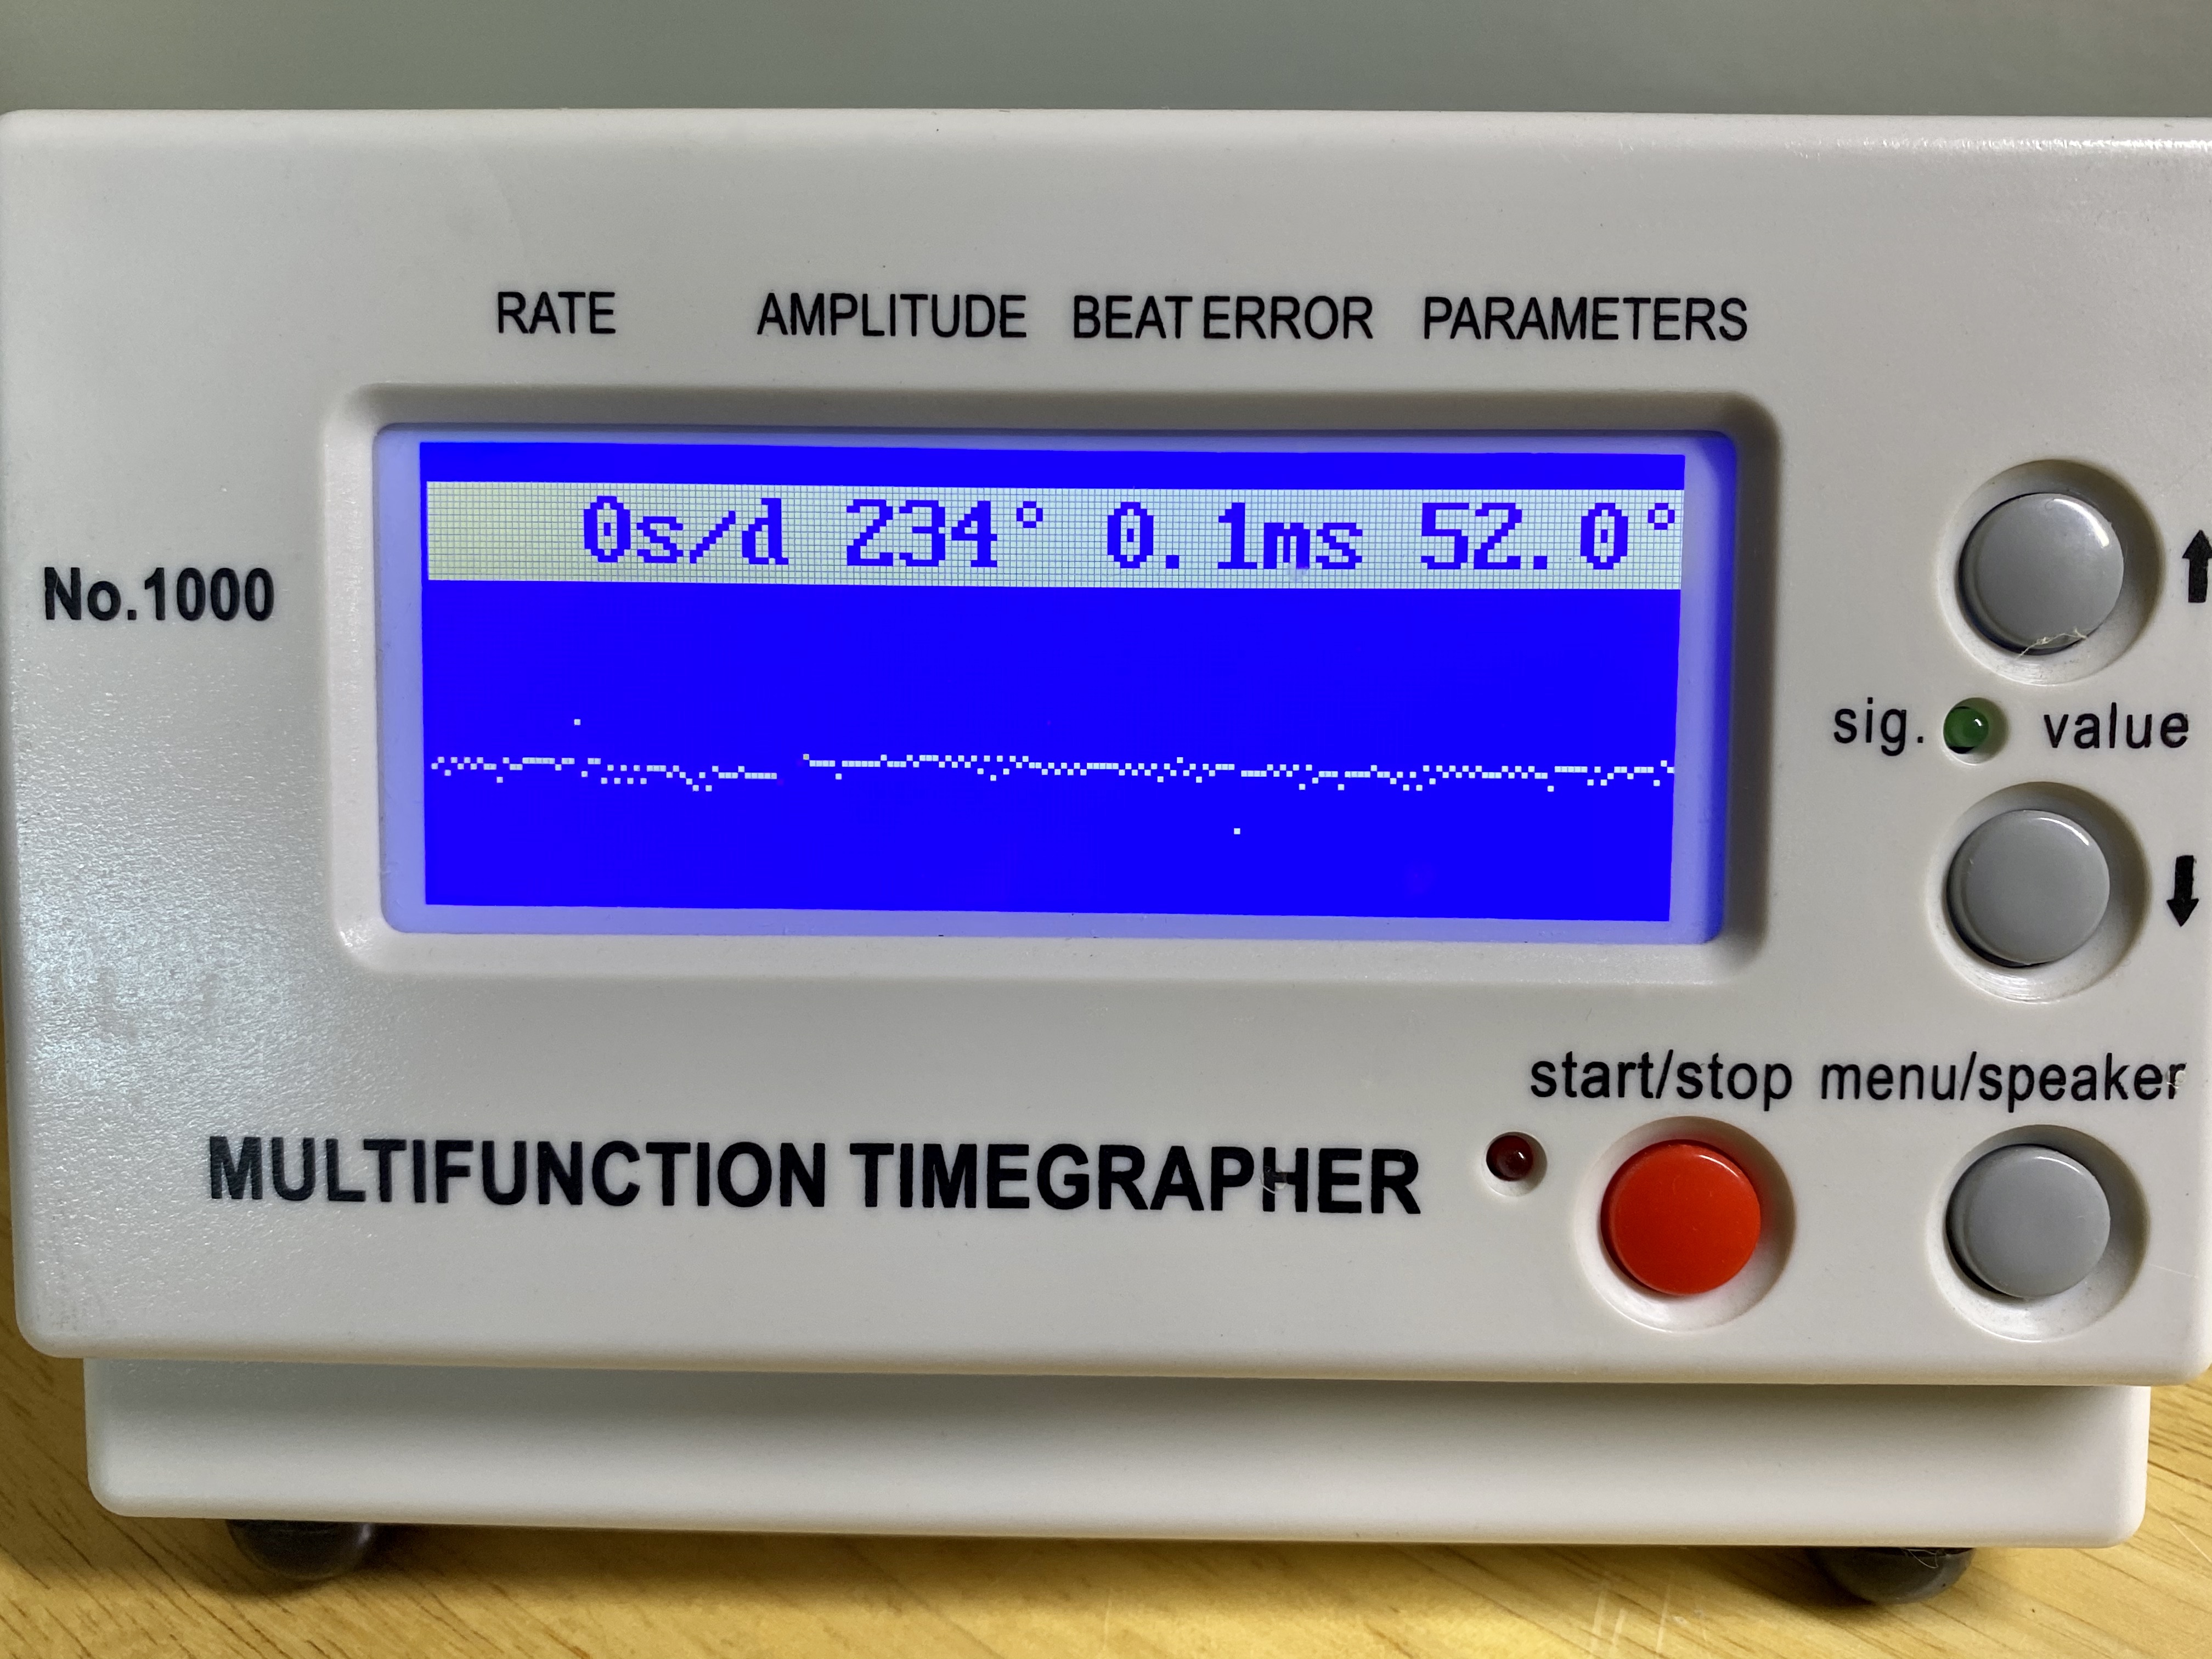
A Balance Wheel can be trued up but I’ve not been very successful in the past fixing misshaped wheels. It takes a lot of experience and a very steady hand to move the metal back where it needs to be. I’m not sure how much this is gong to bother me in the long run though; I may go back and replace the whole assembly at a later date.

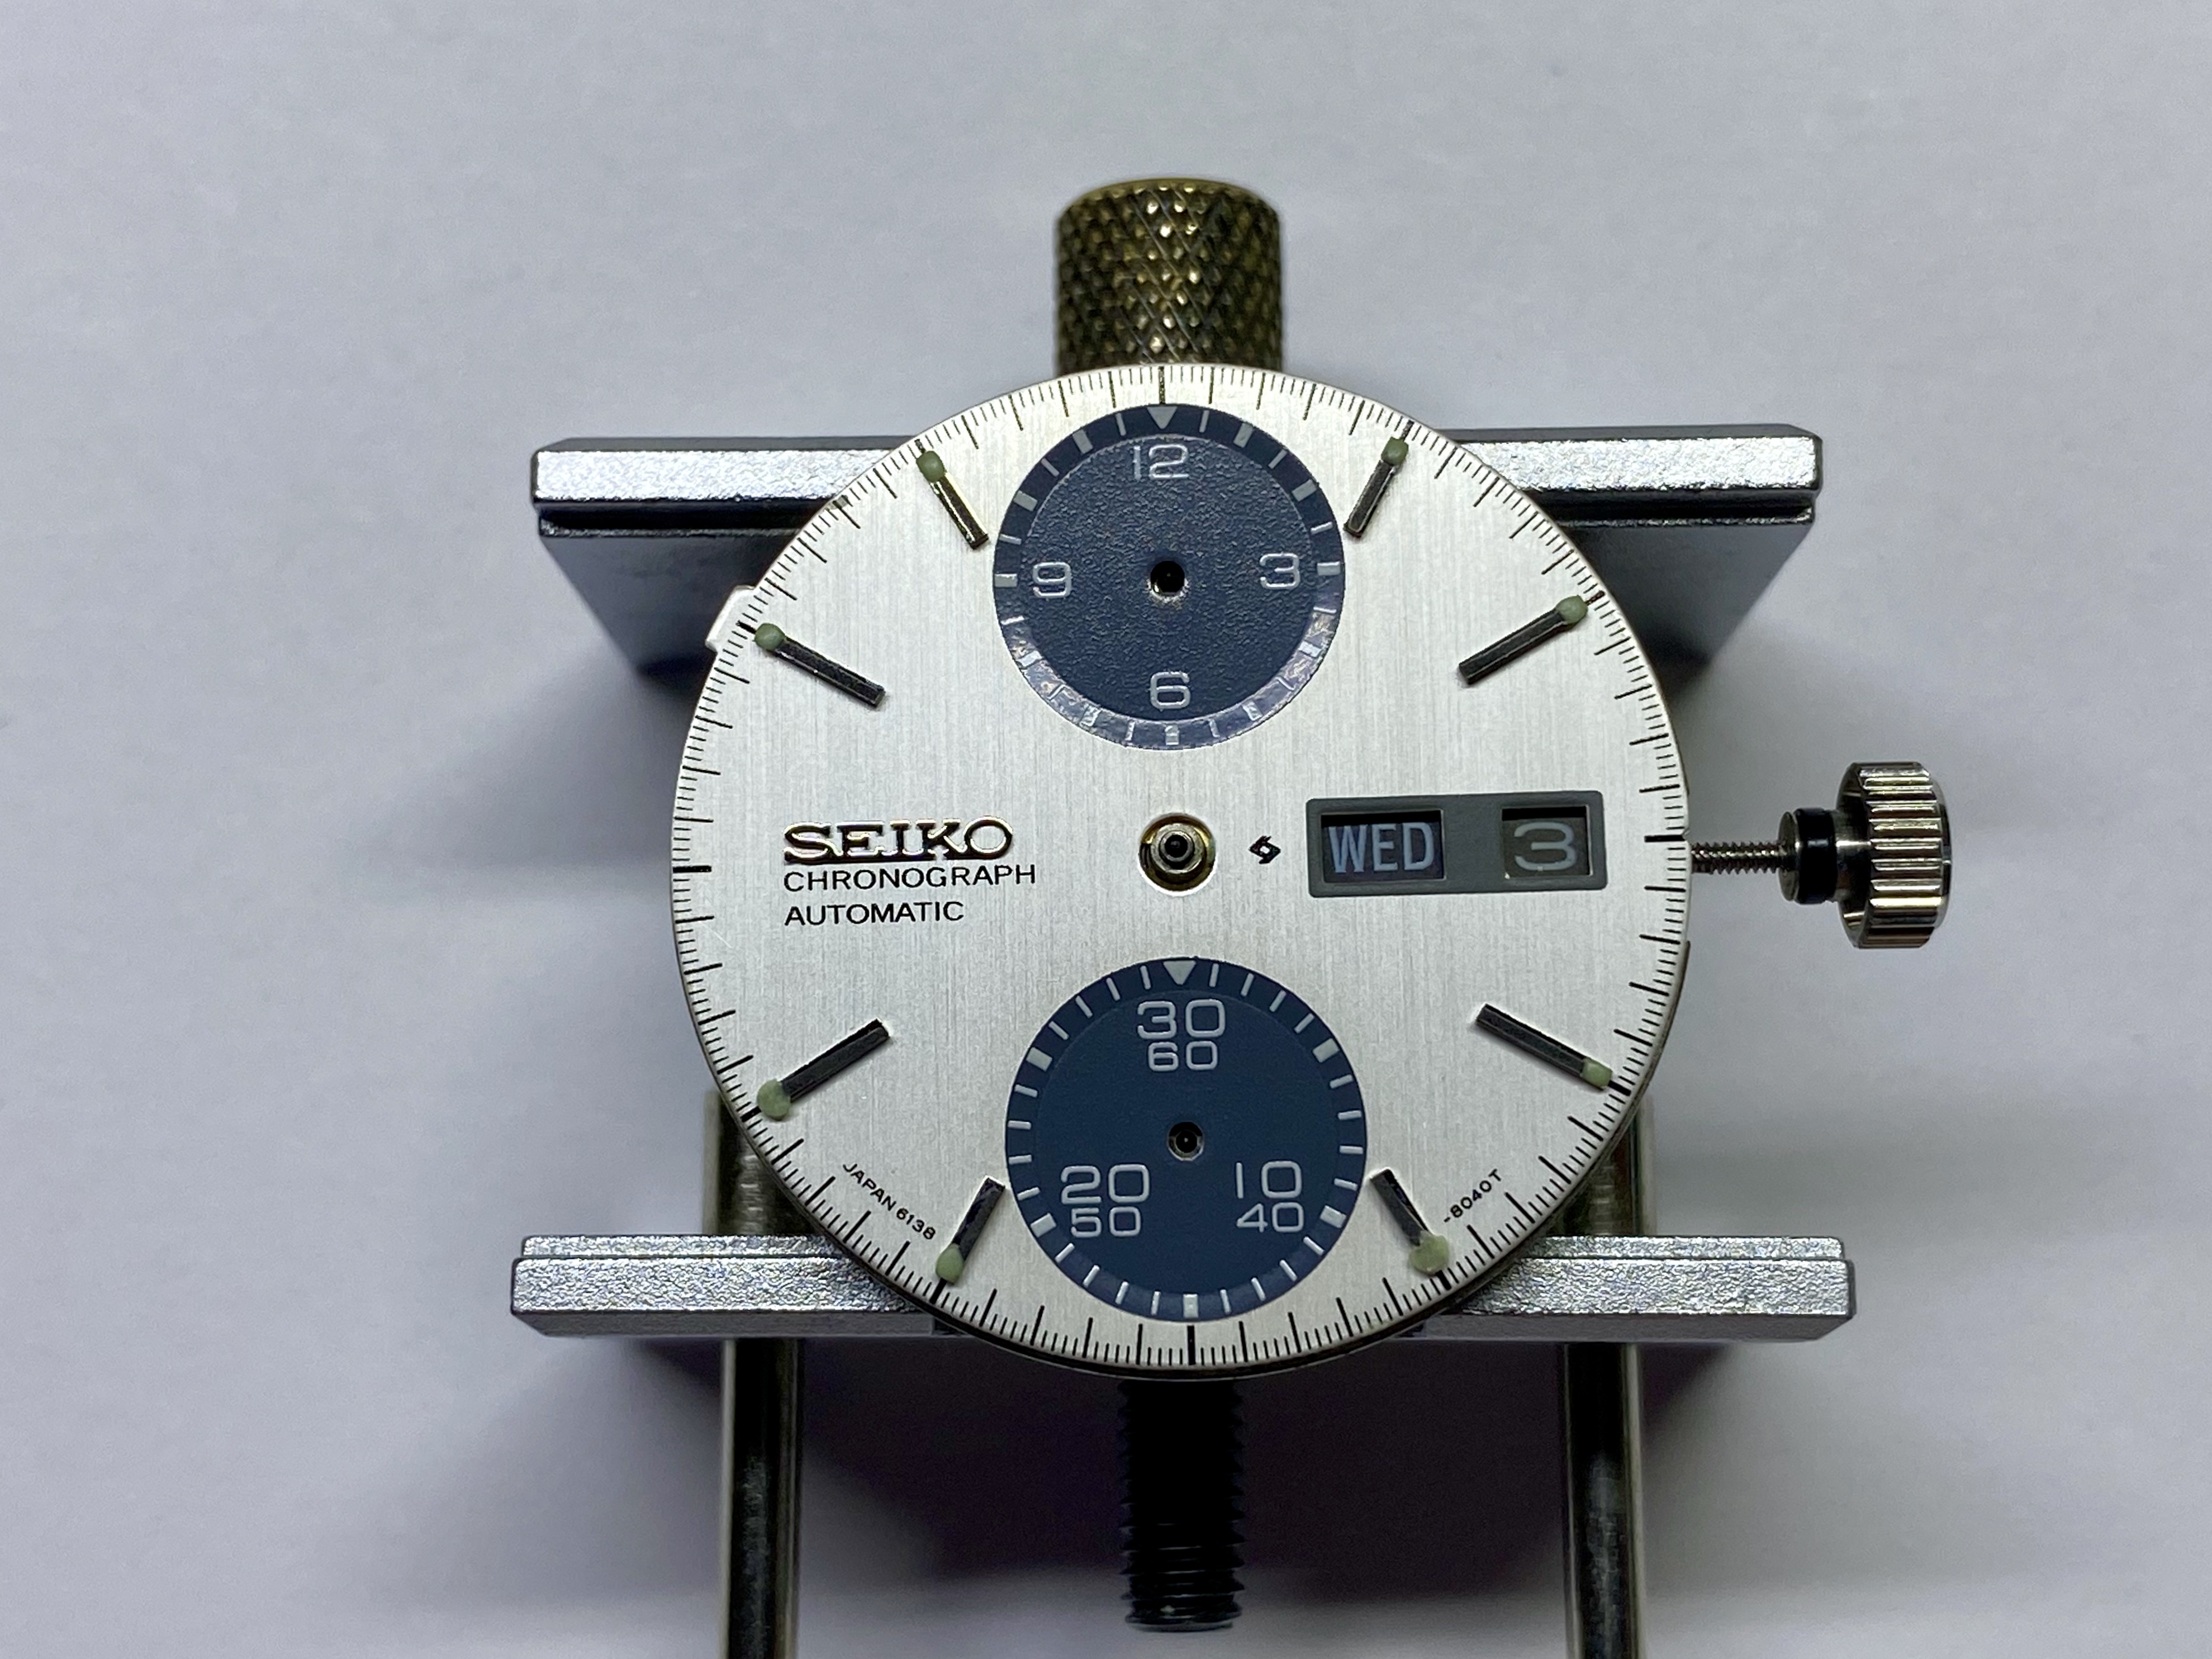
The replacement dial took a bit of time to arrive because of the pandemic but when it did I was happy with what I received. The fit was spot on and the text and markers on the dial are crisp and legible. The Seiko logo isn’t quite right but I don’t mind the tip-off that this isn’t the original dial. The only thing that really bothered me was the untidy glob of luminous compound on the five o’clock marker.
I put away the original dial for the day I sell this piece as there’s no way of knowing now if the next owner will prefer the original or the replacement.
The case came back in phenomenal condition- I didn’t know it could look this good. In my opinion the refinishing was money well spent and even though I had to be patient for six months it was worth the wait.

I installed the movement with the correct movement ring the new pushers fit like a glove.

I mentioned earlier that I ordered a replacement Screw for the Oscillating Weight. I discovered after the initial assembly it wouldn’t thread appropriately in the bearing and since the Oscillating Weight was scarred with pitting, I replaced it as well.
Things were starting to look real good, especially after I procured a NOS Seiko crystal. I like to add steel bracelets to my watches when I can find them and this watch was calling out for one as well. Lucky for me brand new aftermarket bracelets made to the original Seiko specification can be found online for a reasonable price. I snapped one of these up as well.


As a final touch I replaced the ugly hand for the elapsed hours sub-register with an aftermarket hand which I stripped and repainted in flat off-white. It more closely resembles the minute counter hand and doesn’t stand out the way the old one did.
And thus ends the restoration of my Seiko 6138-8021 Panda. It’s come a long way from the scratched and abused timepiece pictured at the top of the page. I love this watch and have worn it every day since the day I finished up the service (although I will admit I cringe at the thought of adding a scratch or ding to it). I’ve been pleased with the timekeeping too as it’s just a minute off after three days of wear.
It has a special feel to it with it’s beautifully restored lines, new dial, and brand new bracelet. It’s almost feels like a new watch, although I must admit I have yet to purchase a new mechanical watch! Under the loupe warts are apparent but on the wrist it’s just perfect.


Excellent work Mr Moeller. Good to see some more of your work after a bit of a break. Just a note on the bent pushers. This is not uncommon in well worn 6138/9s and doesn’t necessarily result from an incorrect movement ring. The bent tips can easily be straightened with needle nosed pliers if you want to put the original pushers back in at any time.
LikeLike
Well thats nice to know- I should still have the original pushers around here somewhere (I never throw parts away) and the replacement pushers are a little tall. I think I might go for salvaging the originals!
LikeLike