

A couple of years ago when I first got into this watchmaking thing I wanted to share my hobby with the family and figured giving my father and brother a good watch for Christmas was a capital idea. Fast forward to Christmas Eve and my father had a finely refurbished Seiko 7002-7000 and my brother had the empty case of a 7002-700J- it would take another couple of weeks for the movement to be ready!
I learned a valuable lesson from that experience and am now careful about what I purchase from the watch chop-shops of India. In the end my brother was quite pleased with his Seiko although about a year later he informed me it was running a slow; no problem, service for family members is free of charge! Sadly, the watch was lost (stolen) before he could drop it off.
My brother works in an industry that requires precision, skill, technical expertise, and the ability to fit your hands into small work spaces unencumbered. One day he found the job was done better sans wristwatch and removed it to complete the task. Alas, he forgot about it by the end of his shift and returned the next day to find the watch missing from his workspace.
Learning of his misfortune I set about finding a replacement and happened upon a Seiko Bellmatic from 1968 that fit the bill. Now, I’ve wanted to get my hands on a Bellmatic for quite a while but have always found the asking price to be just north of what I budget. In fact, I had originally set out to get my brother a Bellmatic before choosing the 7002 diver when it became apparent that I would never find one before Christmas.
So fortune favored me when this Bellmatic popped up on “the Bay” with a major issue that sent buyers running for the hills. With a low asking price and a bit of eBay credit in my pocket, this purchase was a no-brainer. I closed the deal, cashed my credit, and was the proud owner of a 1968 Seiko Bellmatic 4006-7020- for just under twelve dollars out of pocket.

This purchase wasn’t without it’s risks though. Firstly, the elephant in the room- the dial is upside down. This is a problem I’ve encountered before and it’s a bear to fix. The Dial Feet, which are small copper legs that are soldered to the back of the dial, have fallen off and that means the dial can no longer be secured to the watch movement. The feet will need to be replaced and getting them soldered in just the right spot is enormously difficult.
Next there was an issue with the hands. The seller stated the hands were loose and would move about depending on the position of the watch. This could simply mean the hands were loose, but may also mean the Hour Wheel or Cannon Pinion was damaged- either of which can be a costly fix. Of course it could be that the hands were secured properly but they appeared to be moving when measured against the dial which was free to rotate in the case.
Despite this, I was excited to take possession of this piece for a few reasons- firstly, it’s a Bellmatic, which in Seiko’s nomenclature means the watch has an automatic movement with an alarm complication. Secondly, my brother recovered his 7002 diver just a few days before I finalized the sale; he lost it in California and “found” it in Texas (an interesting story) and that meant this piece would stay in my collection. And lastly, I get to fix it.
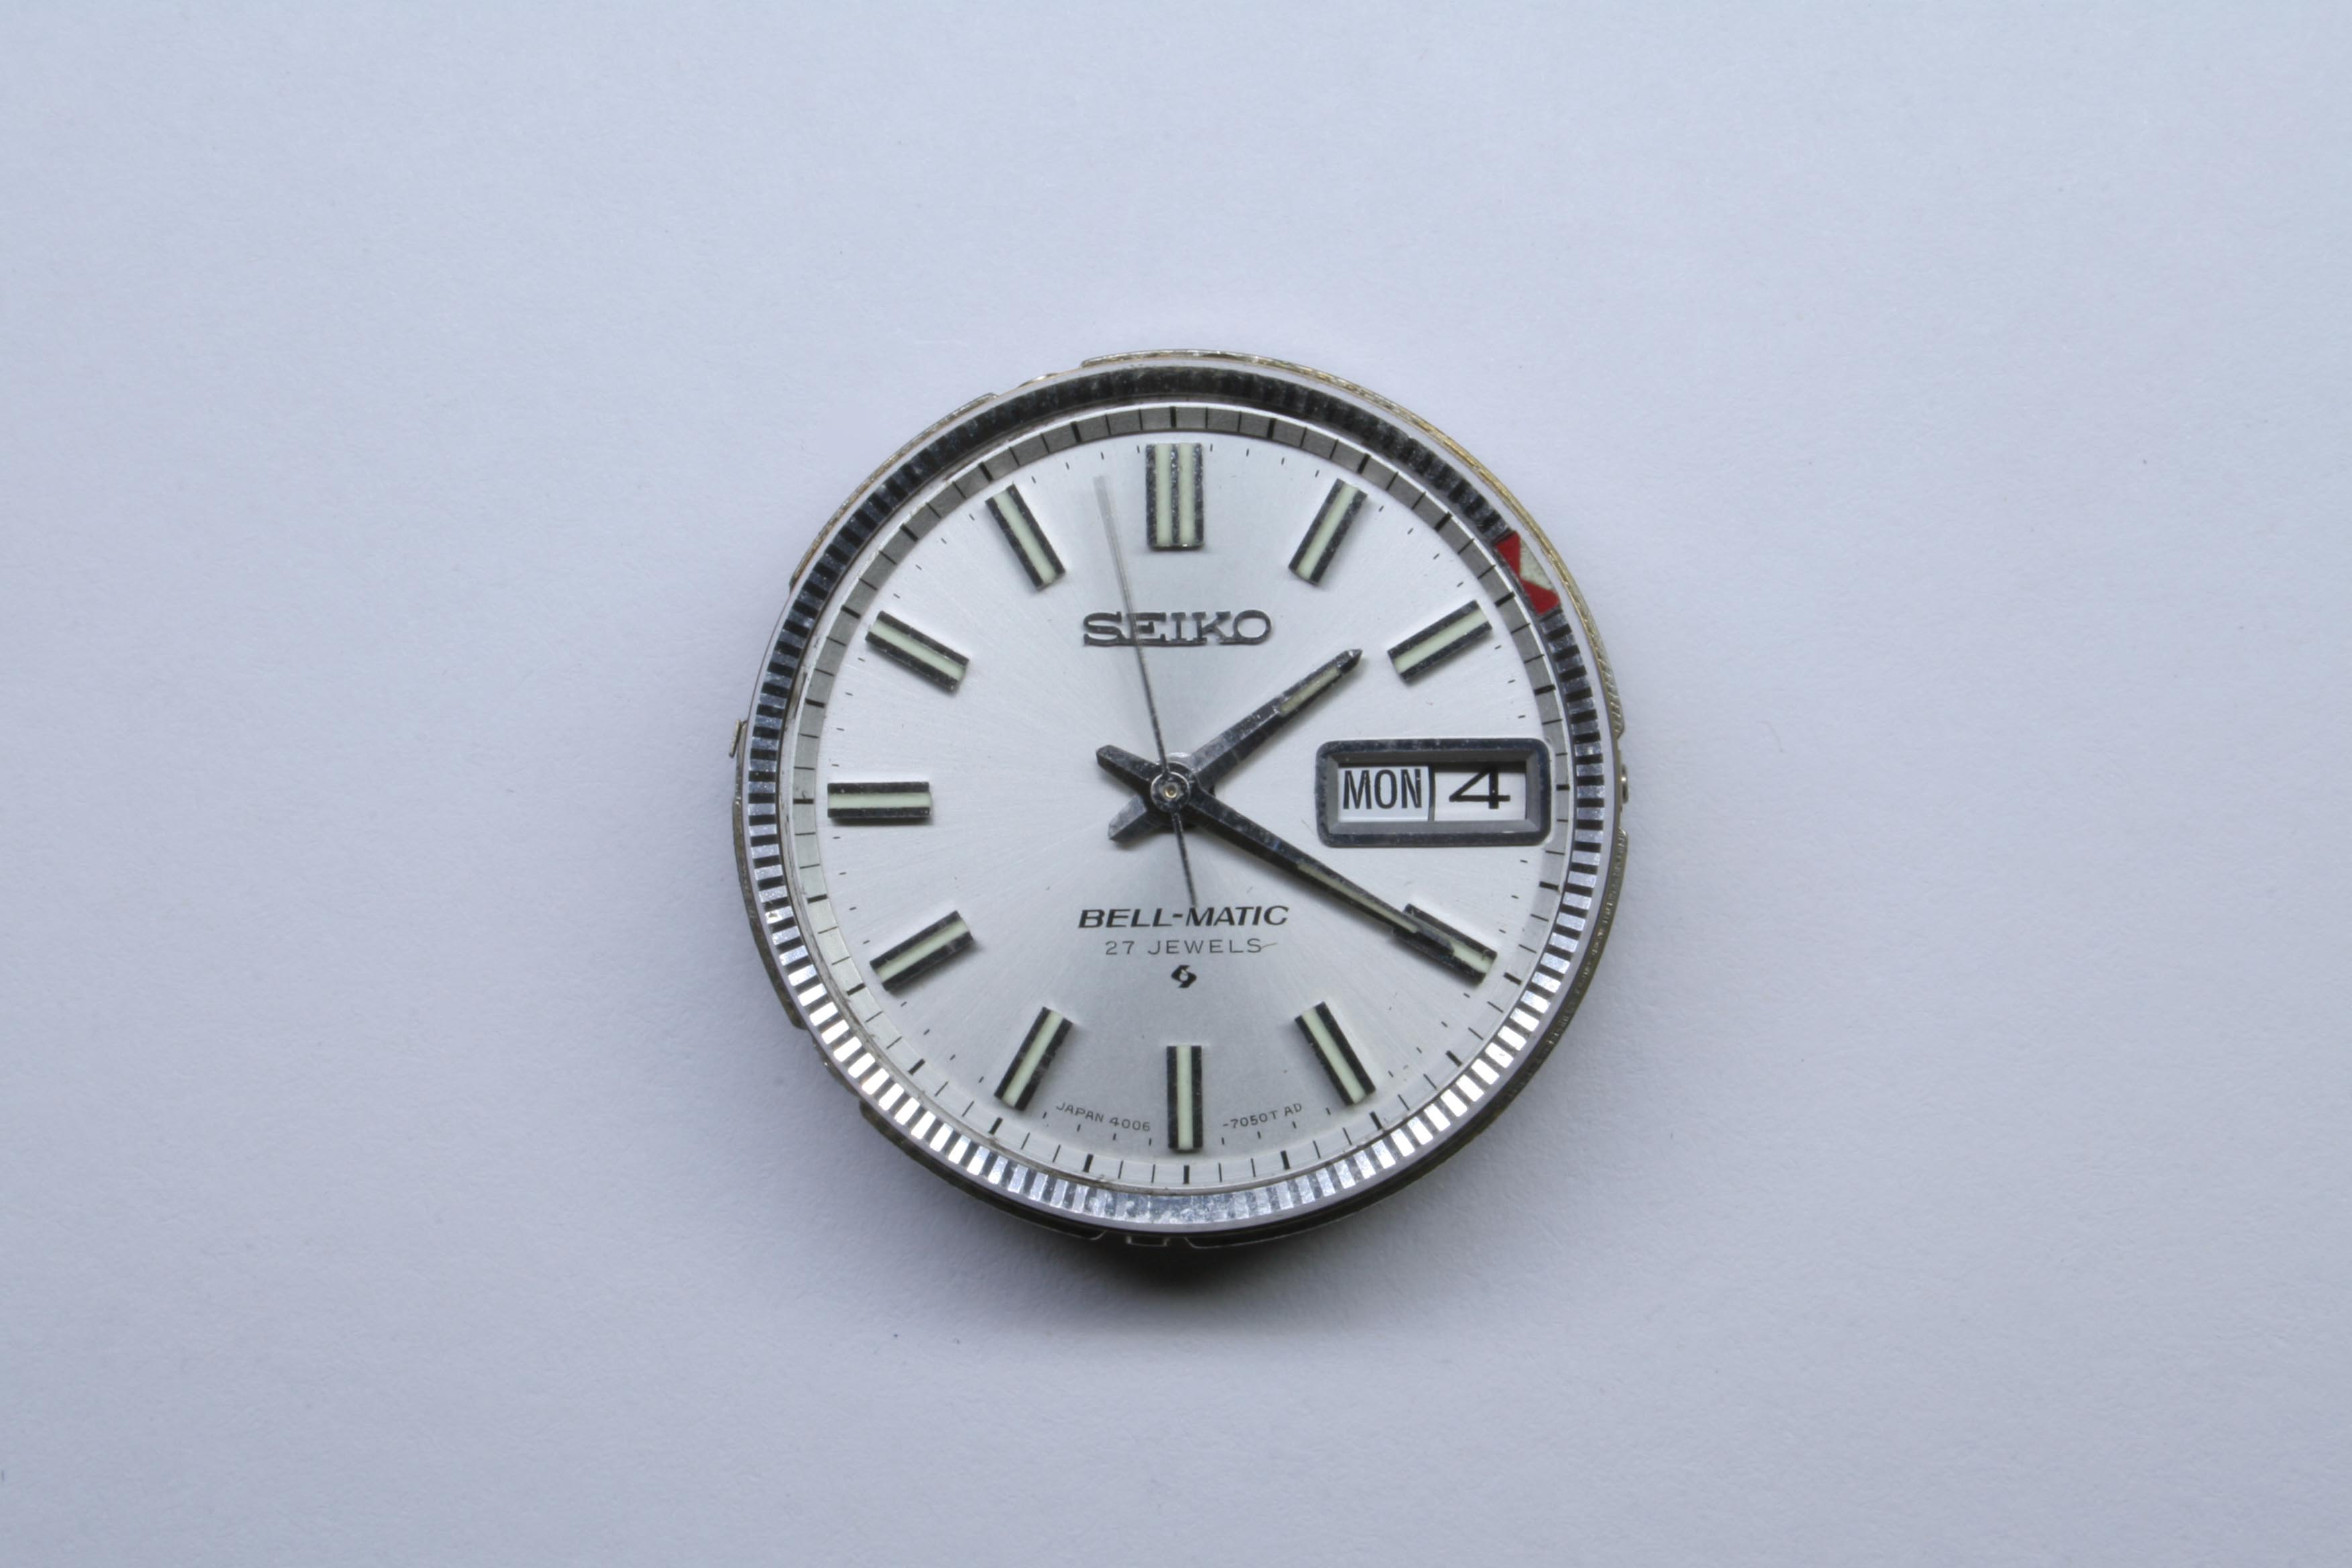
There were some positives to be found in the condition of the watch too. Although the dial was askew it appeared to be almost unblemished which is impressive for a watch of its age. The crystal was a mess but it was a proper Seiko crystal and appeared to be original to the piece, this means the watch probably had only one owner and not many hands have tinkered with it. Everything else I could see also appeared original which would classify this watch as a “Barn Find”.
Any doubts I may have had were put to rest when I opened the Caseback and gazed upon the movement. It was in splendid condition and smelled powerfully of rancid oil. That oil had to be original- the sour aroma would take fifty years of aging to perfect.

I pulled the Crown, Stem, and Bell Button to release the movement from the case. As I had hoped the dial was just about perfect.
I had to hold my nose while pulling the movement down but other than the smell there was not much to complain about.
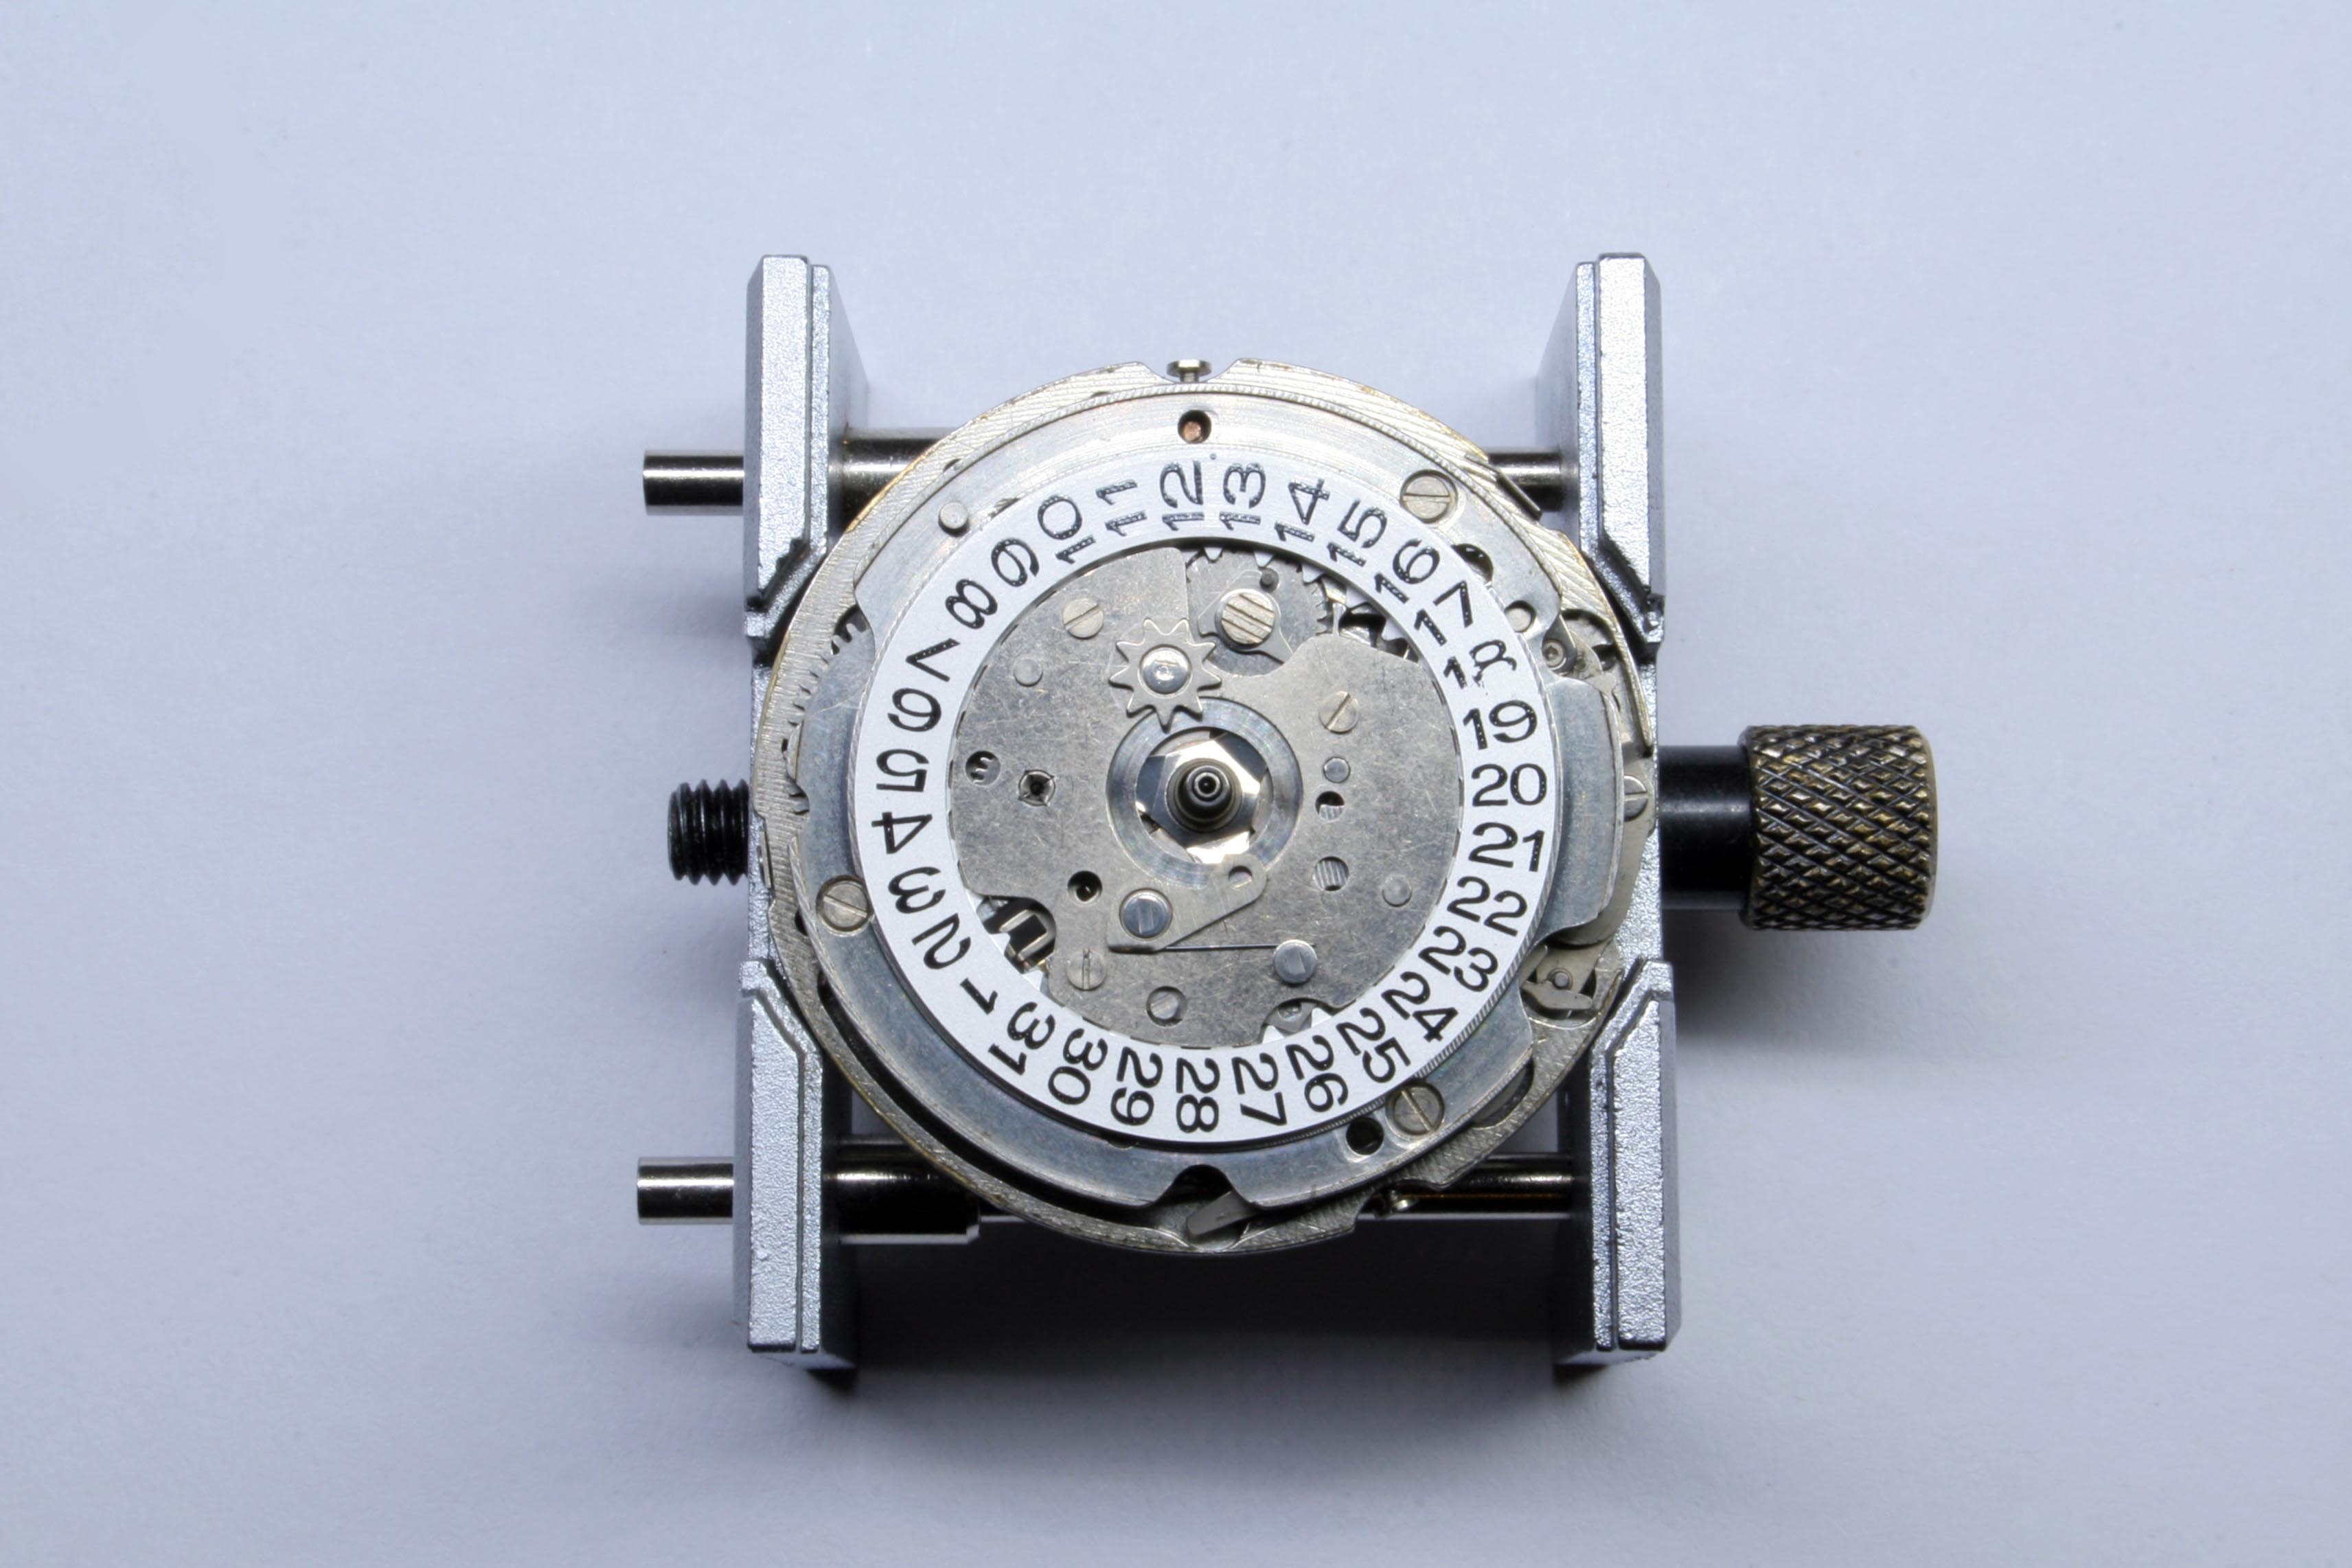
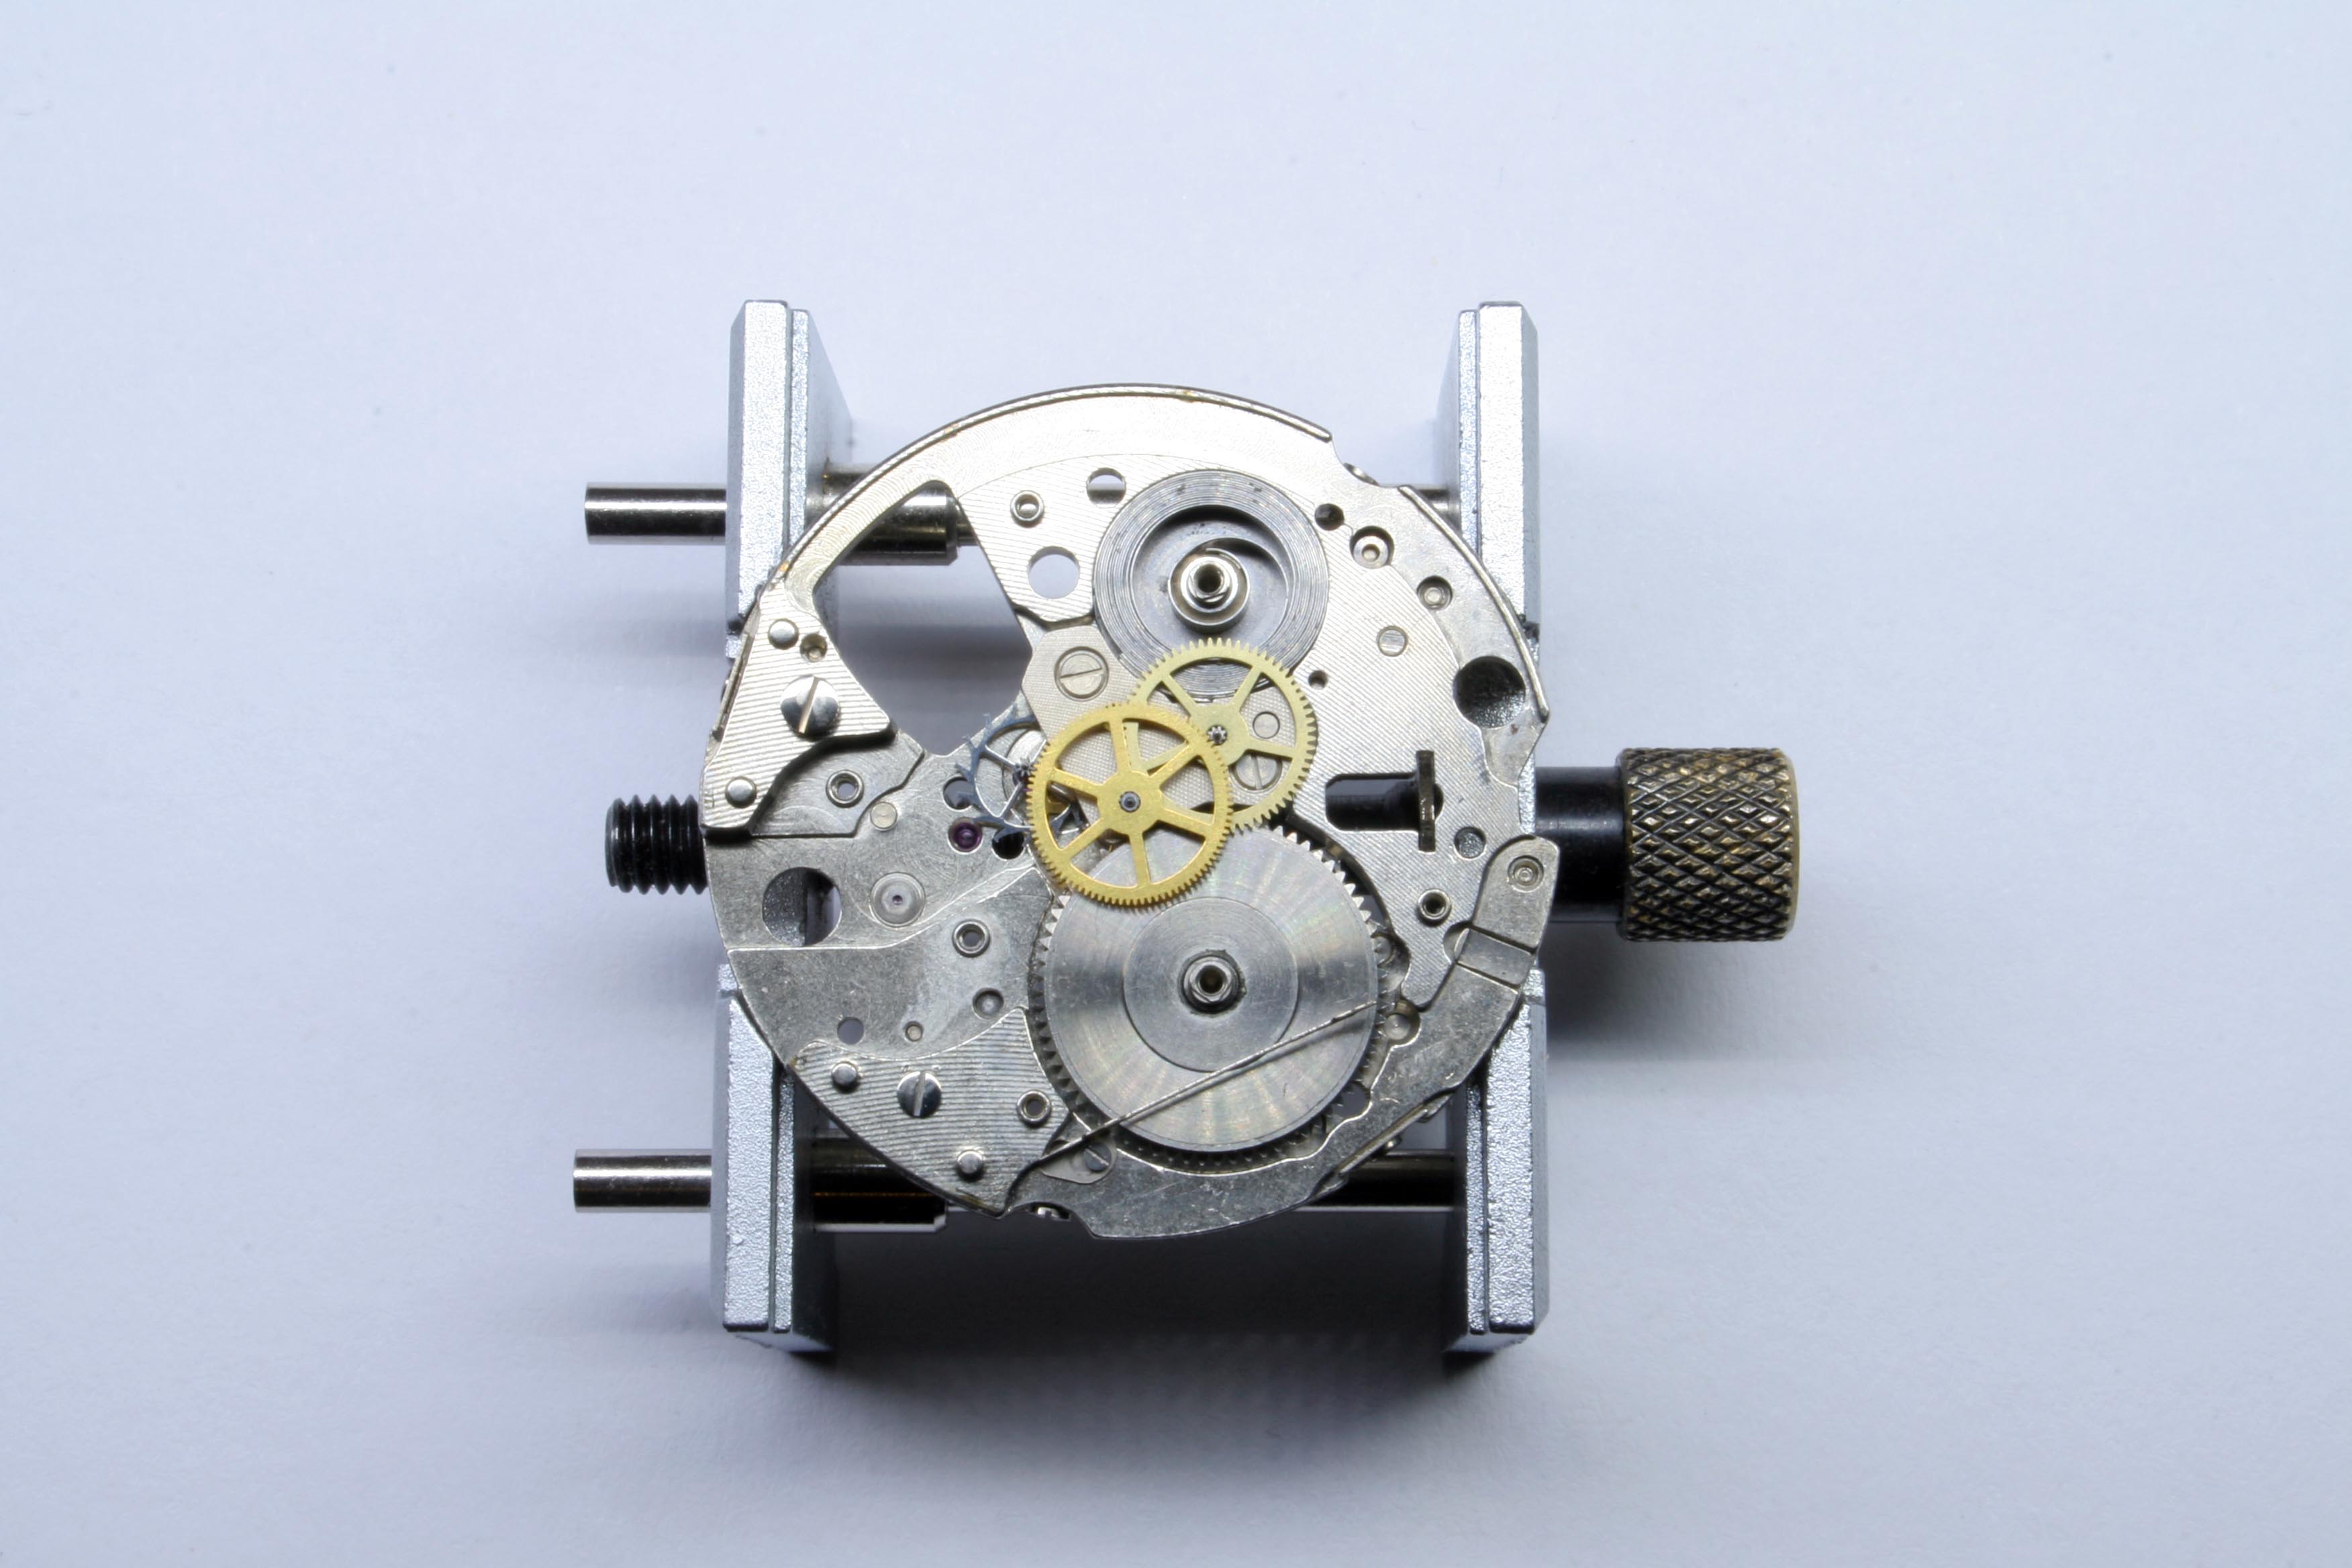
The calendar works are pretty standard across each Seiko line; the interesting stuff happens below the Calendar Plate on the 4006A movement- you can see it gets quite complicated.

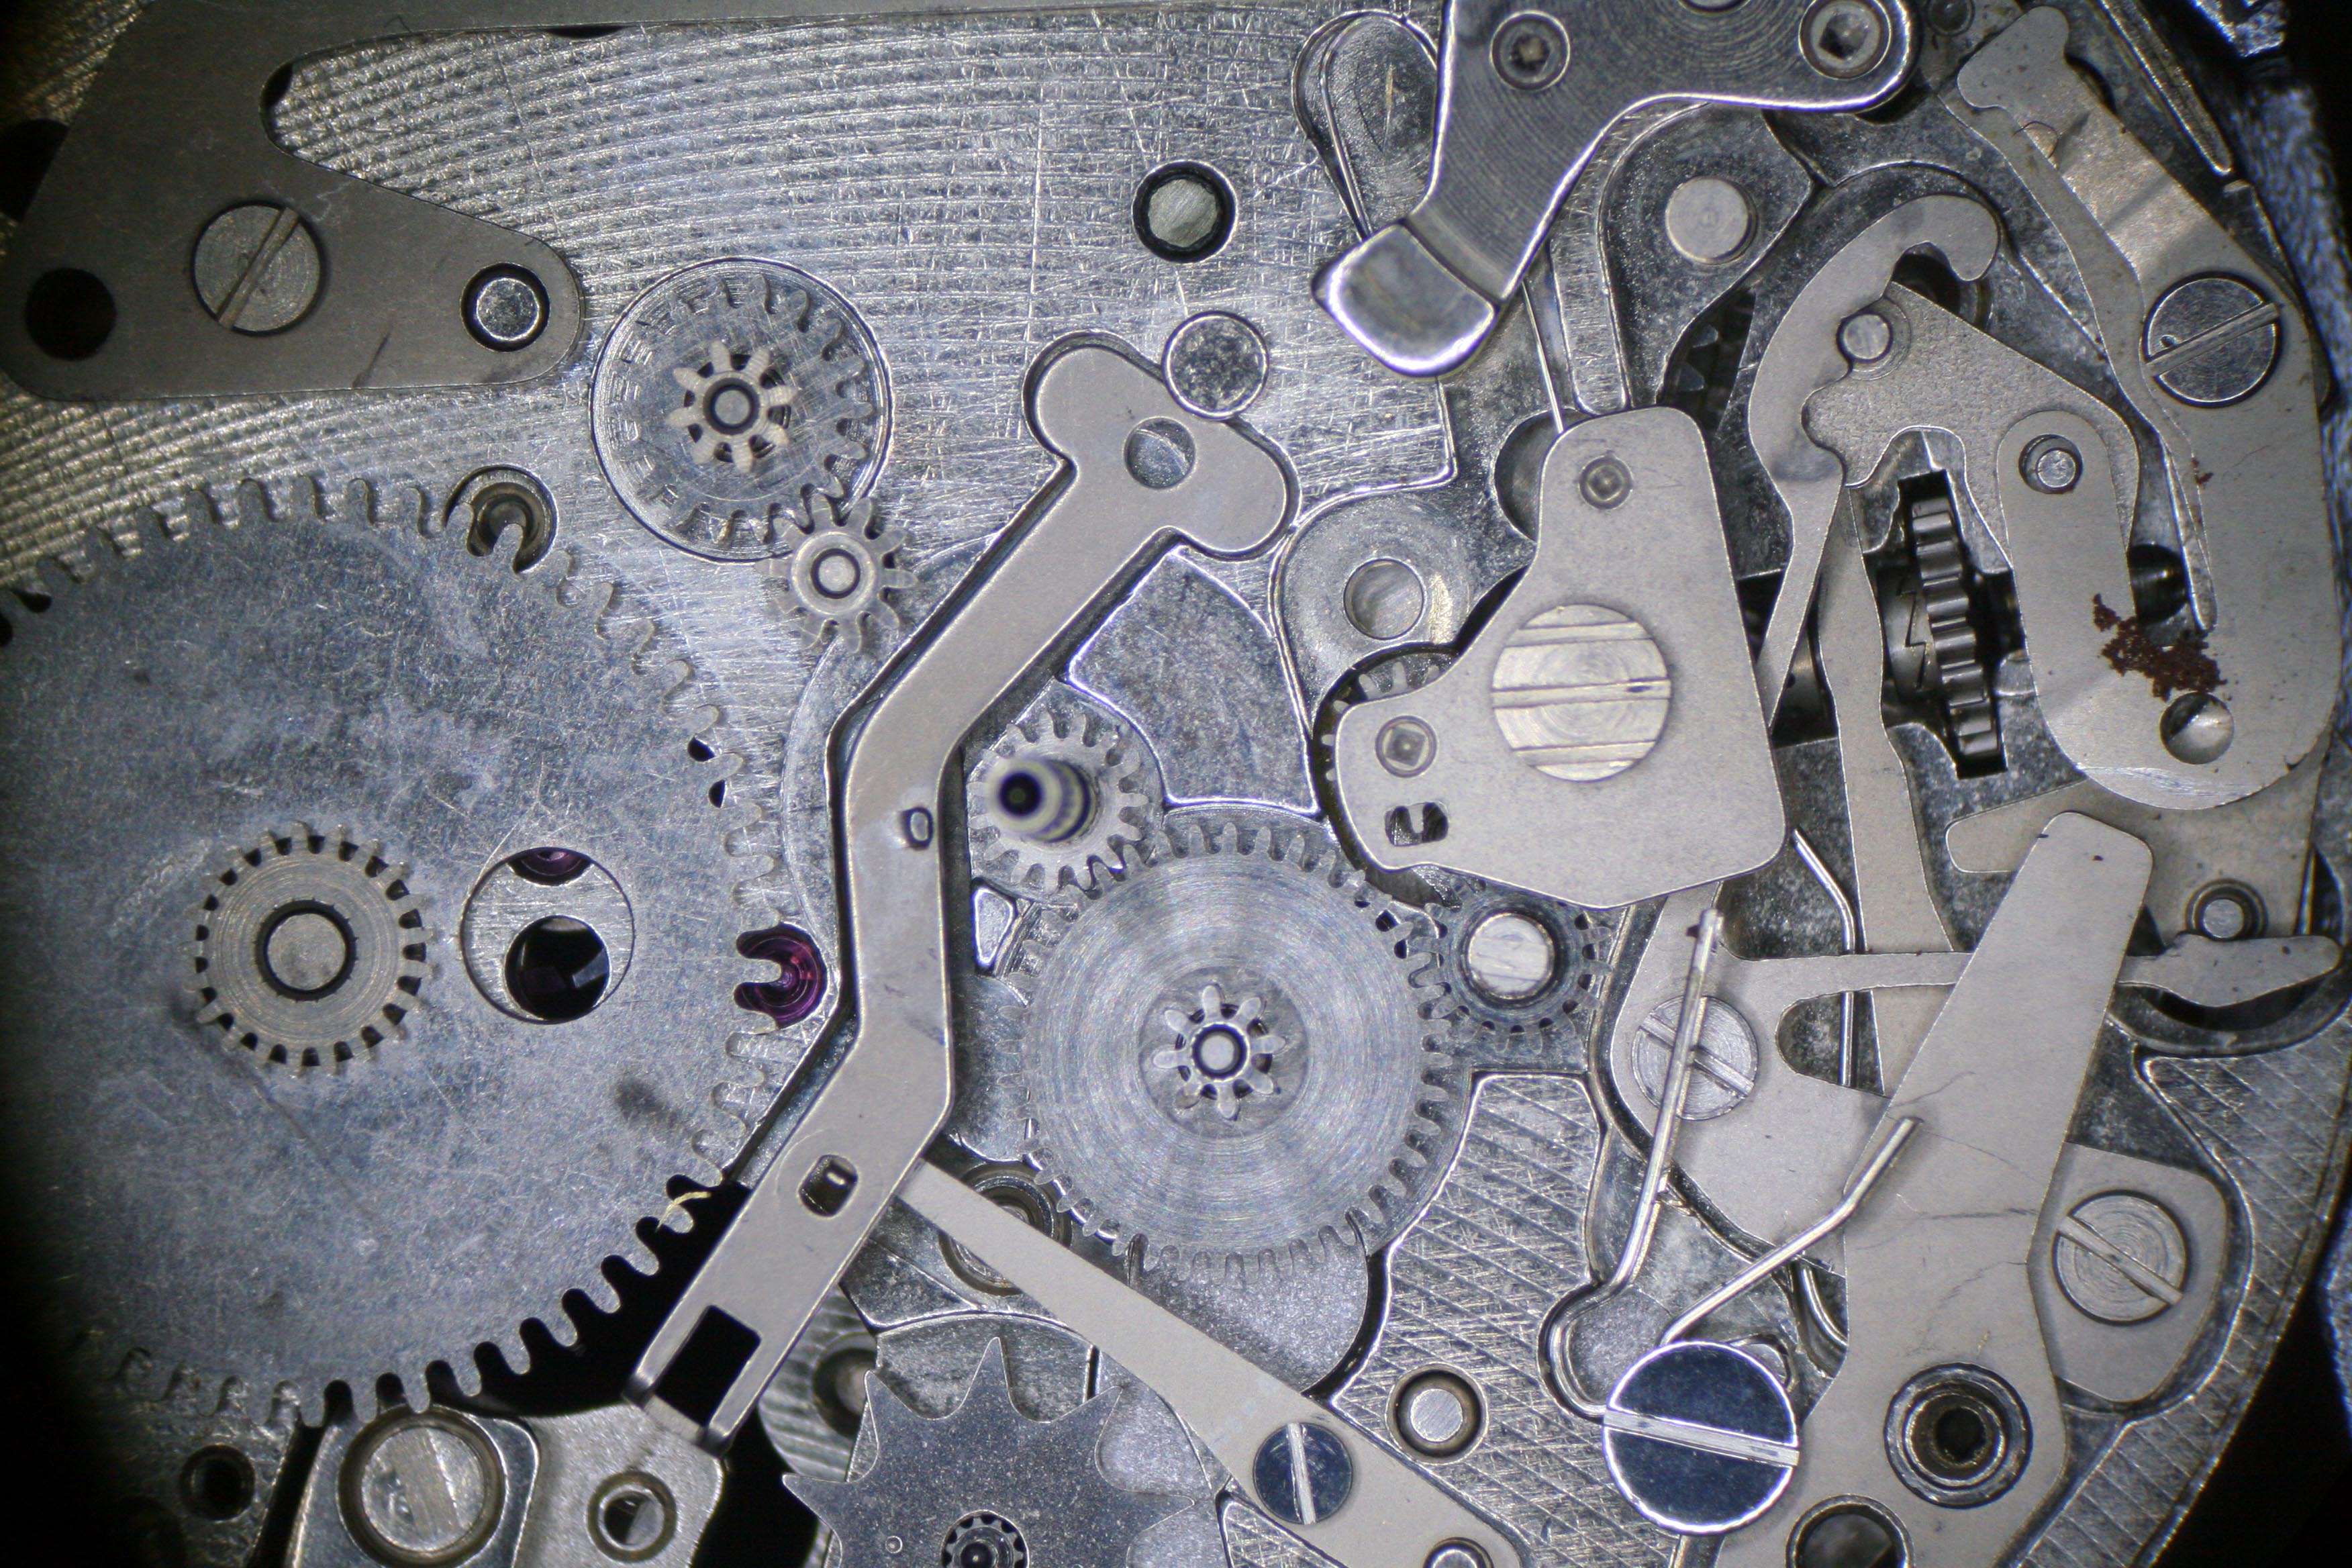
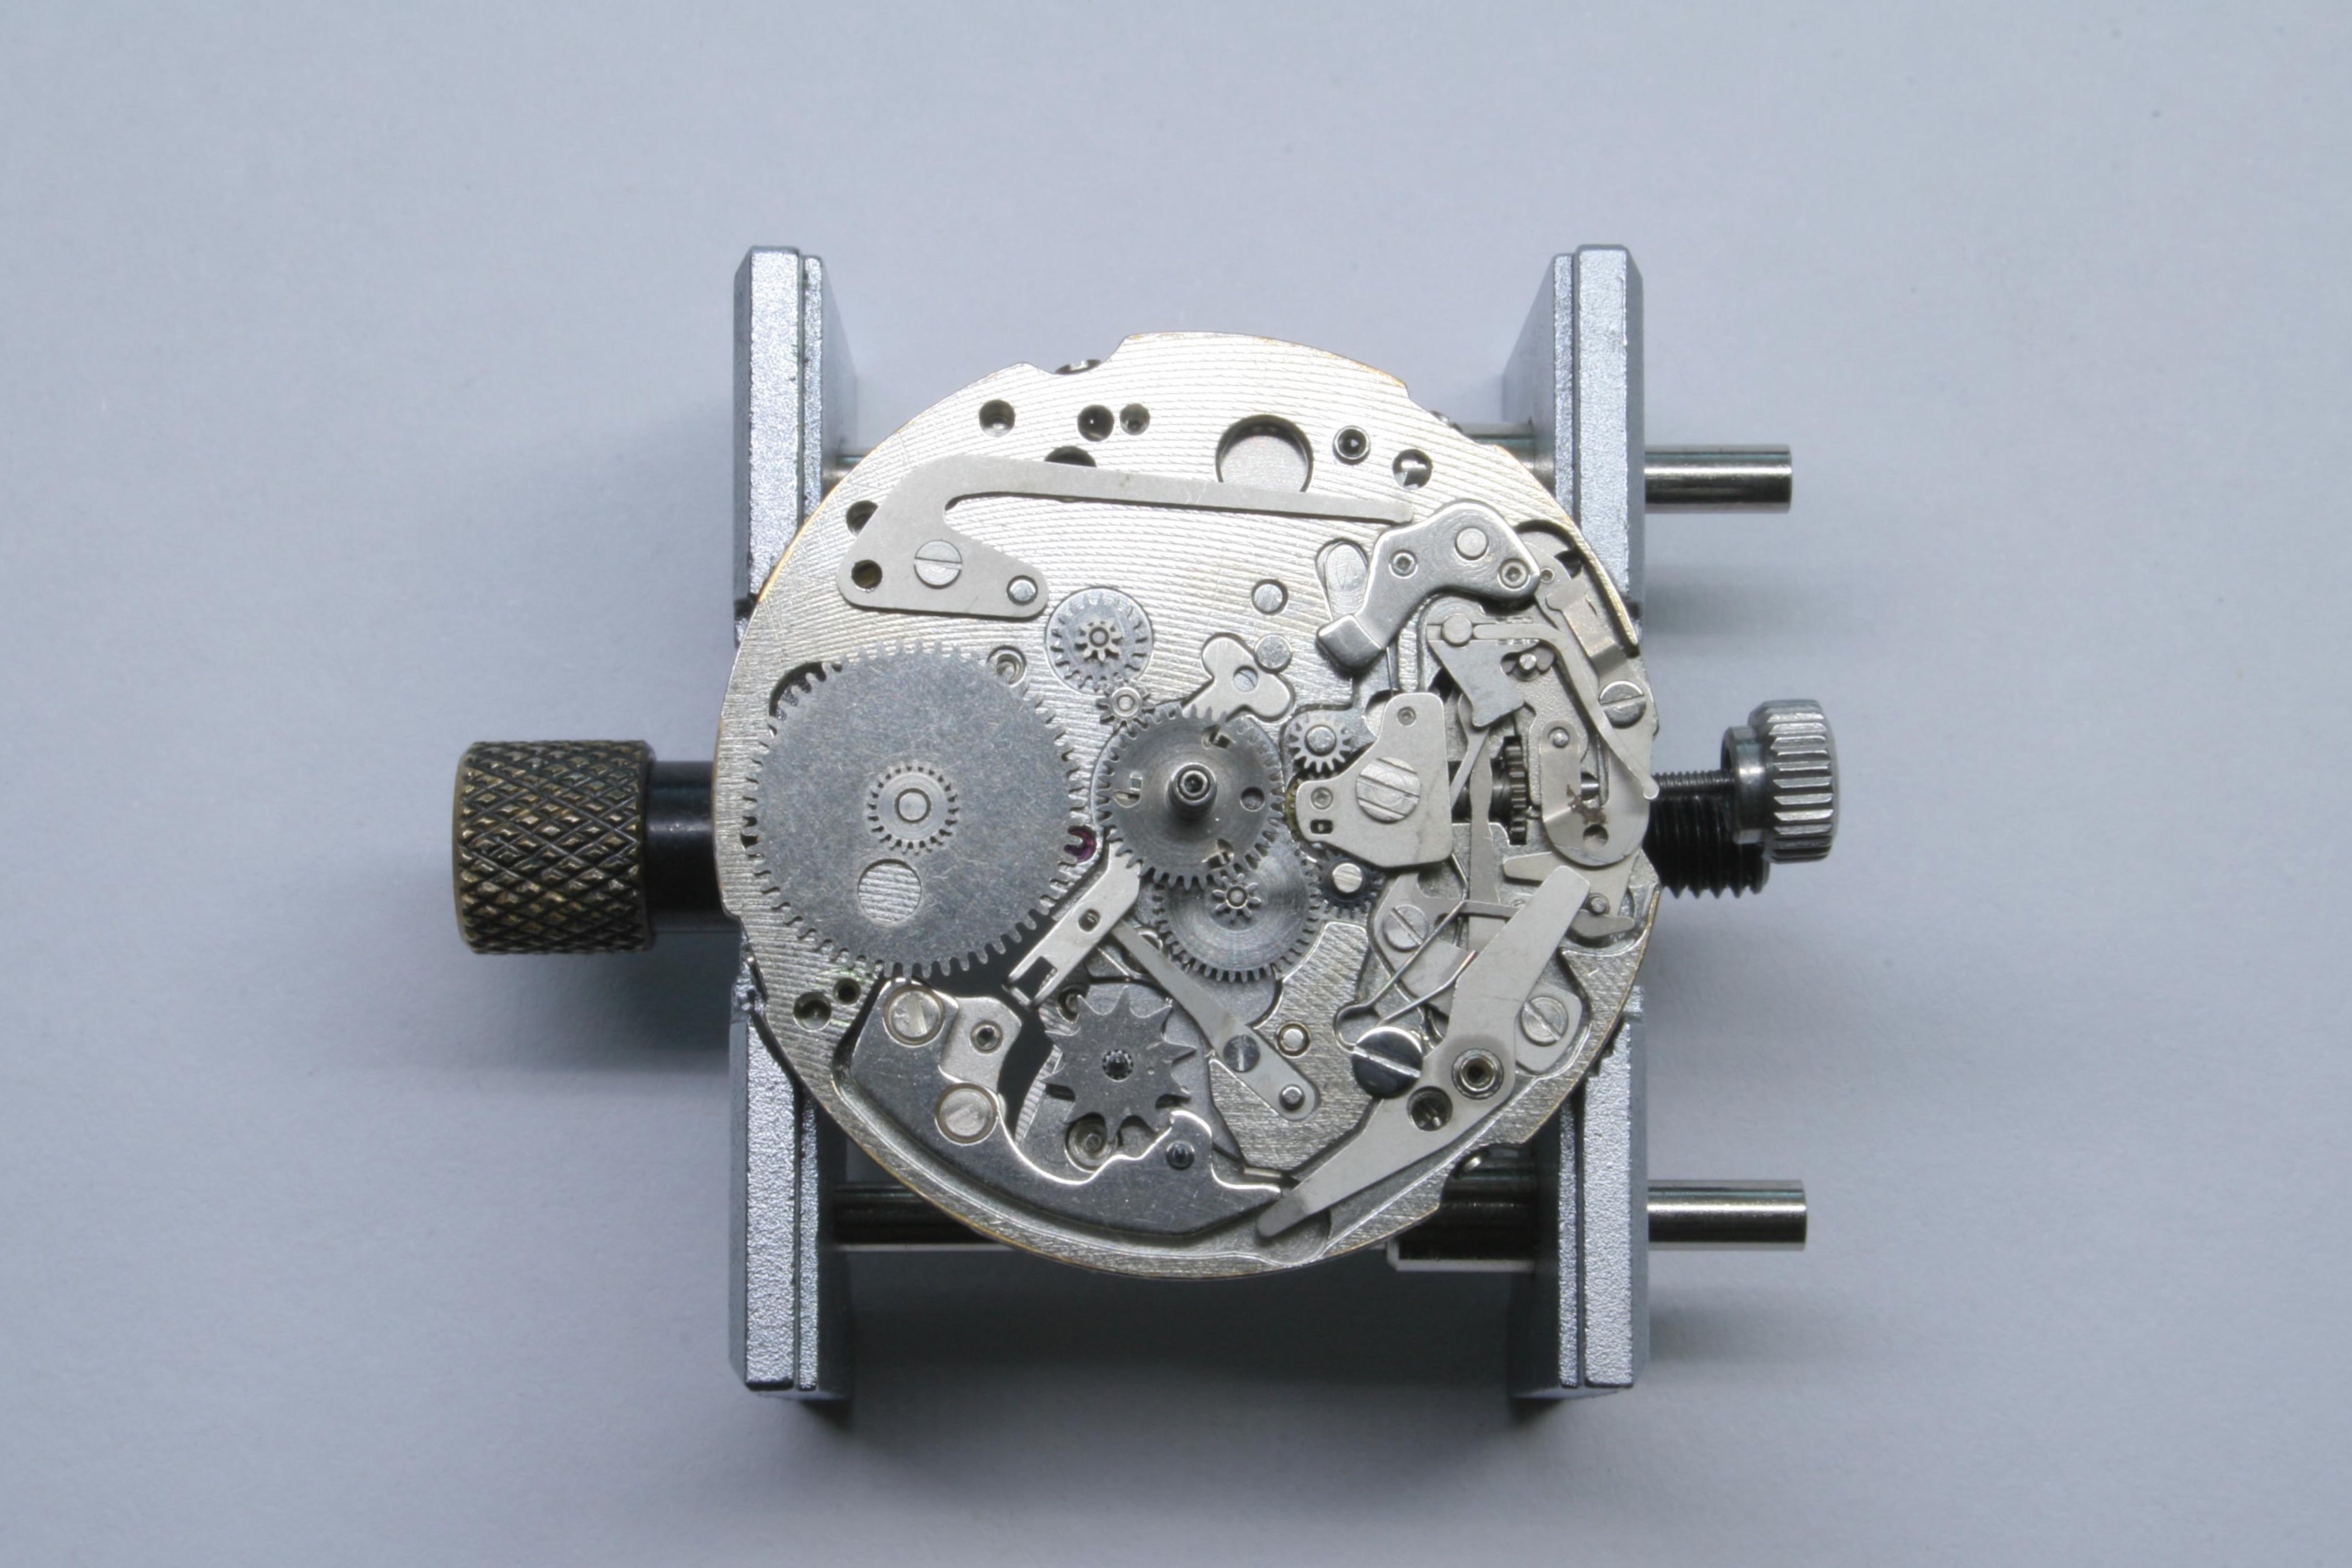
I won’t get into too much detail trying to explain how the alarm works other than to point out the Hammer for the alarm mechanism in the photo above. The star shaped wheel is the Alarm Wheel which acts upon the Hammer when the alarm is activated. As the Alarm Wheel rotates, the points of the star come in contact with the Hammer which in turn contacts the Sounding Spring.
The alarm mechanism is powered by a second Mainspring which is manually wound. The Crown has three positions- in the first position the Crown will wind the Alarm Mainspring. Pulled out to the second position, the alarm can be set. Pulled to the third position, the time is set.
A service guide is published by Seiko and available in a Portable Document Format (PDF). It’s important to have this when working on a movement with so many parts as you want make sure you get the oil and grease in just the right spots and also account for all the pieces in the movement. I relied on the guide during assembly but also on my detailed photographs taken during disassembly.

While the dial side of the movement is quite complicated, the topside is more or less generic Seiko. Topside, the first bit to come off was the automatic works. The Oscillating Weight was removed while the movement was still in the case, the Automatic Bridge came off next. Seiko designed their own automatic winding system which is called “Magic Lever”. It is extremely simple (see video here), requiring just a few parts to operate.

Once I had removed the automatic works, I gave the Mainspring a wind and checked the beat on the Timegrapher. Although it had life, it registered no time keeping ability. I can’t say I expected much more though as the watch clearly hadn’t been serviced in ages. At least the Going Train was free and the Balance Wheel moved as it should.


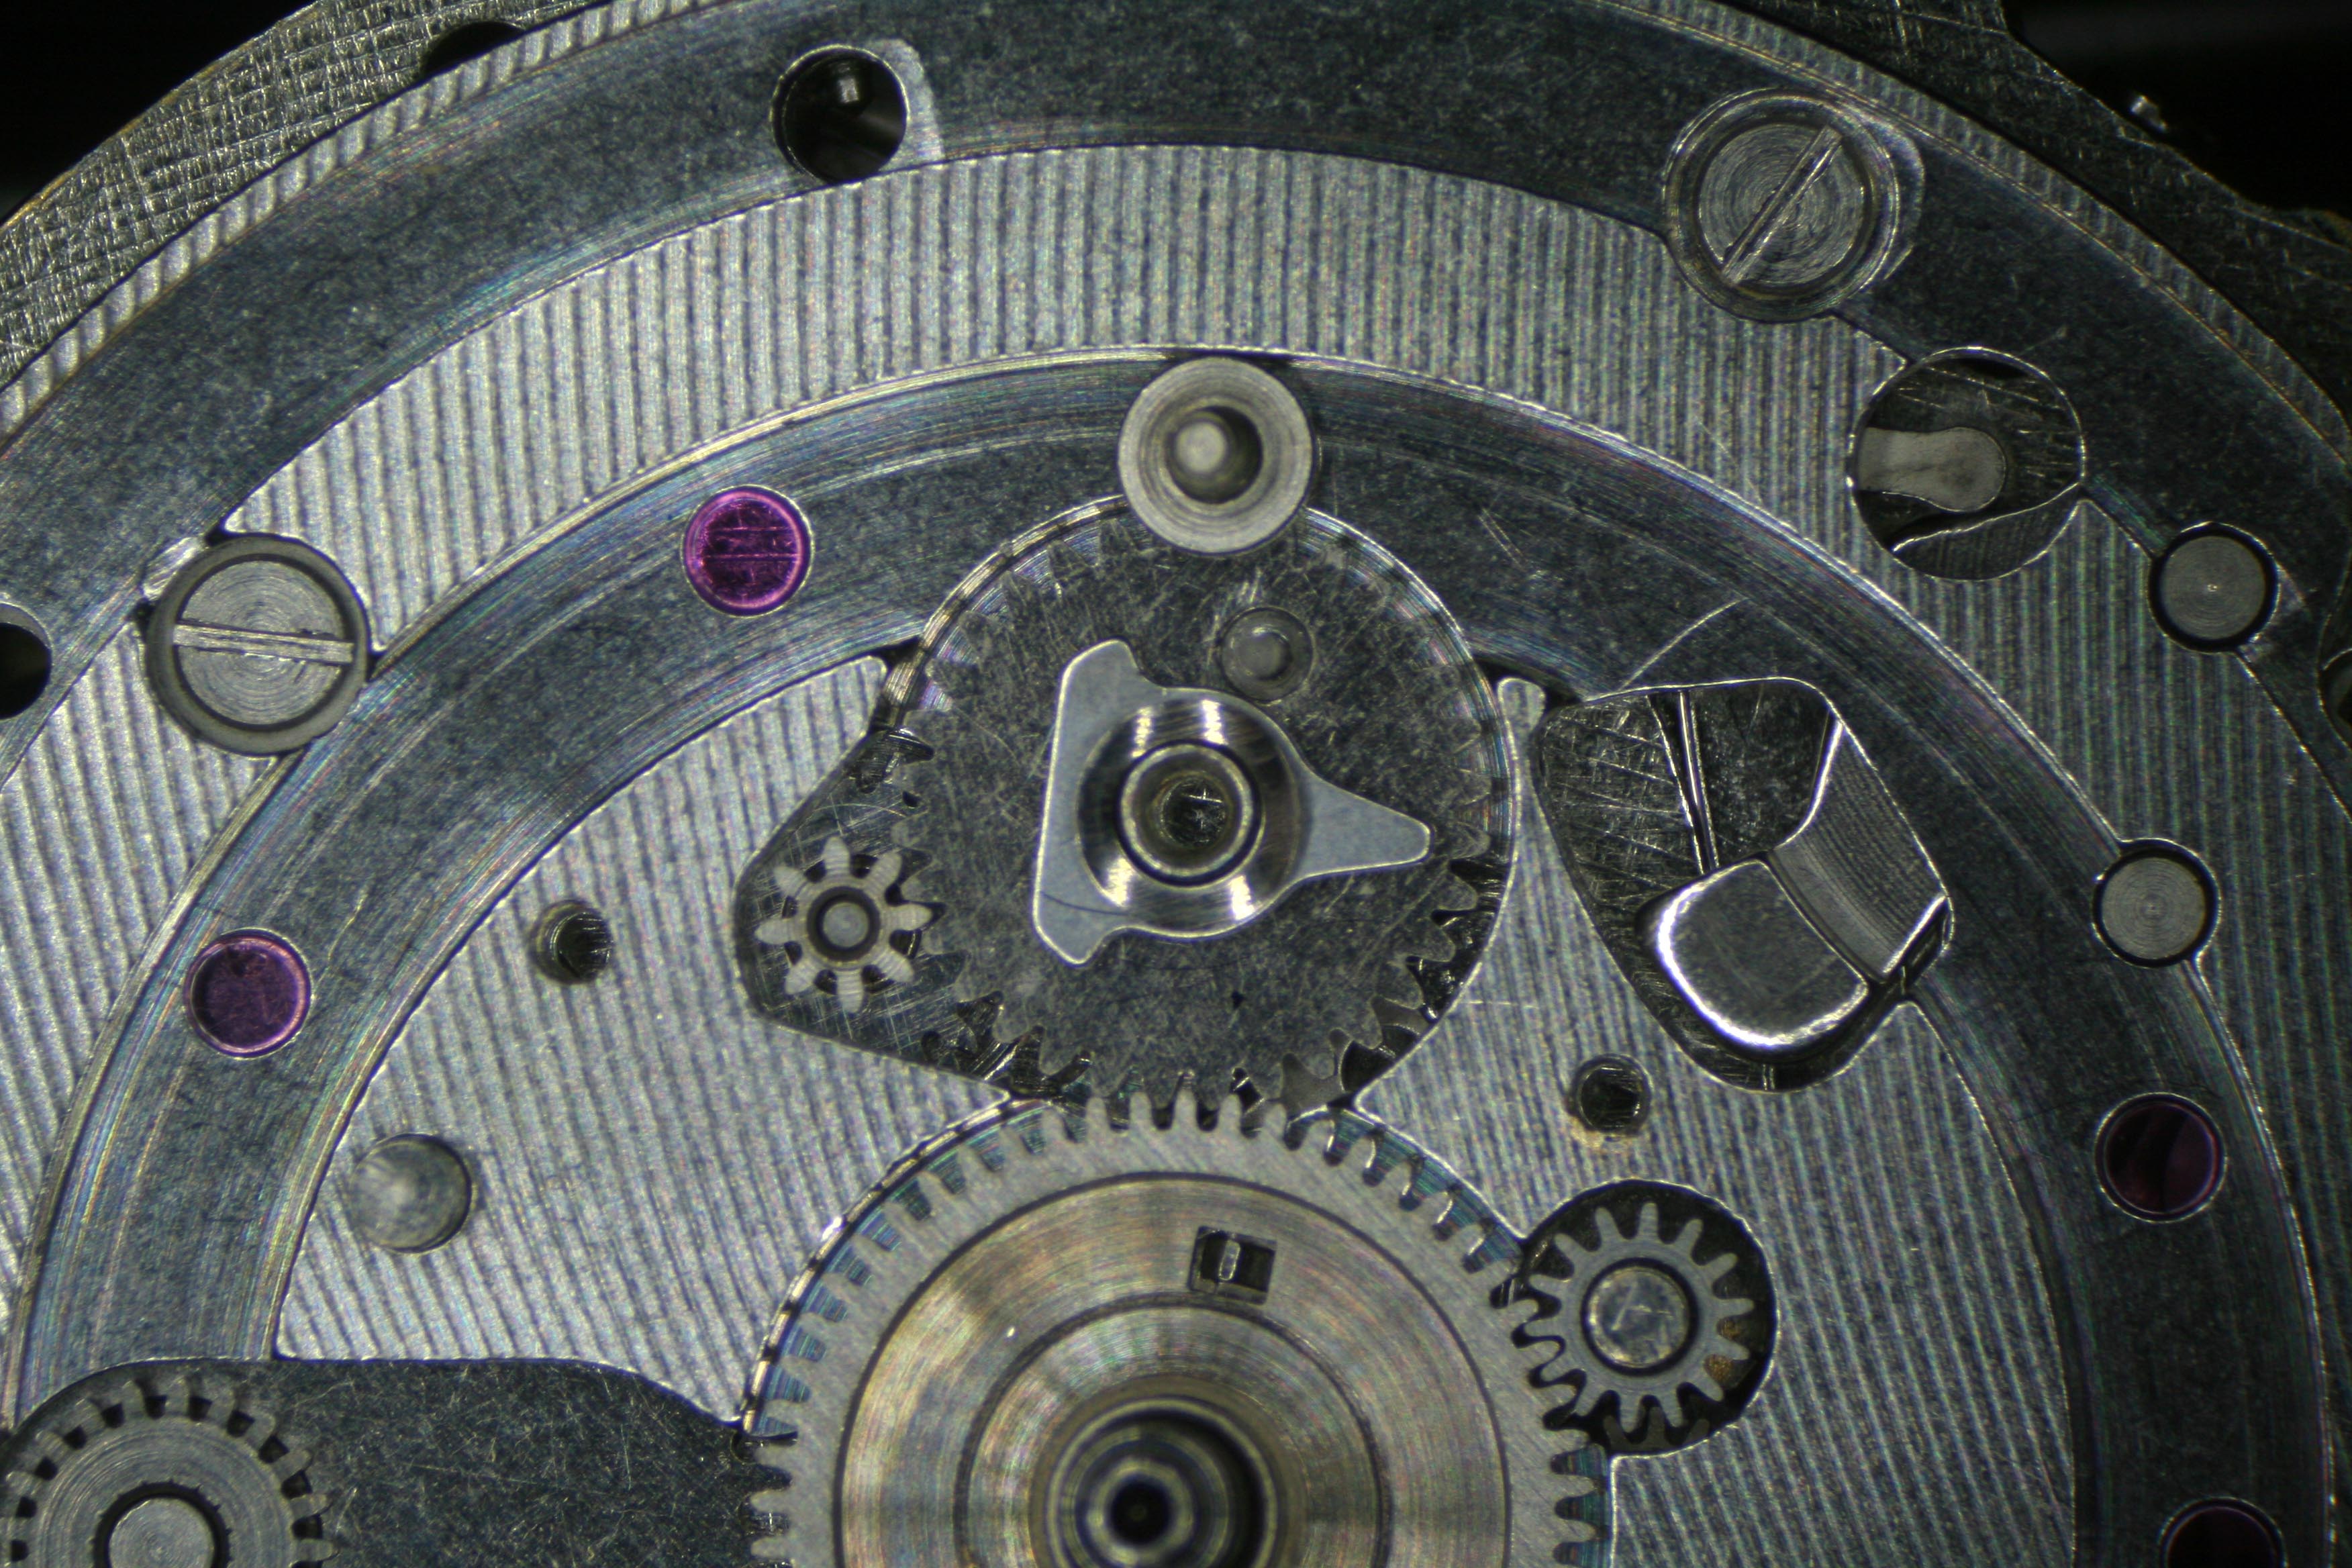
This particular Bellmatic is the earlier 27 jewel version. Seiko produced this version for a while before reducing the jewel count to 21 and later to 17. As I took the movement down I troubled myself with finding the locations of the extra jewels Seiko had installed. I found several beneath the Date Wheel which were placed there to reduce the drag on the wheel (it glides across the jewels instead of gliding across the Calendar Plate). I found a jewel for each Mainspring too. These are quite large jewels and more expensive to source than the smaller jewels used throughout the Going Train. The Mainsprings produce a lot of torque and jeweling them will make the movement last quite a bit longer as brass bearings would lose their form over time.


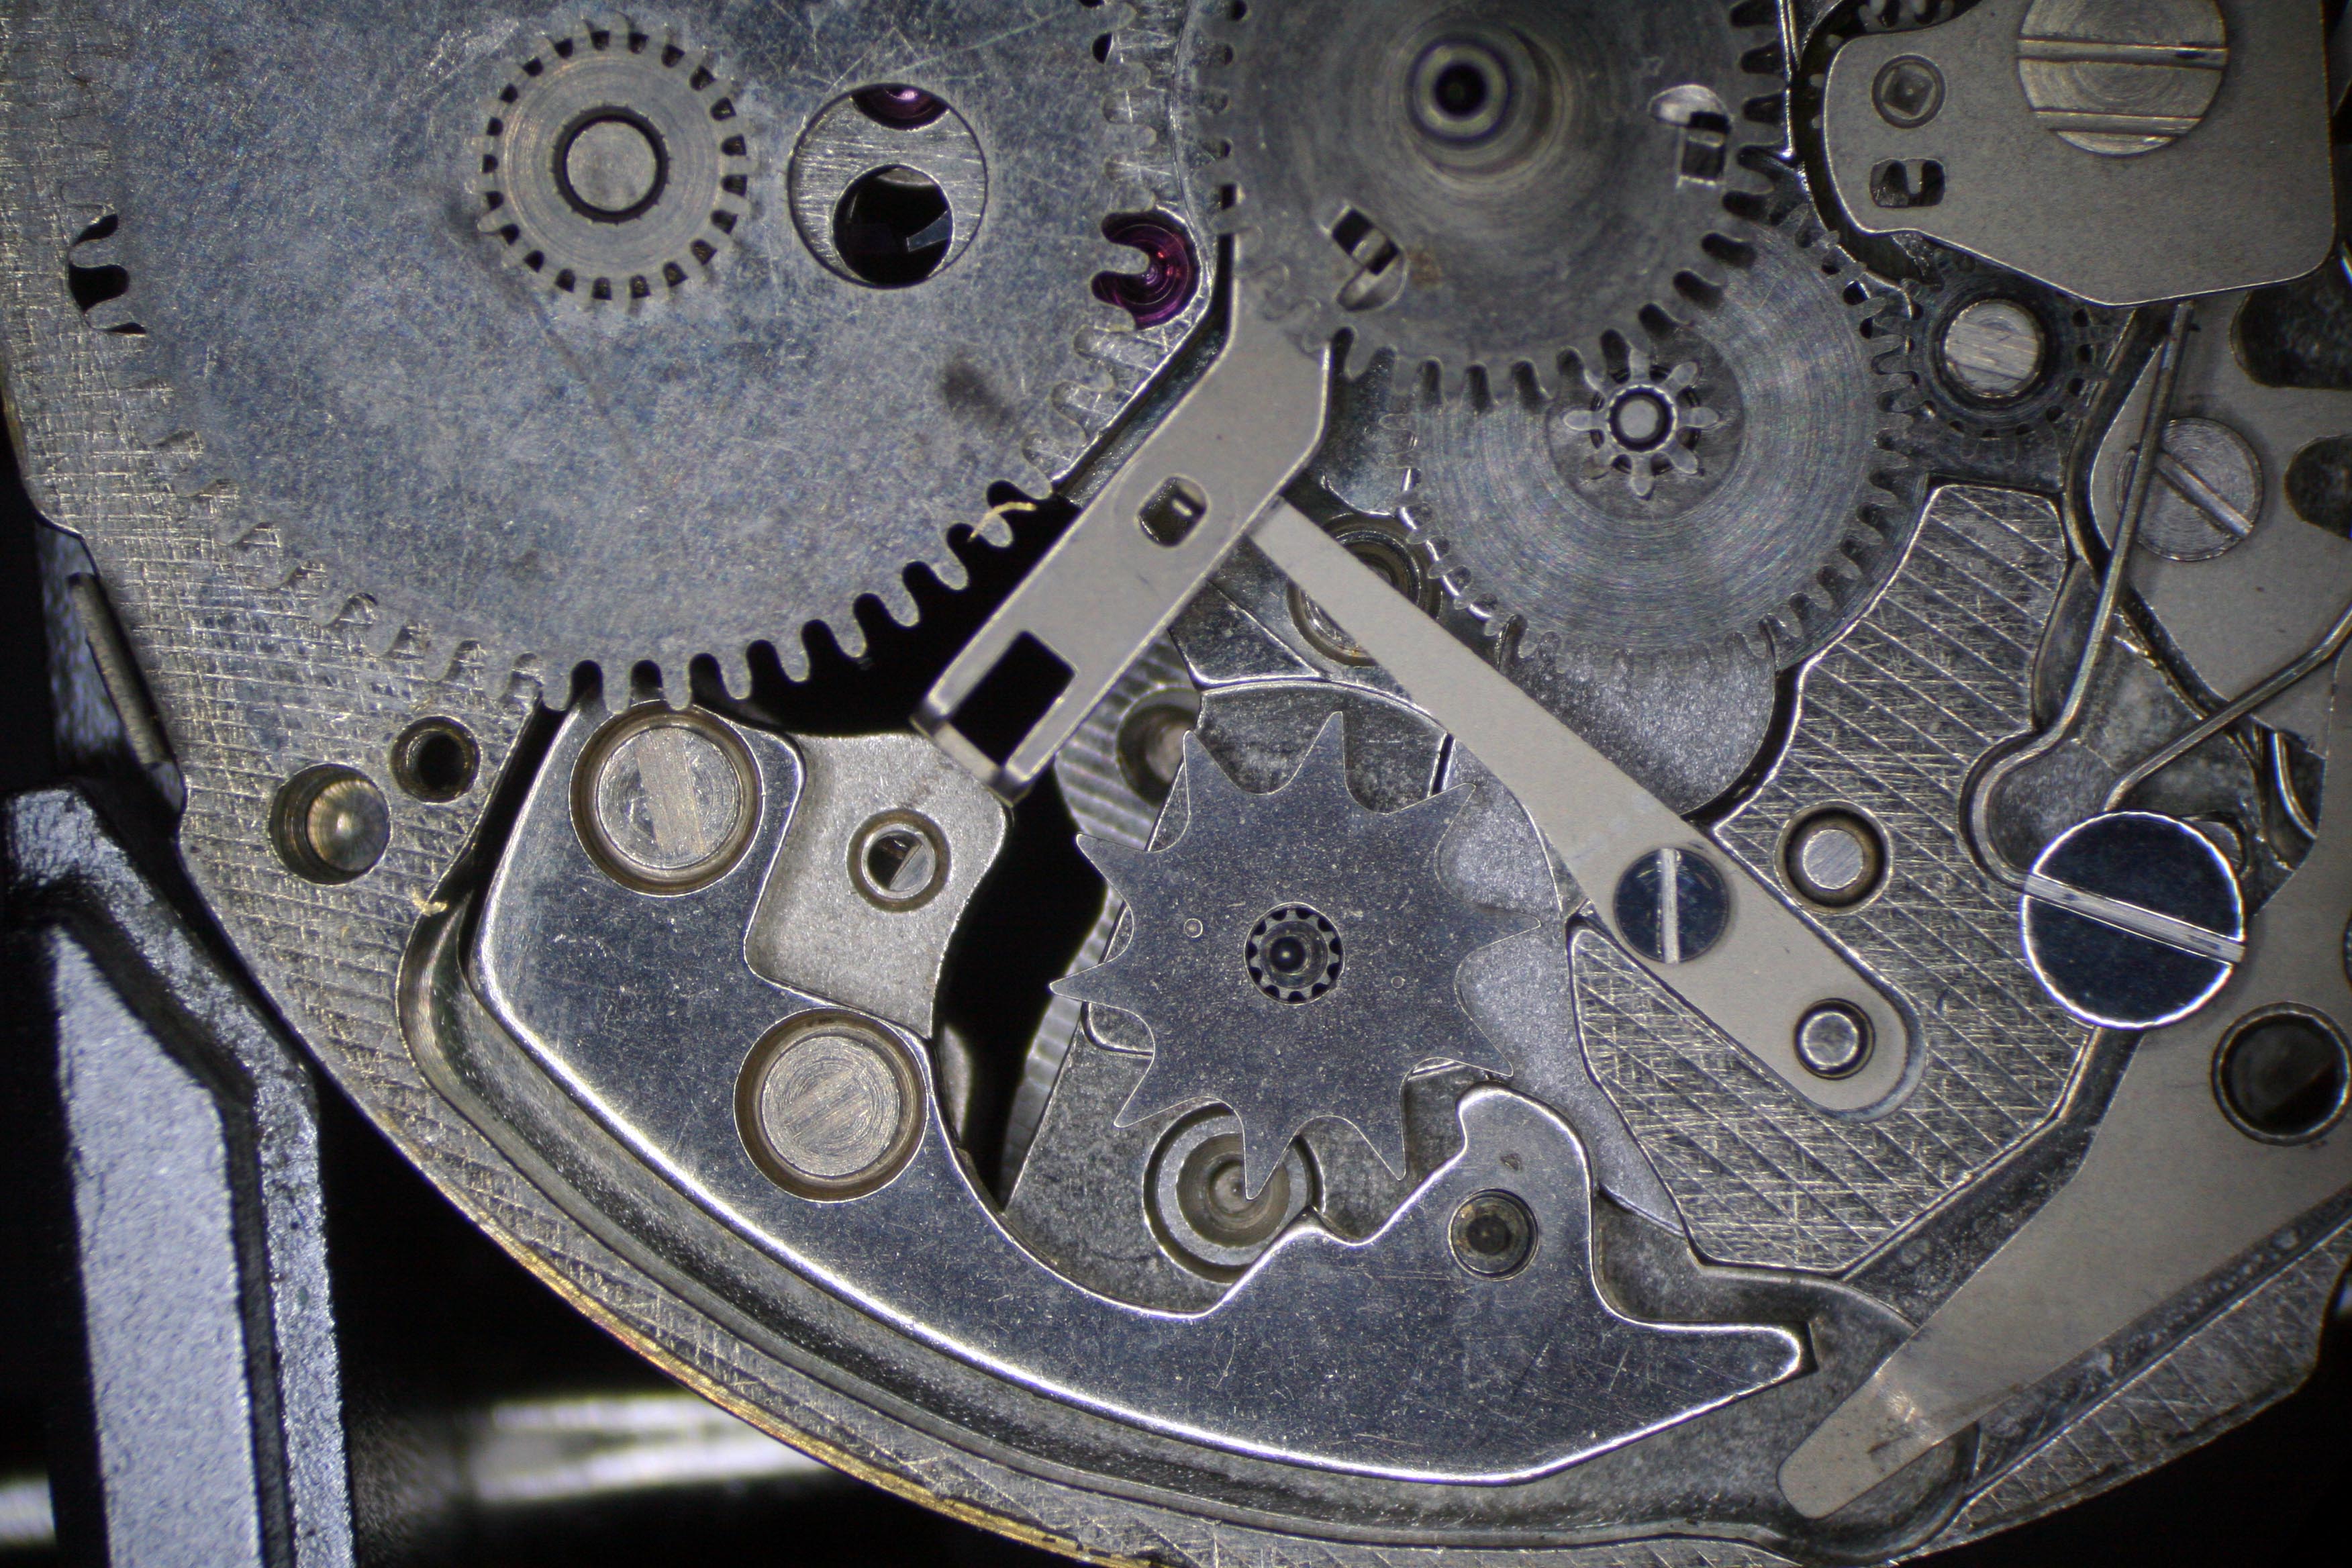
I removed the Barrel Bridge to reveal both Mainsprings in the movement. The movement is powered by the Mainspring Barrel which is wound automatically by the Oscillating Weight. The smaller Alarm Mainspring is wound manually with the Crown; this Mainspring is not packed into a Barrel but instead resides in a cutout on the Mainplate.
Once completely disassembled, I packed the movement into my trusty L&R cleaning machine only to have it suffer an electrical fault. I rewired the machine a few years ago but one of my soldered connections broke loose and needed repair. I’ve never been great with the soldering iron, in fact I loathe the device, but when it works you feel pretty darn good about it.
Naturally, having no talent for soldering, I had given away my iron, so while I waited for the replacement from Amazon I set to cleaning up the watch case and placing part orders.
The case got a good scrub followed by an ultrasonic bath and came out looking like a champ. The Pendant Tube had come lose but I was able to reset it with the staking kit.
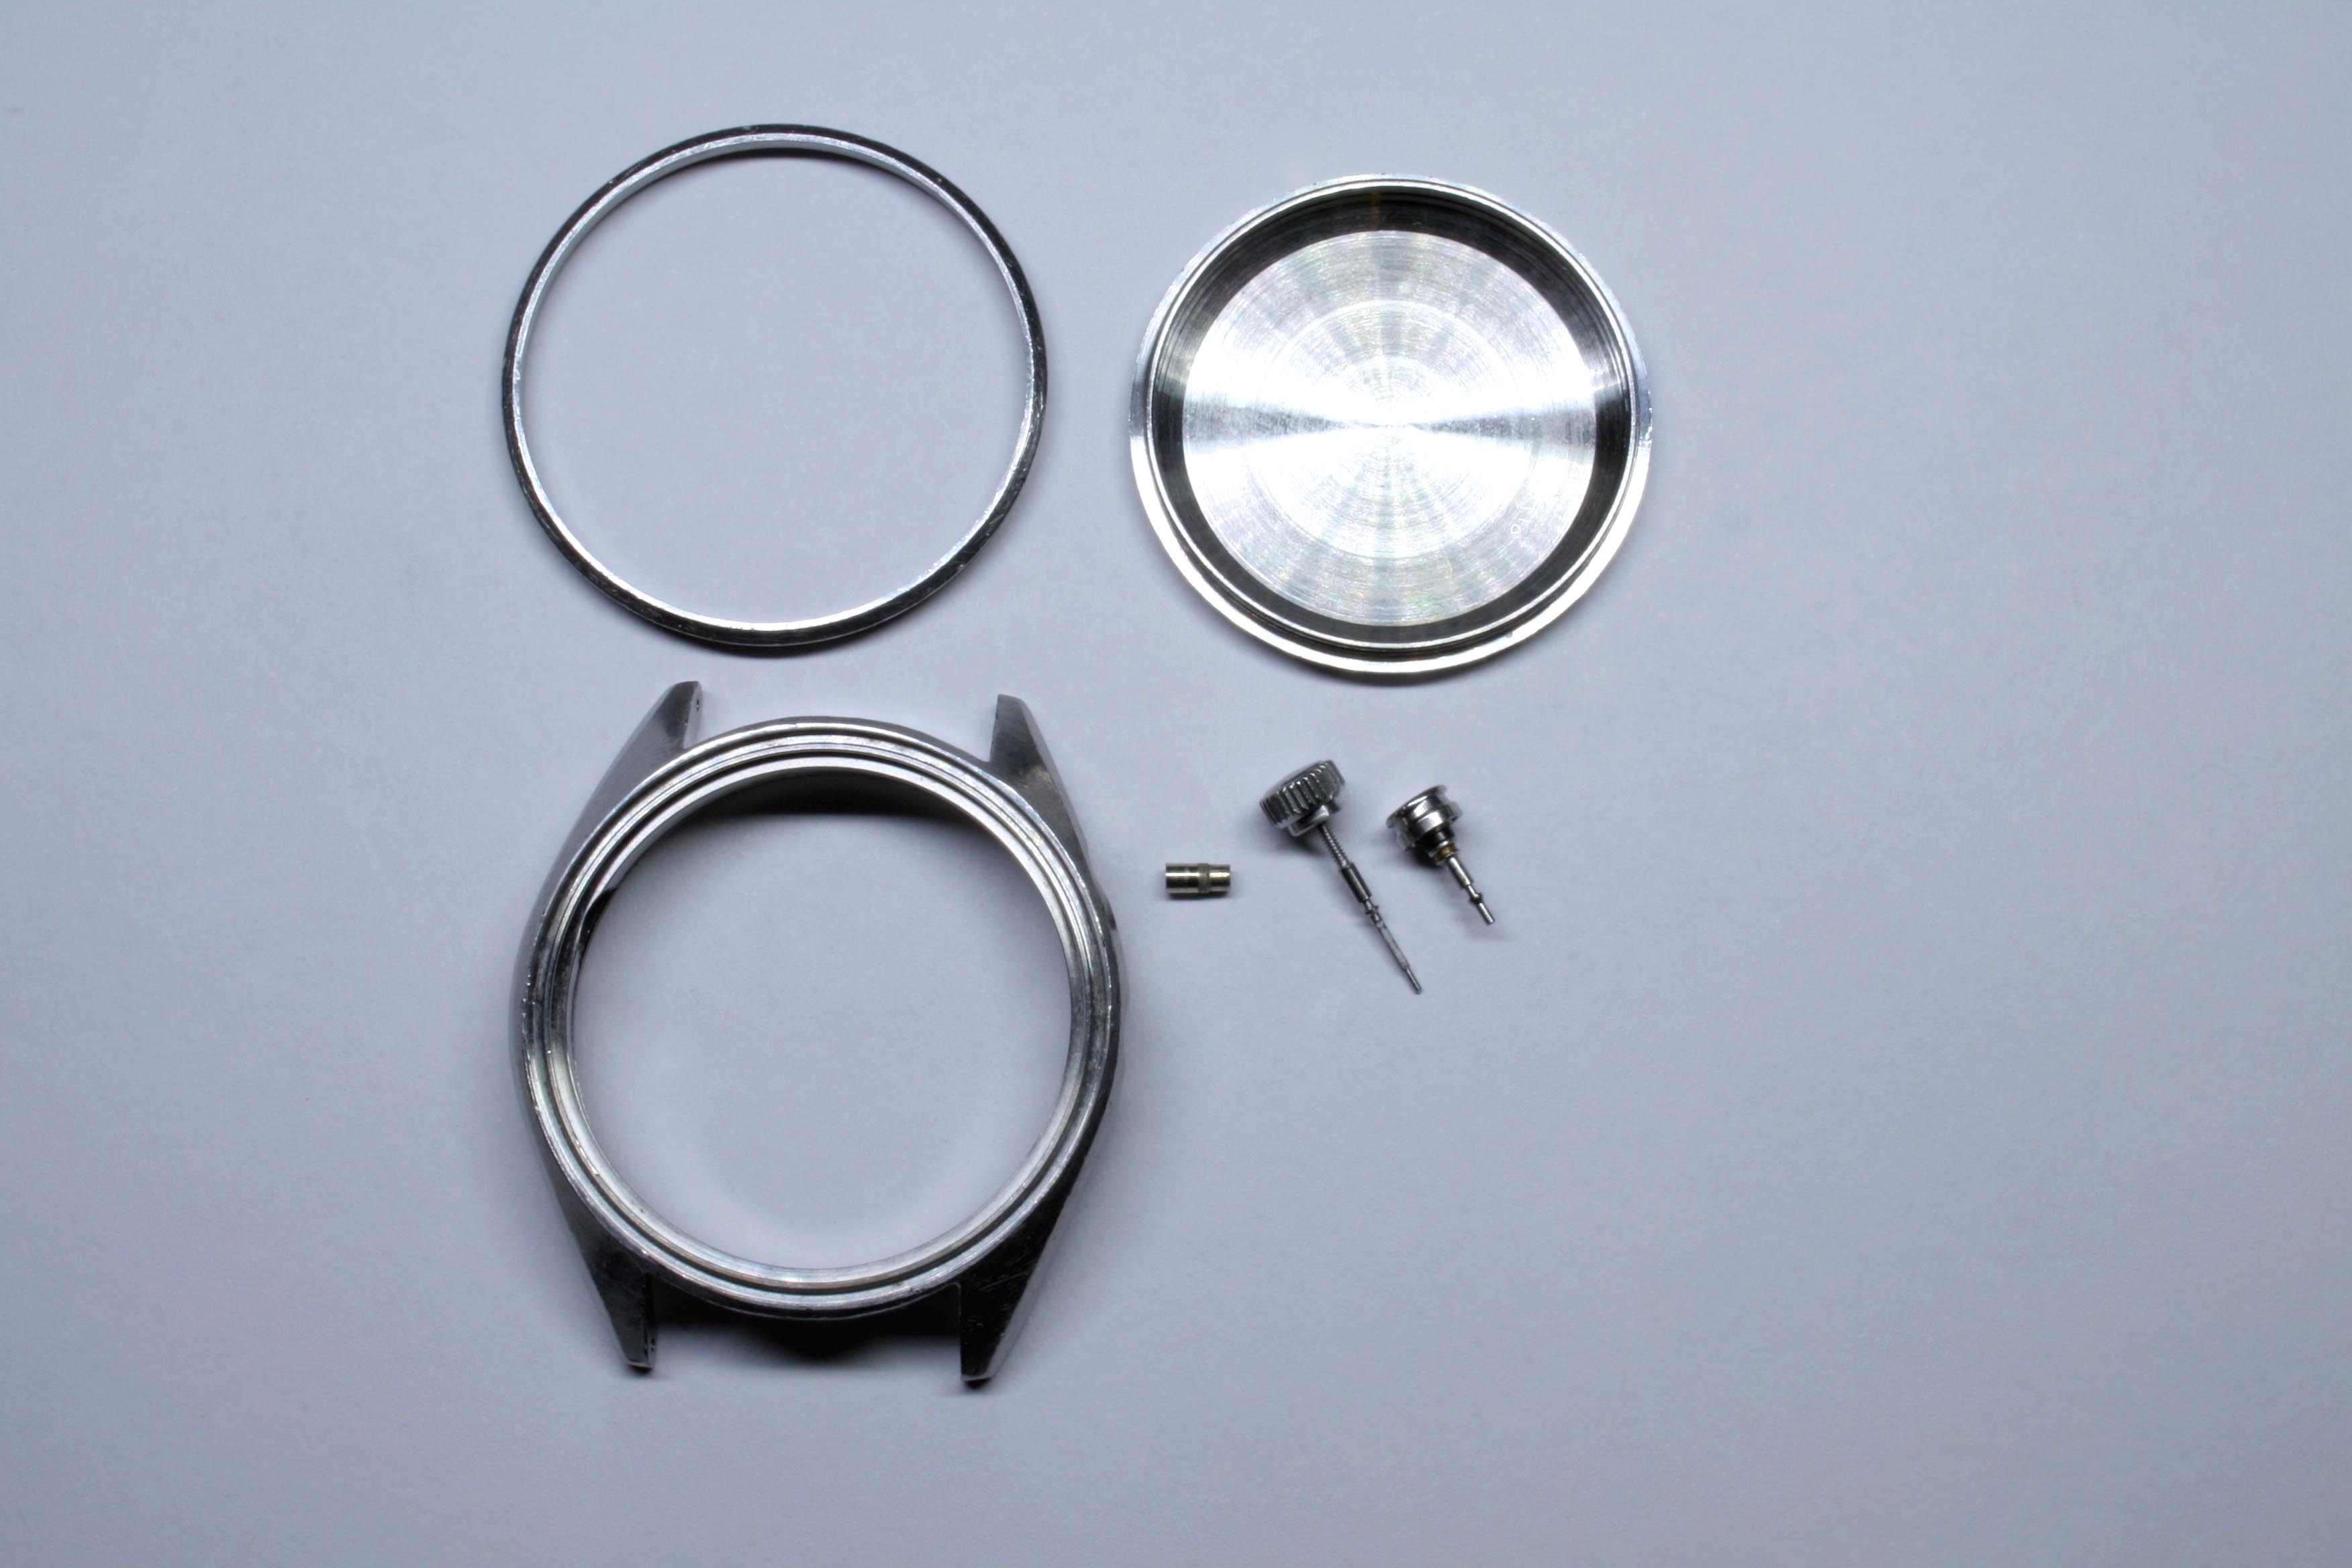
The case would need a new crystal and I wanted to put in a New-Old-Stock Seiko crystal if possible. You can still find them floating about the market and NOS crystals have a nice bevel on them which gives the watch a classic look. I managed to find one on eBay and snapped it up.
I also needed a new Mainspring, a full set of gaskets and an Alarm Setting Wheel Holder. This last bit secures the Alarm Setting Wheel to the movement. There are two in the movement but one had a broken finger.

Following the arrival of my new soldering iron, I repaired the L&R machine and cleaned the movement. As usual, reassembly revealed a few gremlins which I had missed before.
Putting the keyless works together, I found that the Setting Wheel had lost a tooth. This was surprising as the wheel is milled from steel and is very robust in this movement. I’m guessing the keyless works must have jammed and someone tried to force the issue. I ordered a replacement from Jules Borel and continued assembling the rest of the movement in the meantime.

I also found in the same area damage to the Calendar Plate which caused the plate to press on the Intermediate Hour Wheel. This resulted in the failure of the Hour Wheel and Cannon Pinion to rotate. To fix this I needed to remove the damaged material from the underside of the Calendar Plate. This was achieved using a small deburring tool. Unfortunately I lost the pictures of the damage and repair.
A proper cleaning and lubrication did wonders and the movement registered a passing grade on the Timegrapher. The amplitude was initially low at 243 degrees of rotation, but would rise another ten degrees within a day. Generally I aim for 270 degrees of amplitude (rotation of the Balance Wheel) but I’ve discovered Seiko movements have a normal operating range somewhere between 240 and 270 degrees.


I continued assembling once the Setting Wheel arrived. It took a few attempts to get all of the keyless works and alarm mechanism bits in their proper places but eventually I had it down.
The next problem to crop up involved the Day and Date Driving Wheel. This wheel advances the Date Wheel one tooth every twenty-four hours. The vertical finger which interacts with the Date Wheel was bent about twenty degrees out of spec. At such an angle it was unlikely to advance the Date Wheel properly. I was able to straighten the finger in the staking kit, saving me from ordering a replacement.


It was now time for the work I was dreading- replacing the feet on the dial!
For this task I used some eighteen gauge bare copper wire and my brand-new soldering iron. I snipped two small lengths of wire (about five millimeters each) and turned the ends down slightly on the lathe then under the microscope I soldered the wire to the dial in the exact location of the missing Dial Feet. I’ve attempted this before and had been wildly unsuccessful but I guess this was my day because against all reason, the solder stuck and with the feet were cut to the proper length the dial fit perfectly.

I actually had to stop at this point just to take a victory lap around the house.

With the dial on all that was needed was to fit the Alarm Setting Wheel, hand set, and re-case the movement.
The Alarm Setting Wheel rests just outside the circumference of the dial. The wheel is toothed underneath allowing it to engage with the Intermediate Alarm Setting Wheel. The area between two teeth had been damaged and needed repair before the wheel could be fitted.
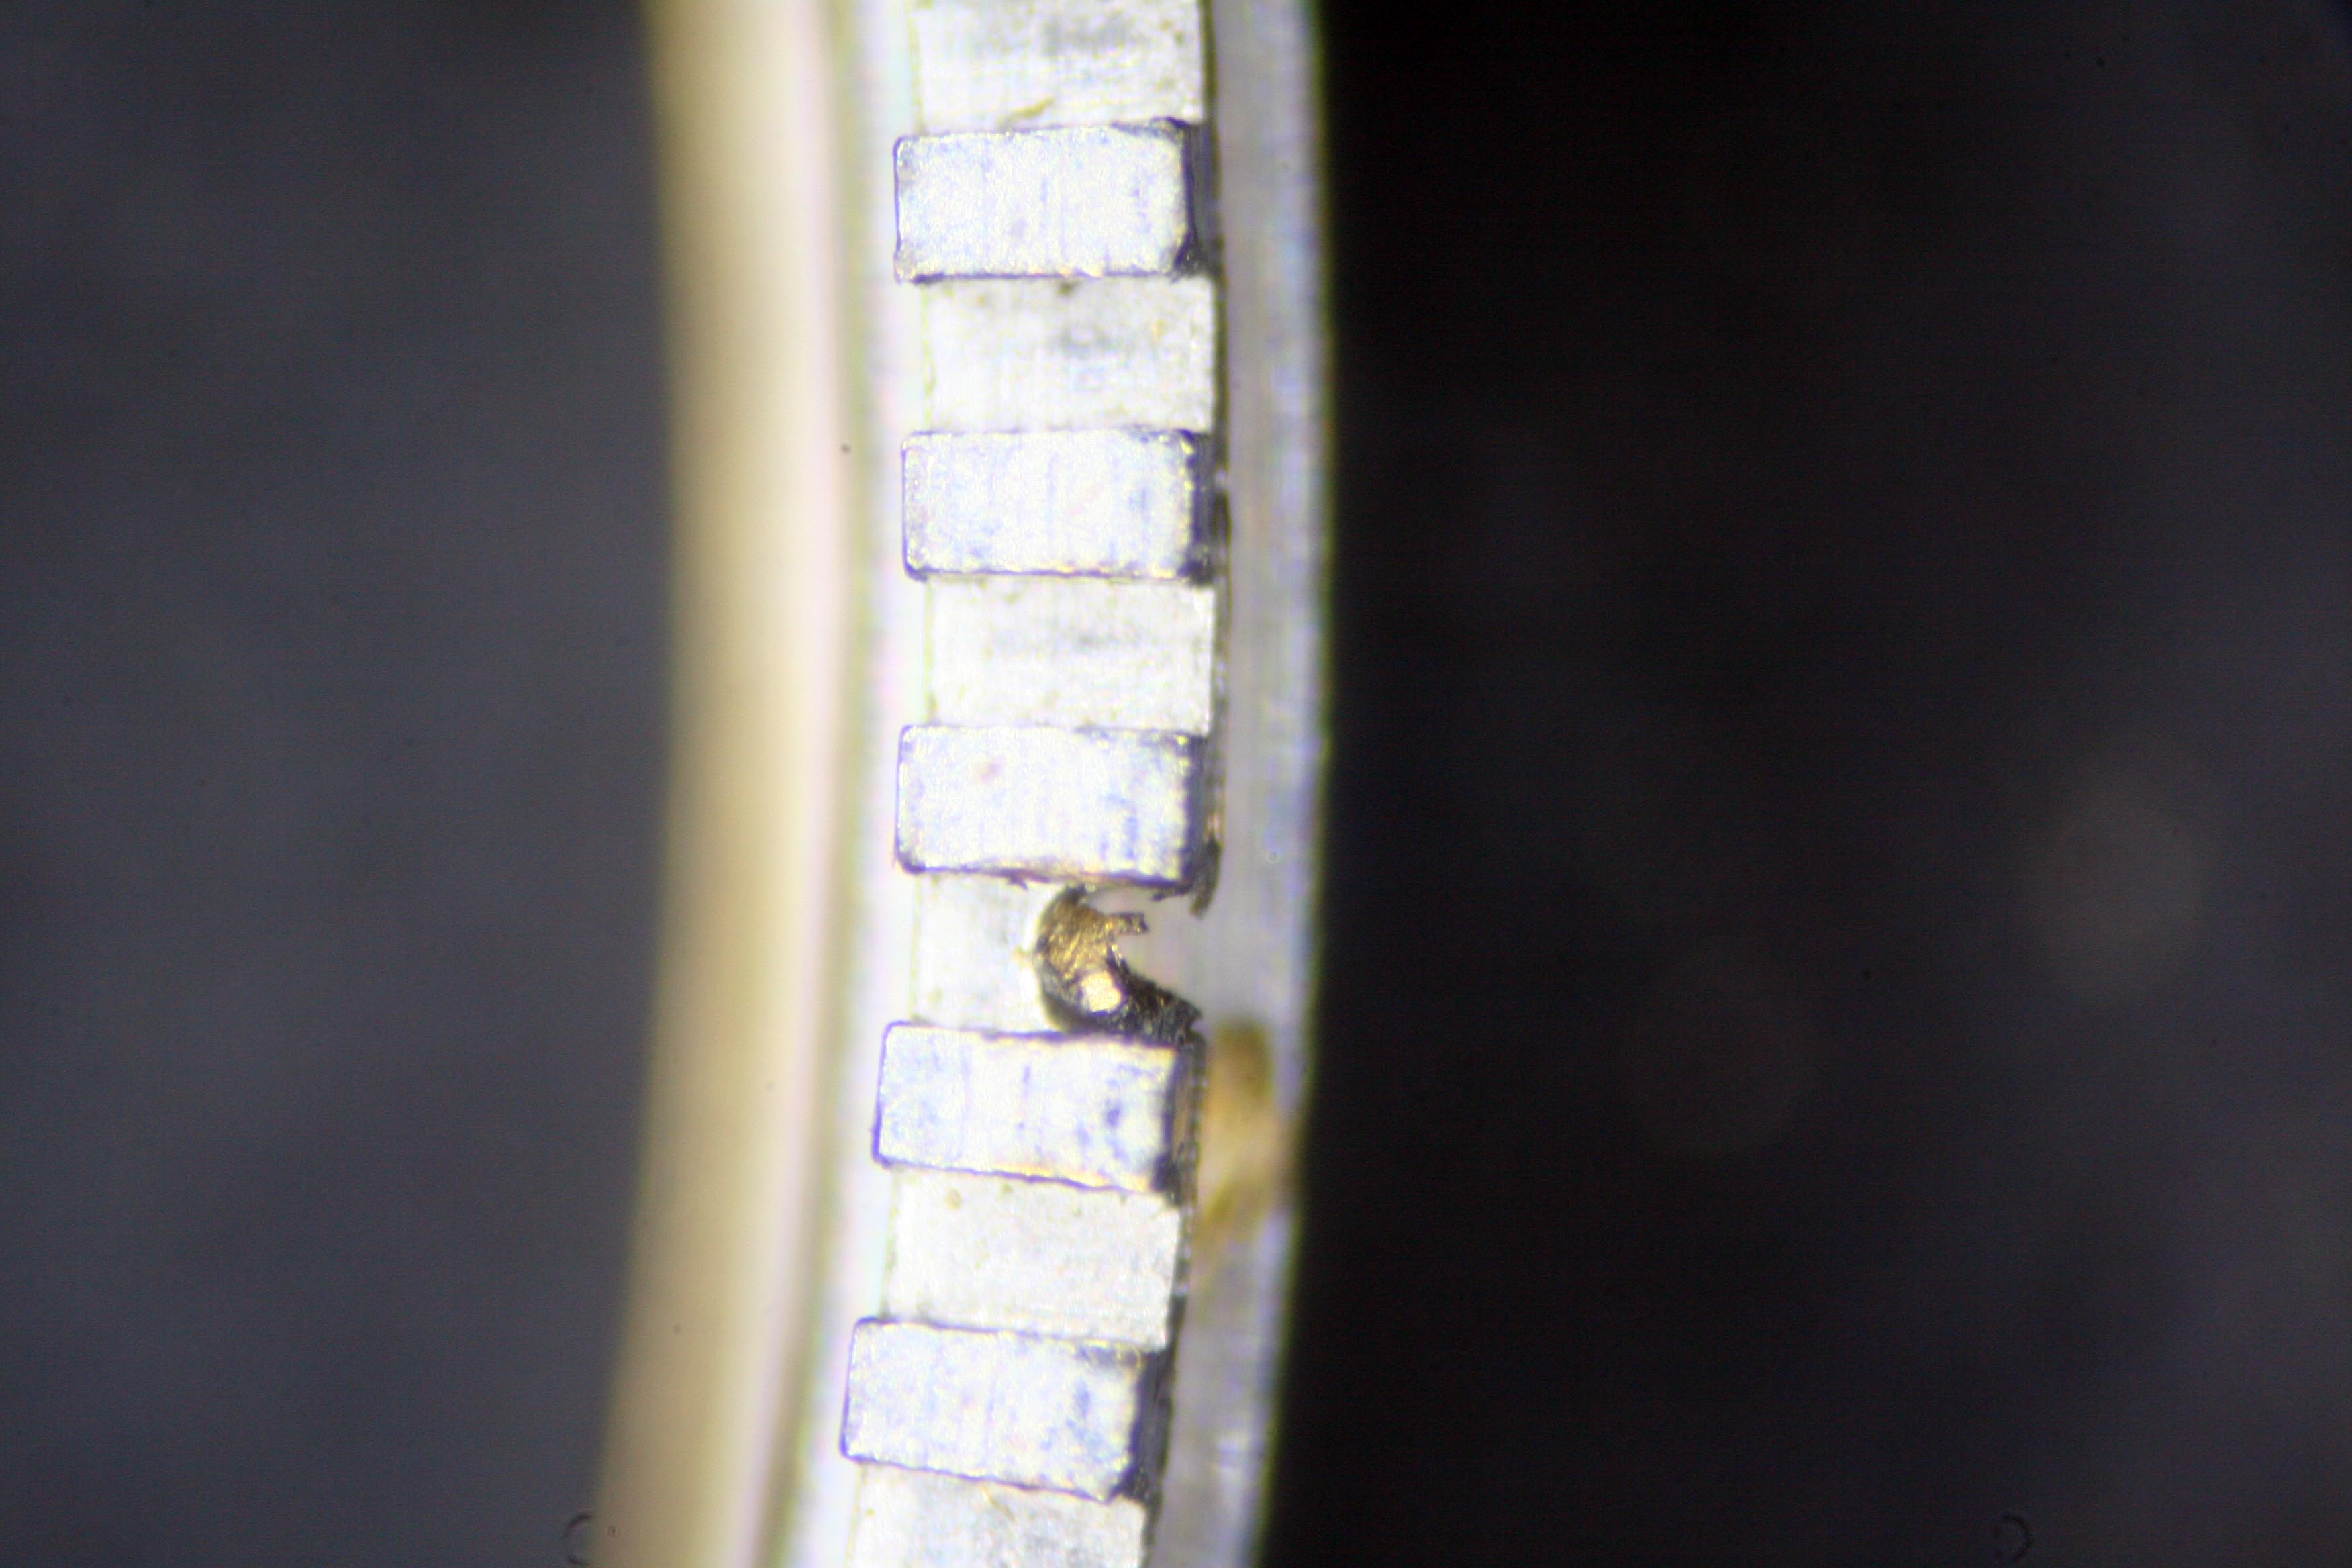
I used a slotting file to remove the damaged brass from between the two teeth and checked that the Alarm Setting Wheel properly engaged with the Intermediate Alarm Setting Wheel. Once confirmed it was time to case the movement.

I turned the movement into the case and refitted the Crown and Bell Button. For each gasket and o-ring I applied a bit of silicon grease to ensure a smooth fit. The Oscillating Weight was installed last, after the movement was already secured in the case.


Testing the functions confirmed the alarm operated correctly and there are no hiccups as you pull the Crown through the three operating positions.

Exhibiting a bit of pride in my work, I showed my daughters how the mechanical alarm worked- now my youngest has claimed the watch as her own. Considering how enamored they are with today’s digital technology, this felt like a victory. Sure a cell phone has limitless ring tones and alarms that can be set to the second- but this has gears, levers, and cogs! You just can’t beat that.

Love the post. Just got my first 4006 and have just started the disassembly. I have a bad bearing. You can see where it was scuffing on the inside of the case back. And a few other gremlins I’m sure. Every spring pin was rusted solid and I had to order some gunsmith drifts to drive out the outer case of one pin stuck in the watch lugs. Fun times 🙂
LikeLike